Category: camping

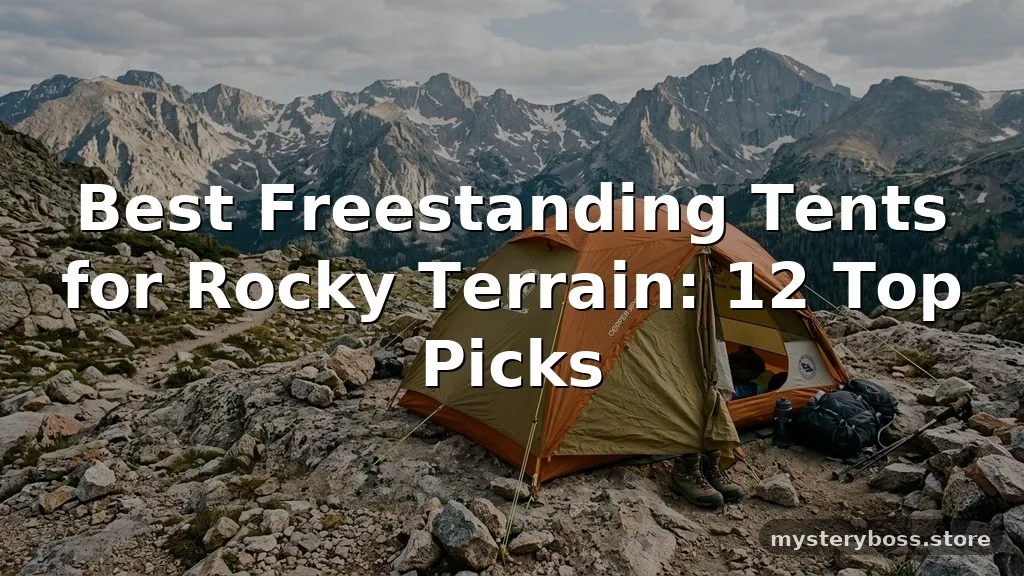
  • Best Freestanding Tents for Rocky Terrain: 12 Top Picks

    Best Freestanding Tents for Rocky Terrain: 12 Top Picks

    Finding the best freestanding tents for rocky terrain means prioritising stability, dependable pole structure, and a setup that doesn’t rely on driving long stakes into hard ground. Rocky campsites can make traditional pitching frustrating, especially when wind, uneven surfaces, or limited anchor points are involved. A good freestanding tent should stand on its own, though guylines and suitable anchors still matter in severe weather.

    This roundup compares lightweight backpacking shelters, durable mountain tents, and roomier options for two or three people. You’ll find practical differences in weight, interior space, weather protection, ventilation, setup, and portability so you can choose a tent that matches your route rather than simply picking the lightest model.

    What Matters in a Tent for Rocky Campsites

    Freestanding does not mean completely anchor-free. The tent body and poles can usually be assembled without stakes, but stakes are still useful for securing the fly, vestibules, and guylines. On hard ground, the right anchoring method can matter as much as the tent design.

    • Pole geometry: Crossing or hubbed poles generally provide a stable structure and useful headroom.
    • Ground contact: A durable floor and a footprint can help protect against sharp stones and abrasion.
    • Wind management: Multiple guy points, a well-tensioned fly, and low-profile geometry improve security.
    • Packability: Backpackers should compare packed length, total weight, and whether the poles fit inside or outside a pack.
    • Livability: Two doors, vestibules, interior pockets, and usable sitting height make bad-weather days less cramped.
    • Season rating: A three-season tent suits most hiking trips, while snow, shoulder-season storms, and exposed alpine routes may justify a four-season shelter.

    For hard-packed ground, carry a few anchoring options rather than assuming standard shepherd-hook stakes will work. Deadman anchors, rocks, cord, and compatible hard-ground stakes can all be useful, but local regulations and campsite impact should guide your approach. The National Park Service’s Leave No Trace principles are a useful reference for choosing and leaving campsites responsibly.

    🛠️ Practical Tip

    Assemble a freestanding tent on the flattest available patch before adding the fly. This lets you rotate the shelter, avoid obvious rocks under your sleeping area, and position the doors away from prevailing wind.

    Quick Comparison of the Best Freestanding Tents for Rocky Terrain

    Product Best For Capacity Design Main Drawback
    Big Agnes Copper Spur HV UL2 Lightweight backpacking Two people Freestanding, double-wall Thin ultralight fabrics need care
    NEMO Dragonfly Osmo 2P Comfortable backpacking Two people Freestanding, double-wall Not the lightest option
    MSR Hubba Hubba 2 Balanced all-round use Two people Freestanding, double-wall Less suited to serious winter use
    REI Co-op Half Dome SL 2+ Roomier weekend trips Two people Freestanding, double-wall Bulkier than minimalist shelters
    Sea to Summit Telos TR2 Ventilation and interior comfort Two people Freestanding, double-wall More complex pole architecture
    Big Agnes Copper Spur HV UL3 Two people with extra room Three people Freestanding, double-wall More weight and packed volume
    MSR Access 2 Cold-weather backpacking Two people Freestanding, winter-oriented Less airy in warm weather
    Hilleberg Allak 2 Four-season reliability Two people Fully freestanding, double-wall Heavy for ordinary summer trips
    Mountain Hardwear Trango 2 Expedition-style camping Two people Four-season, freestanding Large packed size
    NEMO Kunai 2 Alpine shoulder seasons Two people Four-season, freestanding design Less open and airy than summer tents
    SlingFin Portal 2 Strong, roomy backpacking shelter Two people Freestanding, storm-focused Higher carrying burden than ultralight models
    Zpacks Free Duo Low-weight freestanding travel Two people Freestanding, ultralight Specialised design and premium materials

    Lightweight Freestanding Backpacking Tents

    1. Big Agnes Copper Spur HV UL2

    Big Agnes Copper Spur HV UL2 - Best Freestanding Tents for Rocky Terrain

    The Copper Spur HV UL2 is a widely recognised two-person backpacking tent built around a lightweight freestanding structure. Its twin-door, twin-vestibule layout gives each camper a separate entry and a place to store muddy footwear or a backpack. The high-volume pole architecture creates more practical interior space than a simple ridge-style design, which is helpful when rocky ground limits where you can pitch.

    Its appeal is portability. The trade-off is that ultralight fabrics generally reward careful site selection and gentle handling. A footprint is sensible on abrasive stone, and the fly should be tensioned properly rather than left loose in wind.

    Pros

    • Lightweight design suits backpacking and long approaches.
    • Two doors and vestibules improve access and gear organisation.
    • Freestanding setup is convenient on hard ground.

    Cons

    • Ultralight materials are not the most forgiving around sharp rocks.
    • Two adults with bulky gear may find the interior close.

    💡 Tip

    Use a thin groundsheet cut slightly smaller than the tent floor. An oversized footprint can collect rainwater beneath the shelter.

    2. NEMO Dragonfly Osmo 2P

    The Dragonfly Osmo 2P targets backpackers who want a lighter tent without giving up a reasonably usable interior. Its freestanding pole system, two doors, and two vestibules make it practical for uneven camps where repeatedly shifting the shelter is inconvenient. The design also places emphasis on ventilation, which can reduce condensation during damp nights.

    This is a strong fit for two people who value access and storage but don’t want a large camping tent. It may not be the first choice for someone counting every gram or regularly camping in sustained winter storms.

    Pros

    • Useful balance of weight, space, and freestanding convenience.
    • Dual vestibules keep packs and footwear outside the sleeping area.
    • Ventilation features suit humid or variable conditions.

    Cons

    • Not as minimal as the lightest one-person or trekking-pole shelters.
    • Requires care when pitching on abrasive stone.

    🌿 Practical Tip

    In warm weather, pitch the tent with the doors open and the fly vents unobstructed. Good airflow is especially valuable when the surrounding ground cannot absorb condensation quickly.

    3. MSR Hubba Hubba 2

    The MSR Hubba Hubba 2 is a straightforward two-person shelter for hikers who want predictable setup and a familiar double-wall layout. It uses a freestanding frame, two doors, and two vestibules, making it easier to manage gear when each person has a separate side of the tent. Its design suits established trails, weekend backpacking, and mixed campsites where rocky soil is common.

    It is best viewed as a three-season all-rounder rather than an expedition shelter. Campers moving into heavy snow or highly exposed alpine terrain should consider a more specialised model.

    Pros

    • Simple freestanding structure is approachable for newer backpackers.
    • Two-person access works well for shared trips.
    • Balanced design suits a wide range of three-season outings.

    Cons

    • Not designed as a dedicated high-altitude or deep-winter tent.
    • Minimalist backpackers may prefer a lighter shelter.

    ⛺ Quick Tip

    Before a trip, practise attaching the fly in daylight. On rocky ground, a quick pitch helps you spend less time kneeling on stones while weather moves in.

    4. REI Co-op Half Dome SL 2+

    The Half Dome SL 2+ is aimed at campers who want more room than a conventional two-person backpacking tent usually provides. Its “plus” layout offers extra shoulder and gear space, while the freestanding structure makes it practical for campsites where stakes are difficult to place. Two doors and vestibules add flexibility for couples, friends, or a solo camper carrying substantial gear.

    The additional room brings a carrying and packed-size penalty compared with more stripped-back tents. That makes it more appealing for weekend backpacking, car-to-camp approaches, and comfort-focused trips than for distance-oriented ultralight routes.

    Pros

    • Roomier interior is useful for two people during poor weather.
    • Freestanding setup works well on firm or rocky sites.
    • Good storage arrangement for larger packs and boots.

    Cons

    • Less compact than minimalist two-person shelters.
    • May be more tent than solo hikers need.

    🧭 Practical Tip

    Measure your sleeping pads before buying. A roomy tent is useful only if its floor shape accommodates your pads without forcing them against the sidewalls.

    5. Sea to Summit Telos TR2

    The Telos TR2 focuses on headroom, ventilation, and flexible use rather than simply chasing the lowest possible weight. Its freestanding frame and spacious two-person layout make it easier to live in during rain, while the pole architecture can create a more comfortable sitting area. That matters on rocky sites where moving to a better sheltered patch may not be possible.

    Its more elaborate structure can take a little more attention during setup than a basic dome tent. Campers who prioritise airflow and interior comfort will likely appreciate that trade-off; strict minimalists may not.

    Pros

    • Comfortable interior and strong ventilation emphasis.
    • Useful for two people spending extra time inside.
    • Freestanding design reduces dependence on perfect soil.

    Cons

    • More pole components can make setup less instinctive.
    • Not the smallest option for ultralight packing.

    ✨ Style Tip

    Use the tent’s highest ventilation settings during cooking breaks or damp mornings, but keep stove flames well away from fabric and always follow the manufacturer’s safety guidance.

    6. Big Agnes Copper Spur HV UL3

    The Copper Spur HV UL3 gives two campers noticeably more space, or allows three people to share a shelter when pack weight is divided. It retains the benefits of a freestanding double-wall tent, with multiple doors and vestibule storage. On a rocky site, that extra room can make a constrained pitch more comfortable because gear has somewhere to go besides the sleeping area.

    The larger floor and pole system naturally increase packed volume and weight compared with the UL2. It suits comfort-minded backpackers and small groups better than solo hikers looking for the lightest possible shelter.

    Pros

    • Generous space for two people and gear.
    • Useful third-person capacity for shorter trips.
    • Multiple access points reduce climbing over sleeping partners.

    Cons

    • Requires a larger campsite than a two-person tent.
    • Ultralight materials still need care around jagged surfaces.

    💡 Tip

    Check campsite dimensions before choosing a three-person tent. In alpine environments, a comfortable interior is less helpful if the available flat platform cannot fit the floor.

    Durable Four-Season and Alpine Options

    7. MSR Access 2

    The MSR Access 2 is designed for cold-weather backpacking where a conventional summer tent may feel too exposed, but a heavy expedition shelter is unnecessary. Its freestanding structure simplifies setup on frozen or hard-packed ground, and its winter-oriented construction is suited to shoulder-season trips and moderate snow conditions.

    More protection usually means less ventilation and more weight than a three-season tent. The Access 2 therefore makes most sense for hikers who routinely camp in cold, changeable conditions rather than fair-weather summer travellers.

    Pros

    Pros - Best Freestanding Tents for Rocky Terrain
    • Freestanding format is useful on frozen or rocky campsites.
    • More weather-focused than a typical summer backpacking tent.
    • Two-person capacity keeps the shelter manageable for mountain trips.

    Cons

    • Can feel warmer and less airy during mild weather.
    • Not a substitute for an expedition tent in extreme conditions.

    ❄️ Practical Tip

    Pack gloves that preserve dexterity when assembling poles. Cold fingers and frozen ground make small clips and tension adjustments harder than they are at home.

    8. Hilleberg Allak 2

    The Hilleberg Allak 2 is a fully freestanding two-person shelter with a strong four-season focus. Its twin-door, twin-vestibule arrangement gives occupants independent access and useful protected storage, while the robust double-wall design is aimed at demanding weather rather than minimum pack weight.

    This is a substantial investment in carrying capacity and durability. It is better suited to frequent mountain users, extended trips, and exposed camps than to occasional summer backpackers who mainly need a light shelter for maintained trails.

    Pros

    • Fully freestanding design works on difficult surfaces.
    • Four-season construction offers broad weather capability.
    • Two vestibules provide practical storage in poor conditions.

    Cons

    • Heavy compared with three-season backpacking tents.
    • More shelter than many casual campers require.

    🛠️ Practical Tip

    Use the vestibules as working zones for wet layers and boots, but keep sleeping bags and insulated clothing inside the inner tent where they are less exposed to condensation.

    9. Mountain Hardwear Trango 2

    The Trango 2 is an expedition-style freestanding tent for serious cold-weather camping, high mountain approaches, and extended periods in severe conditions. Its structure is more substantial than a typical backpacking shelter, with a design focused on protection, stability, and usable living space when retreating from bad weather is not easy.

    That capability comes with a large packed size and a heavy load. It is not an efficient choice for fast summer trips, but it can make sense when dependable shelter matters more than portability.

    Pros

    • Purpose-built for demanding four-season environments.
    • Freestanding construction helps on exposed or frozen ground.
    • More practical for prolonged occupancy than many lightweight tents.

    Cons

    • Too bulky for most ordinary backpacking routes.
    • Requires a strong pack system and a suitable campsite.

    🏔️ Quick Tip

    For expedition tents, inspect the packed length as carefully as the total weight. Long pole sections can be difficult to fit inside smaller packs or vehicle storage areas.

    10. NEMO Kunai 2

    The NEMO Kunai 2 occupies the middle ground between a summer backpacking tent and a full expedition shelter. Its freestanding structure and weather-focused design suit shoulder seasons, alpine travel, and colder trips where wind and light snow are possible. The two-person format keeps it more portable than a larger mountain basecamp tent.

    Because it is built for harsher conditions, warm-weather ventilation and open living space are not its strongest qualities. It is a specialised choice for people who want one compact shelter for variable mountain seasons.

    Pros

    • Useful compromise between backpacking portability and alpine protection.
    • Freestanding setup suits rocky, frozen, or uneven camps.
    • Two-person capacity is practical for shared mountain trips.

    Cons

    • Less airy than a dedicated three-season tent.
    • May be unnecessary for lowland summer camping.

    🌬️ Practical Tip

    On exposed ground, orient the narrow end toward the prevailing wind and use every available guy point. A freestanding frame still benefits from careful aerodynamic positioning.

    Roomy and Strong Freestanding Shelters

    11. SlingFin Portal 2

    The SlingFin Portal 2 is designed for backpackers who want a strong, liveable shelter without moving all the way to an expedition tent. Its freestanding frame, interior room, and storm-oriented features make it attractive for exposed routes where a very minimal ultralight tent may feel too delicate. The layout is also useful for two people sharing gear in poor weather.

    It is not the lightest item on a tents list, but its appeal lies in the balance between protection and practical comfort. Backpackers should compare the packed weight with their expected conditions rather than assuming more structure is always better.

    Pros

    • Strong design for exposed backpacking conditions.
    • Roomy enough for two people and wet-weather gear management.
    • Freestanding setup remains convenient on hard terrain.

    Cons

    • Less appealing for gram-counting ultralight trips.
    • May be excessive for sheltered summer campsites.

    💡 Tip

    Practise adjusting the guylines before an exposed trip. The frame provides the structure, but properly tensioned lines help distribute wind loads and keep the fly from flapping.

    12. Zpacks Free Duo

    The Zpacks Free Duo is aimed at hikers who want a genuinely light two-person freestanding tent rather than a traditional heavy dome. Its design uses lightweight materials and a dedicated pole structure, giving backpackers more setup independence than many trekking-pole tents. That can be useful on rocky terrain where finding perfect pole-anchor positions is awkward.

    As with other ultralight shelters, the materials demand thoughtful handling around rough stone, branches, and sharp gear. It is best for experienced backpackers who understand the trade-off between reduced weight and a smaller margin for careless pitching.

    Pros

    • Lightweight freestanding concept suits long-distance backpacking.
    • Two-person layout provides more independence than some trekking-pole shelters.
    • Compact carrying format supports portability-focused trips.

    Cons

    • Lightweight materials require careful campsite preparation.
    • Specialised design may not suit campers wanting maximum simplicity.

    🎒 Practical Tip

    Separate sharp cookware, tent stakes, and trekking-pole tips from the tent fabric inside your pack. Lightweight floors and fly materials benefit from simple gear organisation.

    How to Choose Between These Tents

    Start with the weather and terrain you actually expect, not the most dramatic conditions you can imagine. A three-season tent such as the Copper Spur, Dragonfly, Hubba Hubba, Half Dome, or Telos is generally more efficient for ordinary backpacking. Four-season choices such as the Access, Allak, Trango, and Kunai make more sense when cold, wind, snow, or exposed camps are regular features of your trips.

    Capacity also deserves an honest look. A two-person tent is usually comfortable for one person with gear, while two adults may appreciate a “plus” model or a three-person shelter. Check the floor dimensions, peak height, vestibule area, and pad compatibility rather than relying only on the capacity label.

    Freestanding Versus Semi-Freestanding Designs

    A fully freestanding tent can usually be lifted and repositioned after the poles are installed. A semi-freestanding shelter may still need stakes or tensioned corners to achieve its intended shape. Semi-freestanding and tarp-style options can save weight, but they are less convenient when rocky soil makes anchoring difficult.

    Staking on Rocky Ground

    Standard stakes may bend or fail when driven into hard rock. Avoid forcing them with excessive impact, and never damage natural rock surfaces to secure a tent. If the site allows, use existing cracks, large rocks, cord, or deadman techniques while keeping the shelter away from fragile vegetation.

    1. Clear only loose debris and choose the flattest durable surface available.
    2. Assemble the freestanding frame and position the doors away from direct wind.
    3. Attach the fly and adjust ventilation before tightening every corner.
    4. Use suitable anchors for vestibules and guylines rather than relying on the frame alone.
    5. Check that rocks, poles, and cookware cannot rub against the floor or fly.

    🛠️ Practical Tip

    Carry cord that can be tied around stable rocks when stakes are unusable. Test the anchor with gradual tension instead of pulling hard enough to dislodge the rock or damage the cord.

    Frequently Asked Questions

    What makes a freestanding tent suitable for rocky terrain?

    A pole-supported structure that can stand before staking makes setup and repositioning easier. Look for durable floor fabric, stable pole geometry, multiple guy points, and a footprint or groundsheet suited to abrasive surfaces.

    What type of tent stakes are best for rocky ground?

    Hard-ground or robust aluminium stakes can work in firm soil, but solid rock may not accept stakes at all. Cord tied to stable rocks, deadman anchors, and careful site selection are often more practical than forcing a stake.

    Are ultralight tents durable enough for rocky campsites?

    They can be, provided they are pitched on a carefully selected surface and handled gently. Ultralight materials reduce carrying weight but generally leave less tolerance for sharp stones, dragging, and careless packing.

    Which tent is more likely to collapse in a strong wind storm?

    No tent should be treated as collapse-proof. A poorly oriented shelter with loose guylines or inadequate anchors is more vulnerable, while a low-profile, well-tensioned tent with a suitable pole structure is better prepared for wind.

    Are freestanding tents better than semi-freestanding tents for backpacking?

    Freestanding models are usually easier to position on hard or uneven ground. Semi-freestanding tents can reduce weight, but they depend more on stakes and proper tension, so the better choice depends on your terrain, weather, and tolerance for setup complexity.

    Final Verdict

    The best freestanding tents for rocky terrain are not all chasing the same goal. Lightweight models such as the Copper Spur HV UL2, Dragonfly, Hubba Hubba, Telos, and Free Duo suit backpackers who value portability, while the Half Dome and Copper Spur UL3 offer more interior space. The Access, Allak, Trango, and Kunai are better matched to cold or alpine conditions, with added weight as the trade-off.

    Before buying, compare packed weight with real weather needs, check the floor and vestibule dimensions, and plan how you’ll anchor the fly when stakes won’t penetrate. Choose the lightest shelter that still offers the stability, protection, and living space your routes demand.
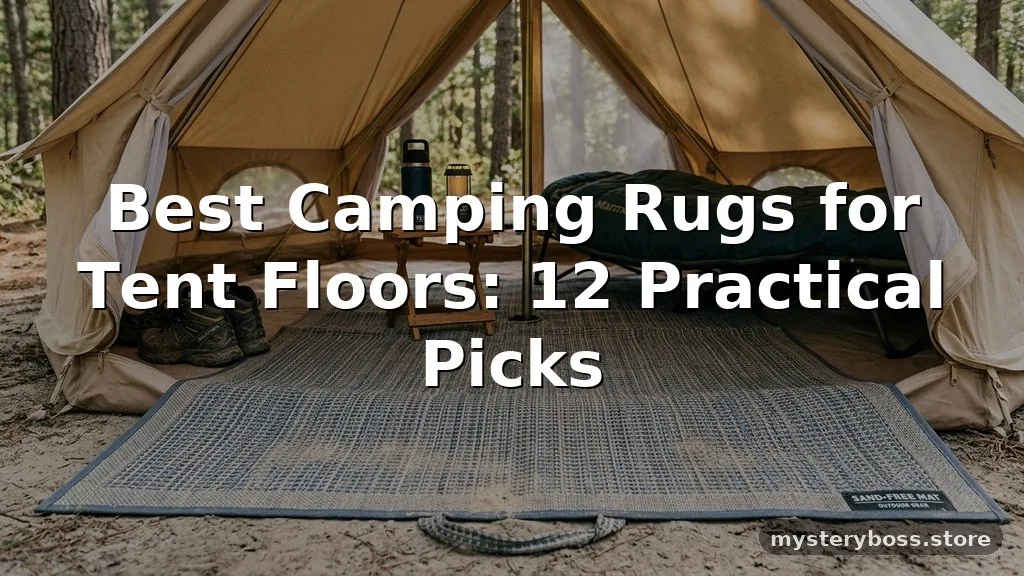
  • Best Camping Rugs for Tent Floors: 12 Practical Picks

    Best Camping Rugs for Tent Floors: 12 Practical Picks

    A cold, damp, gritty tent floor can make an otherwise comfortable camp feel rough fast. The best camping rugs for tent floors add insulation, reduce dirt, soften hard ground, and create a more welcoming space inside a tent, bell tent, yurt, or camper setup. The right choice depends on more than appearance: packed size, drying time, grip, drainage, cleaning, and how much floor area you need all matter.

    This roundup compares practical camping rug styles and products, from lightweight backpacking mats to larger outdoor rugs for family camping and glamping. You’ll also find buying advice, setup tips, limitations, and guidance for choosing a floor covering that suits your camping style.

    What Makes a Good Tent Floor Rug?

    A camping rug should make the tent floor more comfortable without creating a bulky, damp layer underneath. Outdoor rugs made from woven plastic or synthetic fibers are usually easier to clean and dry than indoor-style fabric carpets. Foam mats and blankets can feel warmer, but they may absorb moisture or take up more room when packed.

    Before buying, think about the tent’s interior dimensions and whether the rug will sit inside the sleeping area, beneath a table, or in a vestibule. A floor mat that fits neatly is safer and easier to fold than one with excess material bunching around the edges.

    • Size: Match the rug to the usable tent floor rather than the advertised tent capacity.
    • Weight: Large woven rugs suit car camping better than long-distance backpacking.
    • Drying: Quick-drying materials are useful after rain, dew, or beach camping.
    • Grip: A textured underside can reduce sliding on tent floors and smooth campsite surfaces.
    • Cleaning: Shakeable, wipe-clean surfaces are practical when sand and mud are common.
    • Storage: Look for folding or rolling designs that fit your existing camping kit.

    🛠️ Practical Tip

    Measure the flat floor area after the tent is pitched, including corners that are actually usable. Sloping walls and furniture can make the interior footprint smaller than the stated tent dimensions.

    The options below cover different camping situations rather than pretending one rug suits every trip. Product availability, dimensions, and materials can vary by seller, so check the current specification before checkout.

    Option Best For Useful Feature Main Limitation
    1. Sand-free outdoor mat Beach and sandy campsites Sand falls through the weave Not designed as a thick cushion
    2. Woven polypropylene rug Car camping Easy to wipe clean Can be bulky when folded
    3. Foam folding mat Cold or hard tent floors Added underfoot insulation Less compact than thin mats
    4. Lightweight picnic blanket Minimalist weekend camping Simple and versatile May move without a grip layer
    5. Bell tent carpet Glamping setups Creates a finished interior Usually heavy and large
    6. Rubber-backed floor mat Entrance areas Helps contain dirt and moisture May trap moisture underneath
    7. Indoor-outdoor carpet tile Modular tent layouts Easy to replace or rearrange More pieces to pack
    8. Reflective insulated mat Cool-weather camping Reflective insulation layer Can be noisy underfoot
    9. Coody-style tent carpet Dedicated tent interiors Designed around a tent footprint May fit only selected tent shapes
    10. Drymate-style tent carpet Moisture-prone campsites Absorbent surface layer Needs thorough drying after use
    11. Recycled plastic camping rug Frequent family camping Durable, washable construction Often heavier than textile mats
    12. Thin wool or fleece blanket Comfort-focused camp interiors Soft, warm feel Not ideal for wet ground

    1. Sand-Free Outdoor Mat

    Sand-Free Outdoor Mat - Best Camping Rugs for Tent Floors

    A sand-free mat uses an open or layered weave that lets loose sand fall below the surface instead of staying on top. That makes it useful for beach camps, dry desert sites, and tent entrances where ordinary fabric rugs quickly become gritty. It works more as clean flooring than as cushioning.

    Pros

    • Sand is easier to brush away or let pass through.
    • Usually dries quickly after light moisture.
    • Suitable for outdoor seating as well as tent use.

    Cons

    • Provides limited warmth on cold ground.
    • Open construction may allow small stones to remain underneath.

    💡 Tip

    Shake a sand-free mat away from the tent before packing it. This prevents grit from migrating into sleeping bags, zippers, and storage pockets.

    2. Woven Polypropylene Rug

    Woven polypropylene is a common choice for outdoor camping rugs because it resists routine dirt and can generally be wiped or shaken clean. These rugs often have colorful patterns and a flatter profile, making them attractive for family camps, patios, and larger tent interiors. Their packed size is the main consideration.

    Pros

    • Easy to clean after muddy or dusty trips.
    • Available in a wide range of designs and sizes.
    • Works well for car campers who have room for bulky gear.

    Cons

    • May not provide much insulation.
    • Large sizes can be awkward to fold and transport.

    ✨ Style Tip

    Choose a patterned woven rug if you expect frequent dust or leaf litter. Small marks tend to be less noticeable than they are on a plain, pale surface.

    3. Foam Folding Mat

    A folding foam mat is a practical answer when comfort and ground insulation matter more than a decorative look. It can soften compacted campsite soil and create a warmer layer beneath bare feet. Closed-cell foam is especially useful because it doesn’t absorb water in the same way as fabric.

    Pros

    • Adds cushioning on hard or uneven ground.
    • Useful under sleeping pads, chairs, or a small table.
    • Folding panels are straightforward to store.

    Cons

    • Can occupy significant space in a backpack or vehicle.
    • Foam may crease, dent, or wear at fold points over time.

    🛠️ Practical Tip

    Place a thin rug over the foam if you want a more finished surface. The rug protects the foam from sharp grit while making the floor feel less utilitarian.

    4. Lightweight Picnic Blanket

    A lightweight picnic blanket can double as a tent floor covering when the goal is to carry fewer dedicated items. Many include a water-resistant underside, though that doesn’t necessarily make the whole blanket waterproof. This option suits short trips, festival camping, and simple camp interiors.

    Pros

    • Serves multiple purposes at camp.
    • Usually lighter than a large outdoor rug.
    • Simple to fold and pack with general travel equipment.

    Cons

    • Fabric may collect sand, grass, and damp debris.
    • It can slide on smooth tent flooring without corner anchors.

    💡 Tip

    Fold the blanket with the clean side facing inward. That keeps the sitting surface protected when the underside has picked up moisture or soil.

    5. Bell Tent Carpet

    A bell tent carpet is made for a large, open interior where appearance and comfort carry more weight than minimum pack size. It can define a central living area and make a glamping setup feel more like an indoor room. Bell tent rugs are generally better suited to vehicle-based camping than hiking.

    Pros

    • Creates a warmer, softer feel inside a spacious tent.
    • Can cover a substantial living area.
    • Works well with camp furniture and decorative accessories.

    Cons

    • Large carpets can be heavy and difficult to dry.
    • May not fit other tent shapes or smaller shelters.

    ✨ Style Tip

    Leave a narrow border of exposed tent floor around the carpet where possible. It helps define the rug’s edge and makes checking for trapped moisture easier.

    6. Rubber-Backed Floor Mat

    A rubber-backed mat is useful near a tent door, where boots and wet gear bring in the most mess. The textured backing can help limit movement, while the upper surface catches dirt before it spreads across the sleeping area. It is best used as a small entry mat rather than a full-tent carpet.

    Pros

    • Helps create a defined clean zone near the entrance.
    • Often stays in place better than a loose blanket.
    • Useful in awnings, vestibules, and vehicle interiors.

    Cons

    • Backing may trap water against the tent floor.
    • Some versions are too heavy for backpacking.

    🛠️ Practical Tip

    Lift rubber-backed mats each morning if condensation is present. Airflow beneath the mat is important because a waterproof layer can hold dampness against the tent floor.

    7. Indoor-Outdoor Carpet Tiles

    Indoor-Outdoor Carpet Tiles - Best Camping Rugs for Tent Floors

    Carpet tiles offer a modular approach to tent flooring. Instead of carrying one large rug, you can arrange smaller pieces around beds, chairs, or a central table. They make sense for semi-permanent camp setups, but the separate pieces add handling and packing work.

    Pros

    • Lets you cover only the areas that need comfort.
    • Individual tiles are easier to replace or clean.
    • Layout can be changed for different tent arrangements.

    Cons

    • Edges may shift or separate under foot traffic.
    • Multiple pieces take longer to pack and organize.

    💡 Tip

    Arrange the tiles after the tent is fully furnished. Furniture legs can hold the edges in place and reveal where extra coverage is genuinely needed.

    8. Reflective Insulated Mat

    A reflective insulated mat combines a thin insulating layer with a reflective surface. It can be useful beneath another rug in cool conditions, particularly when the campsite floor feels cold. It is more of a functional underlay than a decorative camping rug.

    Pros

    • Adds a layer between feet and cold ground.
    • Can be combined with foam or fabric floor coverings.
    • Usually has a low profile.

    Cons

    • Some reflective materials make a crinkling sound.
    • May look less attractive as a standalone floor covering.

    🛠️ Practical Tip

    Use the reflective side according to the manufacturer’s instructions and cover it with a less slippery top layer if people will walk across it frequently.

    9. Coody-Style Tent Carpet

    A dedicated tent carpet, such as a Coody-style floor insert, is designed around the footprint of a particular shelter rather than being a general-purpose outdoor rug. This can give the interior a tidy, fitted appearance. Compatibility is the critical issue, so check the exact tent model and dimensions before purchasing.

    Pros

    • May fit a matching tent more neatly than a rectangular rug.
    • Creates a defined interior floor for comfort-focused camping.
    • Can reduce exposed ground in the living space.

    Cons

    • Limited versatility if you change tents.
    • Availability and specifications may vary by model and seller.

    💡 Tip

    Compare the carpet’s shape with the tent’s actual floor plan, including pole locations and door openings. A technically correct length can still leave an awkward gap if the shape differs.

    10. Drymate-Style Tent Carpet

    A Drymate-style tent carpet uses a fabric surface intended to manage small spills, dirt, or moisture around a camp living area. It may be useful for family camping and indoor-style tent layouts, but absorbent products need careful drying before storage. Read the care instructions rather than assuming a rug is fully waterproof.

    Pros

    • Can feel softer and more textile-like than plastic matting.
    • Useful beneath tables, chairs, and general camp furniture.
    • May help contain minor dampness and tracked-in dirt.

    Cons

    • Wet fabric can become heavy during transport.
    • Storing it damp may lead to odors or material damage.

    🛠️ Practical Tip

    Pack a separate drying cord or use a campsite clothesline to air a damp carpet before the journey home. Never seal a wet floor covering in a closed storage bag.

    11. Recycled Plastic Camping Rug

    Recycled plastic camping rugs are often woven into flat, colorful patterns for outdoor use. They suit car campers who want a washable surface that can move between the tent, picnic area, and campsite kitchen. The environmental description alone doesn’t tell you how a rug performs, so inspect the construction, edge finishing, and care instructions.

    Pros

    • Typically handles everyday outdoor dirt well.
    • Often available in reversible designs.
    • Can serve as both tent flooring and an outdoor seating rug.

    Cons

    • May feel less warm than fabric or foam.
    • Some large versions are cumbersome to carry.

    ✨ Style Tip

    A reversible design gives one rug two visual uses: place the busier side upward for active camps and the plainer side upward for a calmer glamping interior.

    12. Thin Wool or Fleece Blanket

    A wool or fleece blanket creates a warm, soft feel inside a tent and can be used on beds, chairs, or laps as well as on the floor. It is a comfort-first choice rather than a wet-weather solution. Keep it away from muddy entrances and use a groundsheet or waterproof layer below it.

    Pros

    • Feels comfortable under bare feet.
    • Can serve several purposes around camp.
    • Easy to add or remove as temperatures change.

    Cons

    • Fabric can absorb moisture and dirt.
    • It may slide on smooth tent flooring.

    💡 Tip

    Use fleece or wool in the central living area, not directly beside the entrance. A separate wipe-clean floor mat will handle boots and wet gear more effectively.

    How to Choose the Right Camping Rug

    Start with the way you travel. Backpackers need a compact, lightweight layer, while car campers can prioritize coverage and softness. Families may value washable materials and clear zones for shoes, whereas glamping setups often favor a larger carpet that improves the look and feel of the entire tent.

    Weather and campsite conditions should guide the material. A breathable woven mat suits dry or sandy locations, while a removable insulating layer helps on cold ground. If rain is likely, prioritize quick drying and avoid leaving absorbent rugs pressed against the tent floor.

    🛠️ Practical Tip

    Before buying, sketch the tent floor and mark the bed, door, vestibule, and furniture areas. This quickly shows whether you need a full carpet, a runner, or two small mats.

    Setting Up a Tent Floor Rug

    1. Pitch the tent and remove loose stones, sticks, and sharp debris from the floor.
    2. Allow the groundsheet to settle flat before placing the rug.
    3. Position the rug away from zippers and door tracks so it doesn’t interfere with opening the tent.
    4. Keep absorbent materials clear of walls where condensation may collect.
    5. Lift and air the rug regularly during a multi-day trip.
    6. Shake, clean, and fully dry the rug before storing it at home.

    For low-impact camping, keep the rug within the existing tent footprint and avoid unnecessary ground disturbance. The Leave No Trace principles offer useful guidance for minimizing campsite impact.

    💡 Tip

    A rug should never cover the tent’s ventilation points or block a door. Comfortable flooring matters, but airflow and safe exits matter more.

    Which Camping Rug Is Best for Different Campers?

    Backpackers should usually choose a thin foam mat, lightweight blanket, or compact sitting mat. Families and car campers can take advantage of larger polypropylene rugs, recycled plastic designs, or modular carpet tiles. Glamping and bell tent users may prefer a dedicated tent carpet or wool-style rug that covers the central living space.

    For a sandy beach camp, a sand-free mat is more practical than a plush carpet. For a cold campsite, combine insulation with a top rug. For a wet location, focus on drying and ventilation rather than choosing the thickest available floor covering.

    ✨ Style Tip

    Use one practical mat at the entrance and a softer rug in the main living area. Separating those jobs usually keeps the interior cleaner than asking one rug to handle every surface.

    Frequently Asked Questions

    What is a good tent floor rug?

    A good tent rug is appropriately sized, easy to clean, comfortable underfoot, and suitable for the campsite conditions. Woven outdoor mats are versatile, while foam or textile layers provide more warmth.

    What should I put on the floor of my tent?

    Use a groundsheet or the tent’s built-in floor first, then add a rug, mat, or blanket that fits without covering ventilation or obstructing doors. Choose quick-drying materials in damp weather.

    Are camping rugs waterproof?

    Some plastic or coated mats resist water, but waterproofing depends on the construction. A rug may have a water-resistant underside while the top remains absorbent, so check the product care and material details.

    What are the best floor mats for tents at the beach?

    Sand-free woven mats are usually the most practical because loose sand can fall through the surface. A regular fleece or thick carpet tends to hold more grit.

    Can I use an indoor rug inside a tent?

    You can, provided it fits safely and stays dry. Indoor rugs may be comfortable, but they often absorb moisture and take longer to dry than outdoor camping rugs.

    Final Verdict

    The best camping rugs for tent floors depend on the balance you want between comfort, weight, coverage, and easy care. Sand-free mats suit beaches, woven polypropylene works well for car camping, foam adds insulation, and dedicated bell tent carpets make spacious glamping interiors feel more finished. Backpackers should keep the floor covering light, while families can prioritize washable materials and generous coverage.

    Before purchasing, measure the usable tent floor, consider the likely weather, and check how the rug packs and dries. A small entrance mat paired with a larger living-area rug is often more practical than one oversized carpet. Choose the option that fits your actual camping routine, not just the most attractive design.

  • Best Padded Camping Chairs for Long Sitting: 8 Top Picks

    Best Padded Camping Chairs for Long Sitting: 8 Top Picks

    Finding the best padded camping chairs for long sitting comes down to more than thick cushioning. A chair that feels comfortable for ten minutes may leave your back, hips, or knees unhappy after a full afternoon by the fire, at a sports event, or beside a fishing spot. Seat height, back support, frame strength, portability, and fabric ventilation all matter.

    This roundup compares eight practical camp chair designs, from oversized high-capacity models to lighter folding seats for travel and backpacking. You’ll see which options suit car campers, families, larger adults, and comfort-focused buyers, along with the trade-offs that can be easy to miss in product listings.

    What Makes a Camping Chair Comfortable for Long Sitting?

    Long-session comfort usually comes from a combination of supportive padding, a properly shaped backrest, stable armrests, and enough seat width. Extra cushioning helps, but overly soft padding can compress over time or hold heat in warm weather. A breathable fabric panel may feel better than a heavily padded seat during summer use.

    The ideal chair also depends on how you travel. Car campers can accept a heavier frame and larger carry bag, while backpackers need to prioritise packed size and weight. For older adults or anyone with limited mobility, a higher seat and firm armrests may matter more than recline features.

    • Seat dimensions: Check width, depth, and height rather than relying on the word “oversized.”
    • Weight capacity: Compare the listed capacity with your own weight and the way you plan to use the chair.
    • Back support: A high back can support the shoulders and neck, while a lower back may pack more easily.
    • Frame design: Steel often favours stability; aluminium generally helps reduce carry weight.
    • Portability: Look at folded size, carry handles, and whether a proper carry bag is included.
    • Weather exposure: Outdoor fabrics may resist light moisture, but most folding chairs still need to be dried before storage.

    🛠️ Practical Tip

    Measure the space where you normally sit before buying. A wide camp chair may be comfortable beside a fire but awkward on a narrow tent porch or crowded stadium row.

    Quick Comparison of the Padded Camping Chairs

    Product Best For Key Feature Portability Main Drawback
    ALPS Mountaineering King Kong High-capacity comfort Oversized seat and strong frame Car camping Bulky for carrying far
    Kijaro Dual Lock Stable everyday seating Locking frame design Moderate Less compact than lightweight chairs
    Coleman Big-N-Tall Larger adults Wide, supportive structure Moderate Not aimed at backpacking
    GCI Outdoor Comfort Pro Reclining comfort Adjustable comfort features Moderate More moving parts
    NEMO Stargaze Recliner Luxury Relaxing around camp Suspended reclining seat Car camping Heavier and more complex
    YETI Trailhead Camp Chair Premium outdoor use Supportive, durable-feeling build Moderate Higher purchase commitment
    Helinox Sunset Chair Portable back support High back with compact frame Travel and camping Padding is limited
    Mac Sports Padded Folding Chair Simple occasional use Straightforward folding design Moderate Specifications vary by model

    💡 Tip

    Treat comparison tables as a starting point, not a substitute for checking the current product listing. Manufacturers sometimes update chair dimensions, capacity ratings, colours, or included accessories.

    Best Padded Camping Chairs for Long Sitting by Use

    1. ALPS Mountaineering King Kong Chair

    ALPS Mountaineering King Kong Chair - Best Padded Camping Chairs for Long Sitting

    The ALPS Mountaineering King Kong is built for campers who want a wide seat, substantial support, and a chair that feels planted rather than delicate. Its oversized frame and high stated weight capacity make it a logical choice for larger adults or anyone who dislikes narrow folding seats. The chair also includes practical storage, including side pockets and a cup holder, which reduces the need to keep essentials on the ground.

    Pros

    • Generous seat width gives larger users more room to shift position.
    • Strong steel-style construction suits car camping and base-camp use.
    • Storage pockets and a cup holder are useful during long outdoor sessions.

    Cons

    • Its bulk and weight make it less attractive for hiking into a campsite.
    • The wide design may take up more room around a small fire ring.

    For long sitting, the King Kong’s value lies in space and stability rather than a tiny packed footprint. It is better suited to frequent car campers, tailgaters, and larger adults than to anyone counting every pound in a backpack.

    💡 Tip

    Place this chair on firm, level ground. Its broad footprint is stable, but soft mud can still cause one side to sink and make the seat feel uneven.

    2. Kijaro Dual Lock Portable Sports and Camping Chair

    The Kijaro Dual Lock stands out for its locking frame, which is designed to keep the chair open and stable once deployed. Its upright seat position works well for conversation, outdoor meals, sporting events, and camp chores where a deeply reclined chair can feel awkward. The padded seat and headrest add comfort without turning the design into a bulky recliner.

    Pros

    • The dual-lock mechanism can make the open chair feel more secure.
    • Upright support suits meals, games, and general camp use.
    • Built-in storage and a cup holder improve convenience.

    Cons

    • The locking hardware adds weight and folded bulk.
    • It may feel too upright for people who want a lounge-style chair.

    This is a sensible middle ground for buyers who want more structure than a basic folding camp chair. It can also work well as a portable chair for sporting events, provided its folded size fits your vehicle or carrying routine.

    🛠️ Practical Tip

    Before sitting down, confirm that the frame is fully opened and the locking mechanism is engaged. That simple check is especially important when the chair has been folded tightly in its carry bag.

    3. Coleman Big-N-Tall Quad Camping Chair

    The Coleman Big-N-Tall Quad Camping Chair is aimed at users who need more room and a higher weight rating than a standard compact chair provides. Its broad seat and reinforced structure make it useful around campfires, at tailgates, and during long outdoor events. Coleman’s familiar folding format also keeps setup straightforward: open the frame, check the seat fabric, and settle it on a stable surface.

    Pros

    • Roomy proportions are helpful for larger adults.
    • Folding construction makes storage and transport uncomplicated.
    • Armrest and cup-holder features support longer, more relaxed sitting.

    Cons

    • Its size and weight are more appropriate for car-based trips.
    • It may not provide the same lounge feel as a reclining camp chair.

    Choose this model when capacity and familiar design matter more than a lightweight pack. It is particularly practical for families who need a dependable extra seat at camp, although buyers should confirm the exact capacity and dimensions for the current version.

    ✨ Style Tip

    If two people in a household will share camp furniture, compare the chair’s actual seat width with the narrower user’s comfort needs too. A very wide seat isn’t automatically supportive for every body shape.

    4. GCI Outdoor Comfort Pro Chair

    The GCI Outdoor Comfort Pro is a good fit for campers who prefer adjustable comfort over a rigid, upright seat. GCI chairs commonly focus on supportive frames and comfort-oriented features, and the Comfort Pro format is intended for relaxed sitting around camp rather than carrying on a long trail. Depending on the specific version, features may include reclining or adjustable support, so check the current listing before purchasing.

    Pros

    • Comfort-focused design can suit reading, conversation, and evening campfires.
    • Supportive armrests make standing up easier than from a low lounge chair.
    • Folding setup remains familiar for occasional campers.

    Cons

    • Moving parts can add weight and create more areas to inspect.
    • Some users may prefer a simpler frame for rough, frequent transport.

    This chair makes sense for comfort-focused car campers who want more adjustment than a basic padded seat offers. It is less compelling for backpacking or minimalist travel, where a simpler and lighter design is usually easier to live with.

    💡 Tip

    Reclining mechanisms are most comfortable when the chair is placed with clear space behind it. Avoid positioning the back directly against a tent wall or rough tree bark.

    5. NEMO Stargaze Recliner Luxury

    The NEMO Stargaze Recliner Luxury takes a different approach from a conventional camp chair. Its suspended seat and reclining design are made for lounging, rocking gently, and looking upward around camp. The high-back shape can support the head and shoulders, making it appealing for long evenings when a normal upright chair feels too formal.

    Pros

    Pros - Best Padded Camping Chairs for Long Sitting
    • Reclining geometry encourages relaxed, lounge-style sitting.
    • High-back support is useful for reading or watching a fire.
    • Distinctive design offers more adjustment than a standard folding chair.

    Cons

    • More components mean more setup than a basic camp chair.
    • It is better for car camping than for carrying deep into the backcountry.
    • Suspended seating may not suit people who prefer a firm, fixed base.

    The Stargaze is best viewed as a comfort-first camp recliner rather than a general-purpose chair. It suits relaxed base camps and longer stays where the extra packed size is acceptable.

    🛠️ Practical Tip

    Practise the setup at home before taking a suspended recliner camping. Learning how the seat connects to its frame is easier in a clear room than beside a dark campsite.

    6. YETI Trailhead Camp Chair

    The YETI Trailhead Camp Chair is designed for buyers who put a premium on supportive construction, a refined sitting position, and outdoor use. Its design is more substantial than a lightweight backpacking seat, yet it remains a folding chair rather than a permanent outdoor recliner. The broad, supportive shape makes it suitable for campfires, patios, tailgating, and extended events.

    Pros

    • Supportive seat design favours long periods of sitting.
    • Folding construction keeps storage simpler than fixed outdoor furniture.
    • Suitable for buyers who want a polished, durable-feeling camp chair.

    Cons

    • It may be more chair than a casual weekend camper needs.
    • Its larger build is not aimed at ultralight backpacking.
    • Pricing can vary, so compare current listings before deciding on value.

    This is a strong candidate for frequent car campers and people who use a camp chair at more than one type of outdoor event. It makes less sense if your top priority is the smallest possible packed size.

    ✨ Style Tip

    A premium chair is easier to justify when it replaces several seats you would otherwise buy for camping, tailgating, concerts, or patio use. Consider the number of settings, not just the campsite.

    7. Helinox Sunset Chair

    The Helinox Sunset Chair is not heavily padded, but it deserves consideration for buyers who want high-back comfort in a portable format. Its lightweight frame and compact packed size make it more practical for travel, remote camps, and trips where a bulky oversized chair is inconvenient. The supportive fabric seat cradles the body, while the tall back provides more shoulder support than many small folding stools.

    Pros

    • Compact pack size is useful for travel and lighter camping loads.
    • High back supports the upper body better than many low chairs.
    • Aluminium-style frame construction keeps the design portable.

    Cons

    • It does not provide the thick cushioning found on dedicated padded chairs.
    • Small components can take more care during setup than a simple steel frame.
    • Some users may want firmer armrests for getting up.

    For backpacking, road trips, and compact gear kits, the Sunset Chair may be more useful than a heavier padded model. It is a comfort compromise: less cushion, but substantially easier to pack and carry.

    💡 Tip

    If you choose a lighter chair for backpacking, add a small seat pad only if it packs efficiently and stays secure. A loose cushion can slide on suspended fabric.

    8. Mac Sports Padded Folding Chair

    A Mac Sports padded folding chair can appeal to buyers who want a straightforward seat for occasional camping, picnics, fishing, or outdoor events. The brand offers several folding chair formats, so exact dimensions, materials, capacity, and accessories depend on the model. That variation makes checking the individual product page especially important.

    Pros

    • Simple folding format is easy for beginners to understand.
    • Padded versions can provide more immediate comfort than bare sling seats.
    • Useful for occasional outdoor use when advanced features are unnecessary.

    Cons

    • Specifications differ between models under the same brand.
    • It may not offer the reinforced structure of a dedicated high-capacity chair.
    • Padding thickness and long-term support should be checked carefully.

    This category is worth considering for budget-conscious or occasional users, but the exact model matters more than the brand name alone. Confirm the weight rating, folded dimensions, frame material, and warranty terms before ordering.

    🛠️ Practical Tip

    For an occasional-use chair, inspect the hinge points and fabric seams when it arrives. Early checks make it easier to resolve a mismatch between the listing and the model delivered.

    How to Choose the Right Chair for Your Trips

    Match the Chair to Your Transport

    A comfortable chair is only useful if you’re willing to carry it. Heavy steel-frame models are usually best for car camping, tailgating, and established campsites. Lightweight aluminium designs make more sense for backpacking, travel, and camps where the chair must share space with a tent, sleeping bag, and cooking kit.

    Check the packed length as well as the stated weight. A chair can be relatively light but still awkward to attach to a backpack if it folds into a long, rigid bundle.

    💡 Tip

    Place the folded chair beside your packed vehicle or backpack before buying. This quick visual check reveals whether the carry bag will compete with other equipment.

    Prioritise Support, Not Just Cushioning

    Thick padding can feel inviting, but seat geometry often has more influence on long-session comfort. Look for a backrest that reaches high enough for your torso, armrests at a natural height, and a seat that doesn’t force your knees sharply upward. Older adults may also prefer a moderately high seat because standing up from a very low chair can be difficult.

    People with larger builds should check both the weight capacity and the usable seat width. A high capacity rating does not always mean the seat itself is spacious.

    ✨ Style Tip

    When comparing two chairs, sit with your shoulders relaxed and feet flat if you can try them in person. The better option is usually the one that supports your posture without constant repositioning.

    Think About Heat, Moisture, and Storage

    A padded chair may feel warmer than a mesh chair in direct sun. Ventilated panels help air move through the seat, while thicker cushions can be more comfortable in cool weather. No outdoor chair should be packed away wet; moisture trapped in folds can lead to unpleasant odours and fabric problems.

    Storage features also matter during long sitting. A cup holder, phone pocket, or side organiser keeps small items within reach, but those extras can add bulk and may catch on nearby equipment.

    🛠️ Practical Tip

    After a damp trip, open the chair fully in a ventilated area and let every fold dry before returning it to the carry bag. Store the bag somewhere dry rather than in a sealed, humid vehicle.

    Which Type of Camper Should Choose Which Chair?

    Car campers and frequent weekend campers can prioritise padding, a high back, strong armrests, and a roomy frame. The ALPS Mountaineering King Kong, Coleman Big-N-Tall, and YETI Trailhead are better aligned with that use than compact backpacking chairs.

    Comfort-focused buyers may prefer a recliner-style design such as the NEMO Stargaze or a comfort-oriented GCI model. These chairs can be excellent around a relaxed base camp, but their added mechanisms may not appeal to people who want quick, uncomplicated setup.

    Backpackers and portability-focused buyers should look first at packed size and weight. The Helinox Sunset Chair offers a more realistic compromise for travel, though its suspended fabric seat does not feel like a thickly padded armchair.

    Families and occasional users may value simple folding operation, storage pockets, and a clear weight rating. The Kijaro Dual Lock and suitable Mac Sports models are worth comparing, but verify the exact specifications before purchasing.

    💡 Tip

    For shared family gear, mark each carry bag with a simple label or colour tag. It prevents similar folding chairs from being mixed up at a busy campsite or event.

    Care and Safe Use

    Even a well-built camping chair needs sensible handling. Keep all legs on stable ground, avoid exceeding the listed capacity, and inspect the hinges, rivets, locking points, and fabric seams periodically. Don’t drag a loaded chair across sharp rocks, and keep it away from direct flames and hot embers.

    For broader campsite guidance, the National Park Service’s explanation of the Leave No Trace principles is a useful reference for reducing impact while camping. A chair should also be packed only after it is clean and dry.

    🛠️ Practical Tip

    Before each trip, open the chair at home and check that the locking points move normally. A few seconds of inspection can reveal a bent frame or damaged seam before it becomes a campsite problem.

    Frequently Asked Questions

    What is the most comfortable padded camping chair?

    Comfort depends on body size, posture, and how you travel. Oversized chairs such as the ALPS Mountaineering King Kong or Coleman Big-N-Tall favour space, while the NEMO Stargaze prioritises reclining relaxation.

    Are padded camping chairs suitable for backpacking?

    Some are, but most heavily padded models are too bulky for long walks. A compact chair such as the Helinox Sunset may be a better compromise if portability matters more than thick cushioning.

    What is the best camping chair for older people?

    Look for a moderately high seat, firm armrests, stable legs, and an easy-opening frame. A very low recliner may be comfortable once seated but harder to get out of.

    Is a high weight capacity enough for a larger adult?

    No. Check the usable seat width, seat depth, armrest position, and frame stability as well as the listed capacity.

    How should a padded camp chair be stored?

    Clean and dry it completely, fold it without forcing the hinges, and store it in a dry place. Avoid leaving it compressed in a damp vehicle for long periods.

    Final Verdict

    The best padded camping chairs for long sitting balance cushioning with proper support, usable seat dimensions, a stable frame, and a packed size you’ll tolerate. The King Kong and Coleman Big-N-Tall make sense for roomy car-camping comfort, while the Kijaro Dual Lock offers a more upright, practical seat. GCI, NEMO, and YETI lean toward relaxed or premium comfort, and the Helinox Sunset is the more portable compromise.

    Before buying, compare the current weight rating, seat dimensions, folded size, and included carry bag rather than relying on a product name alone. Choose the chair that matches your transport and posture needs, then keep it dry and inspect the frame regularly. That approach will usually matter more than simply choosing the thickest padding.

  • Best Tunnel Tents for Windy Camping: Reliable Choices

    Best Tunnel Tents for Windy Camping: Reliable Choices

    Strong gusts can turn a comfortable campsite into a noisy, stressful night, so choosing among the best tunnel tents for windy camping takes more than checking capacity. The tent’s shape, pole structure, guyline layout, fabric, floor design, and setup all affect stability. A well-pitched tunnel tent can offer excellent space-to-weight efficiency, but it still needs suitable stakes, correct tension, and sensible site selection.

    This roundup compares proven tunnel-style camping tents for solo trips, backpacking, family use, and four-season conditions. You’ll see where each model fits, what its wind advantages are, and which limitations deserve attention before purchase.

    What Makes a Tunnel Tent Suitable for Wind?

    A tunnel tent uses curved poles running across the width of the shelter, creating a long, aerodynamic shape. The low profile can present less surface area to wind than a tall cabin-style design, while the continuous flysheet helps reduce exposed seams and gaps.

    That doesn’t mean every tunnel tent performs equally in bad weather. Stability depends on the number and strength of poles, the quality of the fabric, guy points, peg selection, pitch direction, and how well the flysheet is tensioned. A tunnel tent is generally strongest when its narrow end faces the prevailing wind.

    • Wind direction: Aim the narrower end into the strongest expected gusts.
    • Guyline support: Use every available guy point when conditions are unsettled.
    • Pole structure: Stronger poles and well-supported sleeves can improve resistance to bending.
    • Stake security: Soft sand, loose soil, and rocky ground may require specialized stakes.
    • Ventilation: Adjustable vents help manage condensation when the flysheet is fully closed.
    • Pitch quality: A tidy, evenly tensioned setup is safer than a rushed one.

    🛠️ Practical Tip

    Check the expected wind direction before pitching, then position the vestibule away from the strongest gusts where possible. A good site is often more valuable than a small difference in tent specifications.

    How to Choose Among the Best Tunnel Tents for Windy Camping

    Capacity and Interior Shape

    Capacity and Interior Shape - Best Tunnel Tents for Windy Camping

    Choose capacity based on how much usable space you need rather than the number printed on the label. A two-person tunnel tent may work well for one person with equipment, while two campers carrying bulky sleeping bags may prefer a larger vestibule or a three-person model.

    Long tunnels can provide useful sleeping and storage space without becoming excessively wide. That layout is especially practical for wet-weather camping because packs, boots, and cooking equipment can stay under cover.

    Weight, Packed Size, and Portability

    A wind-focused shelter often uses more fabric, stronger poles, and extra guy points than an ultralight summer backpacking tent. That added structure can improve confidence in rough conditions, but it may increase packed weight and bulk.

    For backpacking, compare the complete packed weight rather than the minimum trail weight. For car camping, a larger packed size may be an acceptable trade-off for better headroom and storage.

    Materials and Weather Protection

    Look for a waterproof flysheet, a bathtub-style floor, protected seams, and a design that keeps the inner tent away from external condensation. Hydrostatic-head figures can help compare fabrics, but they don’t tell the whole story. Construction, seam treatment, fabric aging, and pitching technique matter too.

    For cold or exposed trips, a more substantial fabric may offer greater abrasion resistance and better long-term confidence. Lightweight fabric can still be highly capable, but it requires more care around sharp ground and rough handling.

    Setup and Wind Management

    Most tunnel tents are straightforward once the pole sleeves and guyline arrangement become familiar. They can be quick to pitch because the inner and outer shelter may connect as one unit, although some models work better with two people in strong wind.

    Before camping in exposed conditions, practice at home. Learn how the flysheet attaches, where the tension points sit, and which guylines need to be used first. For general safety information, consult the Met Office mountain weather guidance before heading into exposed terrain.

    💡 Tip

    Practice pitching with the door facing different directions. This helps you understand how the tunnel behaves before you need to make a fast setup in rain or strong wind.

    Tunnel Tents Worth Considering

    The models below cover lightweight backpacking shelters, spacious trekking tents, and more substantial options for exposed or colder trips. Specifications can vary by year, regional version, and included accessories, so confirm the current manufacturer details before ordering.

    Product Best For General Capacity Wind-Relevant Strength Main Limitation
    Hilleberg Nallo 2 Lightweight trekking Two people Low-profile four-season tunnel design Limited interior width for two with bulky gear
    Hilleberg Nallo 3 GT Two people wanting a large vestibule Three people Extended GT vestibule and multiple guy points More weight and packed bulk
    Hilleberg Nammatj 2 GT Exposed, demanding trips Two people Stronger fabric and robust construction Heavier than lightweight alternatives
    Hilleberg Kaitum 2 GT Comfortable four-season trekking Two people Spacious tunnel with dual vestibule access Greater complexity and weight
    Fjällräven Abisko Endurance 2 Three-season trekking Two people Long tunnel profile and adjustable ventilation Less suited to buyers wanting a very large living area
    Terra Nova Voyager Lightweight UK-style backpacking Two people Low tunnel profile and trekking-focused build Compact interior for extended stays
    Robens Pioneer 2EX Value-minded trekking Two people Stable tunnel layout with a useful porch Not as light or refined as premium alternatives
    Vango Banshee Pro 200 Solo campers and compact two-person trips Two people Low-profile backpacking design Limited living space for two adults

    ✨ Quick Tip

    Treat the table as a starting point, not a substitute for checking the current product page. Pole materials, packed weights, and included footprints can differ between regional versions.

    Lightweight Tunnel Tents for Trekking

    1. Hilleberg Nallo 2

    The Hilleberg Nallo 2 is a compact two-person tunnel tent designed for trekkers who want low weight without moving to an especially fragile shelter. Its connected inner and outer construction can simplify pitching in wet weather, and the tunnel profile gives it a sensible footprint for narrow campsites.

    For one person, it offers useful room for sleeping and storing equipment. Two people can use it, but the interior may feel tight if both campers carry large packs or expect to spend long periods inside. The design is better suited to efficient touring than relaxed family camping.

    Pros

    • Compact tunnel shape with a good balance between weight and weather protection.
    • Practical for backpacking trips where packed size matters.
    • Flysheet-first pitching can help keep the inner shelter dry.

    Cons

    • Two occupants have limited interior space compared with larger tunnel tents.
    • Premium construction comes with a higher purchase commitment than basic trekking models.
    • Strong performance still depends on careful guyline use and correct orientation.

    💡 Tip

    If two people share the Nallo 2, keep heavy equipment in the vestibule and use compact sleeping mats. That preserves the central floor area and reduces clutter near the doors.

    2. Fjällräven Abisko Endurance 2

    The Abisko Endurance 2 is aimed at trekkers who want a lightweight tunnel format with more weather-focused features than a basic summer camping tent. Its long profile creates a defined sleeping area and vestibule, while adjustable ventilation is important when the flysheet is closed during rain.

    This is a sensible choice for two-person trekking where a low, efficient shape matters. It may also suit a solo camper who values extra storage and doesn’t mind carrying a little more shelter than a minimalist one-person design.

    Pros

    • Efficient tunnel layout for backpacking and multi-day trekking.
    • Useful balance of sleeping room, vestibule space, and portability.
    • Ventilation options can help manage condensation in damp conditions.

    Cons

    Cons - Best Tunnel Tents for Windy Camping
    • Not designed to provide the large living area of a family tunnel tent.
    • Wind protection depends on a precise pitch and secure anchoring.
    • Buyers should check the current regional specification before comparing weights.

    🛠️ Practical Tip

    Open the highest vents slightly before condensation builds, but keep the windward side more protected. Small airflow changes can make the interior feel noticeably drier overnight.

    3. Terra Nova Voyager

    The Terra Nova Voyager has long been associated with lightweight two-person trekking in changeable conditions. Its tunnel arrangement keeps the profile relatively low and provides a compact porch for wet footwear or a small pack.

    It suits backpackers who prioritize carrying efficiency over lounge-like comfort. The interior works best when equipment is organized carefully, and taller campers should check the current dimensions before committing because a compact tunnel can feel restrictive at the ends.

    Pros

    • Low-profile design suited to exposed walking routes.
    • Compact format for hikers who need a manageable packed shelter.
    • Useful vestibule space without turning the tent into a large load.

    Cons

    • Limited room for sitting, changing, or keeping several bags under cover.
    • Not the obvious choice for family camping or long base-camp stays.
    • Pitching accuracy matters because a small shelter has less tolerance for slack fabric.

    ✨ Style Tip

    Pack the poles along the side of your backpack rather than across the top. This keeps the load balanced and makes it easier to place the tent on the ground before unpacking everything else.

    4. Vango Banshee Pro 200

    The Banshee Pro 200 is a compact two-person tunnel-style backpacking tent with a low sleeping profile and a small porch. Its proportions make it particularly appealing to solo hikers who want more storage than a tiny one-person shelter provides.

    Two adults can use it for shorter trips, but the interior is not intended to feel spacious. It is better viewed as a practical trekking shelter than a comfortable base for storm-bound days. Buyers should compare the current version’s fabric, pole, and weight details before purchase.

    Pros

    • Compact footprint for campsites where space is limited.
    • Small porch provides a place for boots and selected equipment.
    • Suitable for budget-conscious backpackers seeking a straightforward tunnel layout.

    Cons

    • Two-person comfort is limited, especially with large sleeping bags and packs.
    • Less internal space than larger expedition-style tunnel tents.
    • Wind performance relies heavily on good stakes and a correctly tensioned pitch.

    💡 Tip

    Use a groundsheet that matches the tent footprint rather than a large sheet that extends beyond the fly. Exposed edges can collect rainwater underneath the floor.

    More Substantial Tunnel Tents for Exposed Conditions

    5. Hilleberg Nallo 3 GT

    The Nallo 3 GT adds a generous extended vestibule to the compact tunnel concept. Although labeled for three people, many campers will find it especially comfortable for two people with wet-weather equipment, or for one person wanting a substantial sheltered storage area.

    The long porch is the defining feature. It can separate sleeping space from packs, boots, and cooking equipment, which becomes valuable when rain keeps everyone inside. The larger footprint and extra fabric naturally make it less appealing to ultralight backpackers.

    Pros

    • Large GT vestibule offers more practical storage and sheltered living space.
    • Suitable for two people carrying substantial gear.
    • Low tunnel profile can be easier to manage in wind than a tall cabin design.

    Cons

    Cons - Best Tunnel Tents for Windy Camping
    • Greater packed bulk than smaller two-person trekking tents.
    • Needs a longer, more carefully chosen pitch site.
    • Three adults may find the sleeping compartment functional rather than spacious.

    🛠️ Practical Tip

    Measure your intended campsite before relying on the GT vestibule. The extended porch is useful, but it needs enough level ground and additional anchoring points to stay properly tensioned.

    6. Hilleberg Nammatj 2 GT

    The Nammatj 2 GT is built around a more robust tunnel approach than lightweight trekking models. Its heavier-duty construction and extended vestibule make it suitable for demanding trips where durability, weather protection, and usable storage are more important than carrying the minimum possible weight.

    This is a strong candidate for exposed backpacking, winter approaches, and frequent use in rough conditions. It may be excessive for sheltered summer camps or short weekend trips where a lighter tent would be easier to carry.

    Pros

    • Substantial construction for demanding trekking conditions.
    • Large vestibule gives two campers more flexibility with wet gear.
    • Well suited to users who value fabric durability and a conservative design.

    Cons

    • Heavier and bulkier than lightweight tunnel alternatives.
    • Higher cost may not make sense for occasional fair-weather camping.
    • Requires a suitable pitch with room for the extended vestibule and guylines.

    💡 Tip

    Carry a mix of standard and specialized stakes if your route includes different ground types. Place the strongest anchors at the windward end and at the main guy points.

    7. Hilleberg Kaitum 2 GT

    The Kaitum 2 GT is designed for campers who want a roomy four-season tunnel without moving to the heaviest expedition format. Its layout emphasizes livability, with generous vestibule space and access arrangements that make it easier to organize two people and their equipment.

    It is a good match for long-distance trekking, shoulder-season camping, and trips where comfort matters as much as low weight. The design makes less sense for a minimalist overnight hike, especially if the weather forecast is settled and the extra room will not be used.

    Pros

    • Roomy interior and vestibule for two campers on longer trips.
    • Good choice for users who want a more comfortable four-season shelter.
    • Dual access and storage arrangements can improve daily usability.

    Cons

    • More weight and packed volume than compact tunnel tents.
    • Requires more campsite space and time to tension neatly.
    • Its larger surface area still needs careful orientation in strong gusts.

    ✨ Style Tip

    Use the vestibules as separate zones: keep one side for wet footwear and the other for dry packs or cooking equipment. That simple division makes a larger tent easier to live in during prolonged rain.

    8. Robens Pioneer 2EX

    The Robens Pioneer 2EX offers a two-person tunnel layout with a useful porch and a more accessible approach than premium expedition shelters. It is aimed at trekkers and weekend campers who want a stable-looking design, practical storage, and straightforward pitching without choosing an ultra-minimal shelter.

    Its appeal is strongest for buyers who camp regularly but do not need the lightest possible pack. The Pioneer 2EX may also work for solo campers who want room to sit, store gear, and wait out poor weather.

    Pros

    • Practical porch space for boots, packs, and wet clothing.
    • Good fit for weekend trekking and regular campsite use.
    • More comfortable than many compact two-person backpacking tents.

    Cons

    • Not as light or compact as premium minimalist shelters.
    • Exact materials and packed weight should be checked for the current model year.
    • Large vestibule and broad footprint need reliable anchoring in exposed camps.

    🛠️ Practical Tip

    Before leaving the campsite, loosen the door tension slightly if a sudden change in wind direction is expected. This can make repacking easier without forcing zippers against a tightly loaded flysheet.

    Which Tunnel Tent Fits Your Camping Style?

    The best choice depends on how you carry, pitch, and use the shelter. A solo backpacker may accept a narrow interior to keep pack weight down, while a couple on a week-long trip may value a larger vestibule more than a small weight saving.

    • For solo backpacking: Consider a compact two-person model such as the Nallo 2, Voyager, or Banshee Pro 200.
    • For two-person trekking: Look at the Nallo 2, Abisko Endurance 2, or Kaitum 2 GT depending on desired space and conditions.
    • For exposed trips: The Nammatj 2 GT offers a more substantial construction approach, but expect extra weight.
    • For wet-weather comfort: A model with a longer vestibule, such as the Nallo 3 GT or Pioneer 2EX, gives more sheltered storage.
    • For occasional weekend camping: A simpler and more affordable tunnel design may provide better practical value than an expedition-grade tent.

    💡 Tip

    Write down your usual trip pattern before shopping: number of people, typical wind exposure, walking distance, and amount of wet gear. That short list often reveals whether you need low weight, a larger porch, or stronger construction.

    How to Pitch a Tunnel Tent for Better Wind Stability

    1. Choose level ground away from dead trees, unstable branches, and obvious drainage channels.
    2. Identify the likely wind direction and point the narrow end of the tunnel toward it.
    3. Secure the windward end before fully extending the tent.
    4. Insert or connect the poles according to the manufacturer’s instructions.
    5. Stake the opposite end, keeping the shelter aligned rather than twisted.
    6. Attach and tension the main guylines so the pole structure remains evenly supported.
    7. Adjust the flysheet until it is taut without overstretching seams or zippers.
    8. Open suitable vents to reduce condensation while keeping wind-driven rain out.

    A good pitch should look symmetrical, with no large folds in the flysheet and no poles leaning unnecessarily. Check the guylines again after the fabric settles, particularly if rain has made the ground softer.

    🛠️ Practical Tip

    Don’t rely on the factory pitch straight from the bag. Walk around the shelter once it is standing and inspect each corner, pole sleeve, vent, and guyline before settling in.

    Common Mistakes to Avoid

    • Pitching broadside to the wind: This exposes more fabric and can increase movement.
    • Using only the corner stakes: Extra guy points are there to support the pole structure.
    • Ignoring the ground: Loose sand and shallow soil may not hold ordinary pegs securely.
    • Closing every vent: A waterproof tent can still become damp inside from condensation.
    • Choosing by capacity alone: A stated two-person capacity does not guarantee generous room for two large adults and their gear.
    • Skipping practice: Setup becomes slower and less secure when the first attempt happens in bad weather.

    ✨ Quick Tip

    Mark the front and rear pole sections with small, removable pieces of tape during practice. It can reduce setup errors when visibility is poor or gloves make handling fiddly.

    Frequently Asked Questions

    Are tunnel tents good in the wind?

    They can be very capable because their low, aerodynamic shape sheds wind efficiently when pitched with the narrow end facing the gusts. Their performance still depends on strong anchoring, correct tension, suitable poles, and a good campsite.

    What is the best tent shape for high winds?

    Low-profile tunnel and geodesic designs are commonly chosen for exposed conditions. A tunnel tent can be lighter and more spacious than a fully geodesic shelter, while a geodesic design may offer more balanced support when wind direction changes frequently.

    Can a tunnel tent be used on a windy beach?

    Yes, but beach sand requires suitable sand stakes or buried anchors rather than relying on standard narrow pegs. Protect zippers and pole sections from abrasive sand, and avoid pitching close to the highest water line.

    Are bigger family tents suitable for strong wind?

    Some large tunnel family tents are stable when correctly pitched, but their taller walls and larger fabric area can catch more wind than a compact trekking tent. Check the manufacturer’s wind guidance and use every available guyline.

    Is a waterproof tunnel tent always good in rain?

    Waterproof fabric is only part of the equation. Seams, floor construction, door design, ventilation, pitching angle, and site drainage all affect how comfortable the tent remains during prolonged rain.

    Final Verdict

    The best tunnel tents for windy camping balance a low profile, reliable pole support, useful guylines, waterproof fabric, and a pitch that can be secured on real ground. Compact models such as the Nallo 2, Voyager, and Banshee Pro 200 suit weight-conscious backpackers, while the Nallo 3 GT and Kaitum 2 GT give two campers more room for wet-weather living. The Nammatj 2 GT is aimed at buyers who accept extra weight for more substantial construction.

    Before purchasing, compare complete packed weight, interior dimensions, vestibule space, pole design, season rating, and the availability of suitable stakes. The right tent is the one whose wind protection, comfort, and portability match your actual trips—not simply the model with the largest capacity or most impressive specification.

  • Best Compact Camping Stools for Hiking: 12 Top Picks

    Best Compact Camping Stools for Hiking: 12 Top Picks

    Finding the best compact camping stools for hiking means balancing sitting comfort against every ounce in your pack. A useful stool should pack small, open quickly, stay stable on uneven ground, and provide enough support for breaks, cooking, fishing, or waiting at a trailhead. Some models are little more than a lightweight seat, while others offer stronger frames and better comfort at the cost of extra weight.

    This roundup compares 12 portable options across ultralight tripod designs, folding stools, and more supportive alternatives. You’ll see where each model fits, what to check before buying, and which style makes the most sense for backpacking, car camping, travel, or everyday outdoor use.

    How to Choose Compact Camping Stools for Hiking

    A camping stool has a simple job, but the design details matter once it is strapped to a backpack. Start with packed size and weight, then consider the frame material, seat height, stated load capacity, and how securely the feet sit on loose or uneven ground.

    Tripod stools usually offer the smallest packed profile and quick setup. Folding stools with four legs can feel more planted, while chair-style seats provide better back support but take up more room. No single option wins every category.

    • Packability: Look for a folded length and shape that work with your backpack or travel bag.
    • Weight: Ultralight models suit long hikes, while heavier designs may offer better stability and comfort.
    • Seat height: A low stool is easy to carry but may be harder to stand from, especially for taller adults.
    • Frame construction: Aluminum is common for low weight; steel can provide a more substantial feel but generally adds mass.
    • Foot stability: Wide or rubberized feet can help on hard surfaces, though every small stool needs careful placement on soft ground.
    • Capacity: Check the manufacturer’s stated limit and leave a sensible margin rather than choosing a model at its maximum.
    • Use case: A backpacking stool prioritizes ounces, while a folding camping stool for car trips can favor comfort and durability.

    🛠️ Practical Tip

    Measure the side pocket or exterior attachment points on your pack before buying. A stool can be technically compact yet awkward if its folded length sticks out beyond the pack or catches on branches.

    Comparison Table: Portable Stools and Compact Seats

    The table below groups the options by their general design rather than declaring one universal winner. Product versions can change, so confirm the current dimensions, weight, and capacity with the manufacturer before ordering.

    Product Best For Design Portability Main Trade-Off
    Walkstool Comfort 45 Comfort-focused hikers Three-leg mesh seat Folds into a slim bundle More substantial than ultralight stools
    Walkstool Basic 50 Simple outdoor seating Three-leg fabric seat Compact tripod format Less cushioned than comfort models
    ALPS Mountaineering Tri-Leg Stool Campers wanting a familiar folding stool Tripod folding frame Easy to carry Limited back support
    GCI Outdoor PackSeat Day hikes and travel Portable folding seat Designed for quick transport Minimal seating area
    TravelChair Joey Backpackers wanting a light stool Compact folding seat Pack-friendly profile Not a back-supported chair
    Vargo Titanium Triad Weight-conscious backpackers Minimal tripod-style seat Very small packed form Basic comfort
    REI Co-op Trail Stool Day trips and campsite use Folding stool Portable, though not the smallest category Check current specifications
    Stansport Folding Stool Budget-minded car campers Traditional folding frame Good for vehicle transport Usually less backpack-focused
    Helinox Chair Zero Hikers who want back support Compact backpacking chair Highly packable chair format Costs more than a basic stool
    Crazy Creek Hex 2.0 Ground-level lounging Soft folding camp seat Flattens for packing Not an elevated stool
    NEMO Moonlite Comfort-focused camp seating Supportive folding chair Portable but larger than a stool Too bulky for some long hikes
    GCI Outdoor Quik-E Fast setup at campsites Folding camp stool Convenient for short transport Less suited to minimalist packs

    💡 Tip

    Treat the table as a starting point, not a substitute for checking the current product page. Weight, materials, and listed capacity may differ between revisions or regional versions.

    Ultralight Tripod and Backpacking Stools

    1. Walkstool Comfort 45

    Walkstool Comfort 45 - Best Compact Camping Stools for Hiking

    The Walkstool Comfort 45 is aimed at hikers who want more usable seating than a tiny three-legged perch can provide. Its tripod layout folds into a slim bundle, and the mesh-style seat is designed to spread pressure more comfortably than a narrow fabric strap. The taller format can also make standing easier during longer breaks.

    Its appeal is comfort without moving all the way to a full backpacking chair. The trade-off is straightforward: a supportive, taller stool usually takes more space and weighs more than a minimalist folding seat.

    Pros

    • More comfortable for extended rests than many basic tripod stools.
    • Taller seating position may suit adults who dislike sitting close to the ground.
    • Compact folding design works for hiking, fishing, and campsite use.

    Cons

    • Not the lightest option for strict ultralight packing.
    • No back support, despite its more comfortable seat.

    ✨ Style Tip

    Choose the taller version only if its packed length fits your carry system. A larger stool is useful at camp, but it may feel awkward attached to a small daypack.

    2. Walkstool Basic 50

    The Walkstool Basic 50 keeps the recognizable three-leg format but uses a simpler seat design than the Comfort range. It suits users who want a portable folding stool for trail breaks, outdoor work, fishing, or travel without carrying a conventional chair.

    The height is useful for people who prefer not to squat near the ground. Because it remains a stool, it offers no back support and is better for short or moderate rests than for reading beside camp all evening.

    Pros

    • Simple tripod construction is quick to open and close.
    • Taller seating can be easier for many adults to rise from.
    • Versatile enough for hiking, gardening, fishing, and spectator events.

    Cons

    • Basic seat construction may not satisfy comfort-focused buyers.
    • Three legs require deliberate placement on slopes or soft soil.

    💡 Tip

    Before sitting, press down gently on the seat and check that all three feet have made firm contact. This quick habit is especially useful on gravel, roots, and uneven trail edges.

    3. TravelChair Joey

    The TravelChair Joey is a compact folding seat designed for people who want a small resting platform rather than a full camping chair. Its appeal lies in the straightforward format: carry it to a viewpoint, open it for a short break, and fold it away when the trail continues.

    It can make sense for backpackers who consider a sit pad too minimal but do not want the bulk of a chair with a back. The small seating area and lack of upper-body support limit its use for long relaxation sessions.

    Pros

    • Useful middle ground between a ground pad and a full chair.
    • Folding format is convenient for day hikes and travel.
    • Simple design avoids the extra parts found on larger chairs.

    Cons

    • Limited comfort for lengthy sitting.
    • Buyers should verify current capacity and packed dimensions.

    🛠️ Practical Tip

    Use a small foam pad beneath a lightweight stool on damp ground. It can reduce moisture transfer and help keep the seat cleaner when you stop beside a muddy trail.

    4. Vargo Titanium Triad

    The Vargo Titanium Triad is built around minimalist backpacking priorities. Titanium construction is associated with low weight and corrosion resistance, while the tripod shape keeps the folded package small. It is best viewed as a compact perch for short breaks, meal preparation, or waiting around camp.

    This is not a plush seat. Buyers choosing it are usually trading cushion and broad support for portability. That makes it more appealing to fast-and-light hikers than to campers who want a relaxed, chair-like experience.

    Pros

    • Minimalist design suits weight-conscious backpackers.
    • Titanium frame construction can resist rust better than untreated steel.
    • Small packed footprint is easy to store in a pack.

    Cons

    • Thin, minimal seating may not suit long breaks.
    • Small feet can be less forgiving on soft ground.

    ⚡ Quick Tip

    Pack a small repair sleeve or tape only if it serves other gear too; a minimalist stool should not lead to a pile of single-purpose accessories that cancel out its weight advantage.

    Portable Folding Stools for Day Hikes and Campsites

    5. GCI Outdoor PackSeat

    GCI Outdoor PackSeat - Best Compact Camping Stools for Hiking

    The GCI Outdoor PackSeat focuses on quick, portable seating for short rests and casual outdoor use. Its folding construction makes it more approachable than a very small ultralight perch, and the design is suited to day hikes, events, fishing spots, and campsites where a full chair feels unnecessary.

    It is a sensible option for people who want straightforward operation rather than a highly specialized backpacking chair. Before buying, confirm the current seat height, folded dimensions, and weight because these details determine whether it belongs on a hiking pack or in a vehicle.

    Pros

    • Simple setup is convenient for brief stops.
    • Works across hiking, travel, fishing, and general outdoor use.
    • More familiar to beginners than highly minimalist designs.

    Cons

    • May be less attractive to ultralight hikers than a tiny tripod seat.
    • Typically offers little or no back support.

    💡 Tip

    For a daypack, compare the stool’s folded length with the pack’s back panel. A stool that sits vertically inside the main compartment may be easier to carry than one strapped horizontally across the outside.

    6. ALPS Mountaineering Tri-Leg Stool

    The ALPS Mountaineering Tri-Leg Stool uses a familiar tripod format that folds for transport and opens quickly at camp. It is a practical choice for users who want an uncomplicated folding camping stool for meals, outdoor chores, or short trail breaks.

    Compared with minimalist titanium designs, it may feel more like general camping equipment than specialist ultralight gear. That can be an advantage for families and car campers, though backpackers should compare the current weight against smaller alternatives.

    Pros

    • Recognizable design is easy for beginners to operate.
    • Tripod layout keeps the construction relatively simple.
    • Suitable for camping, fishing, and outdoor events.

    Cons

    • Limited back support and moderate sitting comfort.
    • May be better suited to short hikes or vehicle-based trips than long-distance backpacking.

    🛠️ Practical Tip

    If children will use a tripod stool, place it on level ground and supervise setup. A lightweight frame can shift if a child sits down from the side rather than lowering onto the center of the seat.

    7. REI Co-op Trail Stool

    The REI Co-op Trail Stool is positioned as a compact seat for trail and camp use rather than a full-size chair. Its folding approach makes it useful for hikers who want an elevated place to sit without carrying a backrest, armrests, and a larger frame.

    It may appeal to beginners who prefer buying from a known outdoor retailer and want a design intended for recreational trips. Current specifications should be checked carefully, particularly if you are comparing it with a backpacking stool where every ounce matters.

    Pros

    • Purpose-built for casual trail and campsite seating.
    • More portable than a conventional camp chair.
    • Good candidate for day hikes, festivals, and travel.

    Cons

    • Not designed to provide back support.
    • Current model details should be confirmed before purchase.

    ✨ Style Tip

    Match the stool to your typical trip. If it will spend most of its life in a car, a slightly roomier seat may be more useful than saving a small amount of pack space.

    8. Stansport Folding Stool

    The Stansport Folding Stool represents the traditional folding camping stool: a simple seat, a collapsible frame, and quick storage when the activity is over. It is more naturally suited to car camping, picnics, fishing, and campsite tasks than to minimalist backpacking.

    Its value comes from familiarity and ease of use rather than advanced suspension or technical materials. Check the exact frame material, capacity, and folded size for the current version, since Stansport sells several types of outdoor seating.

    Pros

    • Easy to understand and quick to deploy.
    • Useful for families, car campers, and casual outdoor activities.
    • Traditional folding format is convenient for storage.

    Cons

    • May be too bulky or heavy for long backpacking trips.
    • Basic models generally provide limited ergonomic support.

    💡 Tip

    For vehicle camping, keep a stool in an exterior gear bin rather than loose in the cabin. Folding hinges can collect grit, so wipe them clean before storage after sandy trips.

    Compact Chair Alternatives for More Comfort

    A stool is not always the right answer. If you want to lean back, read, eat, or spend several hours beside a fire, a backpacking chair may justify its larger packed size. These alternatives are included because many shoppers searching for the best compact camping stools for hiking are really comparing stools with low-weight chairs.

    9. Helinox Chair Zero

    Helinox Chair Zero - Best Compact Camping Stools for Hiking

    The Helinox Chair Zero is a compact backpacking chair rather than a stool, but its low-weight, collapsible design makes it a notable alternative. It provides a backrest and a more conventional sitting position while still packing down far smaller than a standard camping chair.

    The added support can make a major difference during long camp evenings. The trade-off is more assembly, more structure, and usually more cost than a basic folding stool. It is best for hikers who value comfort enough to carry the extra components.

    Pros

    • Back support is much better than on a standard stool.
    • Compact packed form suits backpacking and travel.
    • Useful for longer periods of sitting at camp.

    Cons

    • More parts to assemble and pack.
    • Usually less minimal than a three-leg stool.

    🛠️ Practical Tip

    Practice assembling a compact chair at home before a trip. It is easier to identify a twisted shock cord or misplaced pole section beside a table than in fading light at camp.

    10. Crazy Creek Hex 2.0

    The Crazy Creek Hex 2.0 is a soft, ground-level camp seat rather than an elevated folding stool. It folds flat, provides cushioning and a shaped back, and can be useful on dry ground, rock slabs, beaches, and informal campsites where a raised seat is not essential.

    This option suits travelers who prioritize comfort and packability without needing legs. It is less suitable for muddy conditions, wet grass, or anyone who finds getting up from the ground difficult.

    Pros

    • Provides back support without a metal frame.
    • Folds flat for simple packing and storage.
    • Useful for concerts, picnics, paddling trips, and camp breaks.

    Cons

    • Does not raise the user above wet or uneven ground.
    • Less suitable for users who need a higher seat.

    ⚡ Quick Tip

    Use a ground-level seat only where the surface is reasonably clean and dry. A waterproof groundsheet underneath can make breaks more comfortable without adding much bulk.

    11. NEMO Moonlite

    The NEMO Moonlite is a supportive camp chair for users who want adjustable comfort and a more relaxed posture. It is not a compact stool, but it belongs in the comparison because hikers often face the same decision: save space with a stool or carry a better seat for evenings at camp.

    Its chair structure is more appropriate for comfort-focused campers, frequent weekend trips, and basecamp use than for fast hiking. Check the current packed weight and size to decide whether it fits your route and carrying style.

    Pros

    • More supportive and relaxing than a simple stool.
    • Better suited to extended sitting around camp.
    • Can appeal to users who find low stools uncomfortable.

    Cons

    • Bulkier than most compact stools.
    • May be excessive for short trail breaks.

    💡 Tip

    Use a supportive chair for basecamp or car camping, then carry a simple stool for day hikes if you want both comfort and low trail weight. One seat does not need to handle every trip.

    12. GCI Outdoor Quik-E

    The GCI Outdoor Quik-E is a quick-opening camp stool aimed at convenience. Its design is more appropriate for campsite cooking, outdoor events, fishing, and short-distance transport than for users counting every ounce on a multi-day route.

    The major benefit is straightforward operation. It gives users a raised place to sit without the assembly process associated with some backpacking chairs. As with other folding models, verify the current dimensions, capacity, and frame materials before making a final decision.

    Pros

    • Fast setup is helpful when moving around camp.
    • Useful for fishing, cooking, spectators, and casual outdoor use.
    • More substantial than a tiny minimalist perch.

    Cons

    • May not be the best match for long-distance backpacking.
    • Limited back support compared with a chair.

    🛠️ Practical Tip

    Open a folding stool fully before sitting, and keep fingers clear of the hinge points. This is especially important when several people are setting up shared camp furniture quickly.

    Which Type of Stool Fits Your Trip?

    The right design depends more on how you travel than on a single headline specification. A solo backpacker may gladly accept a narrow seat, while a family car camper may prefer a heavier model that feels stable and comfortable.

    • For ultralight backpacking: Choose a minimalist tripod or compact folding seat, and prioritize packed weight over cushioning.
    • For day hiking: A simple PackSeat-style design offers a useful middle ground between a sit pad and a full chair.
    • For car camping: A traditional folding stool or supportive chair is easier to justify because transport weight matters less.
    • For fishing and outdoor work: Look for a stable seat with a practical height and a frame that tolerates repeated folding.
    • For comfort-focused campers: Consider a chair with a back, even if it no longer qualifies as the smallest option.
    • For ground-sensitive users: Avoid very low stools and check whether the seat height makes standing comfortable.

    Before buying, check the manufacturer’s care instructions and inspect hinges, feet, fabric, and tension points periodically. On public land, keep your setup considerate of other visitors and follow local rules; the National Park Service’s Leave No Trace principles are a useful reference for minimizing campsite impact.

    ✨ Style Tip

    If you hike with a black pack or dark outdoor clothing, a brightly colored stool can be easier to spot at camp. Visibility is a small convenience that helps prevent leaving gear behind at a rest stop.

    Frequently Asked Questions

    What is the best portable chair for hiking?

    The best choice depends on whether you value minimum weight or back support. A compact tripod stool is usually simpler and smaller, while a backpacking chair such as the Helinox Chair Zero offers a more supportive seat at the cost of additional structure and packed bulk.

    What is the most comfortable compact camping stool?

    Taller stools with wider or mesh seats are generally more comfortable than very small minimalist perches. A chair with a back will usually provide better long-sitting comfort than any stool, but it may be less convenient for short trail breaks.

    What is the most compact and portable stool available?

    Minimalist tripod and titanium designs tend to pack smaller than traditional four-leg folding stools. Compare the folded length, packed diameter, and weight rather than relying only on the product name.

    What is the lightest camping chair for hiking?

    Lightweight backpacking chairs vary by model and version, so check current manufacturer specifications. A stool will usually be simpler and lighter than a chair, but it will not provide the same back support.

    Are collapsible stools stable on uneven ground?

    They can be stable when placed carefully, but small feet and short frames are less forgiving than larger camp furniture. Set the stool on firm, level ground, check that every foot is planted, and avoid leaning far to one side.

    Final Verdict

    The best compact camping stools for hiking are not all built for the same person. A minimalist tripod or titanium seat makes the most sense for backpackers who want a portable perch with minimal pack impact. A folding stool is more practical for day hikes, fishing, families, and car camping, while a compact chair is worth considering when back support matters more than absolute weight.

    Before choosing, compare the current packed size, weight, seat height, capacity, frame material, and stability on the ground you expect to use. Decide how long you normally sit, then choose the smallest design that still feels usable. That trade-off will lead to a better purchase than chasing a single “best” model.

  • Best Camp Seating for Tall People: 12 Comfortable Options

    Best Camp Seating for Tall People: 12 Comfortable Options

    Finding the best camp seating for tall people starts with more than checking a chair’s weight limit. Seat height, back support, usable seat depth, frame strength, and packed size all affect whether you can sit comfortably around a fire or stand up without struggling. A low camping chair may suit shorter adults but feel cramped for someone six feet tall or more.

    The right option depends on how you camp, too: car campers can carry larger oversized seats, while hikers need a lighter folding design. Below, you’ll find practical seating ideas for different outdoor situations, plus the measurements and features that deserve attention before buying.

    What Tall Campers Should Look For

    A comfortable camp chair for a tall adult should support your legs without forcing your knees upward. Look for a higher seat, a backrest that reaches your shoulders, and enough width to avoid pressure at the hips. Capacity matters, but a high weight rating alone doesn’t guarantee a comfortable fit.

    • Seat height: Compare the actual measurement rather than relying on words such as “tall” or “XL.”
    • Seat depth: A deeper seat can support longer thighs, but too much depth may leave shorter users without lower-back support.
    • Back height: A high-back design is useful if you want shoulder and neck support.
    • Frame construction: Steel frames often provide a solid feel, while lighter aluminum designs are easier to carry.
    • Weight and packed size: These are crucial for backpacking, hiking, and public-transport travel.
    • Useful extras: Cup holders, side storage, a carry bag, padding, and reclining features can improve convenience.

    For general outdoor preparation, the National Park Service camping guidance is a useful reference for campsite planning and responsible use of public areas.

    Comparison of Camp Seating for Taller Adults

    Seating option Best for Key advantage Portability Main limitation
    Raised high-back chair Car camping and campfires Easy entry and shoulder support Moderate Usually bulkier than standard chairs
    Oversized steel-frame chair Large adults and relaxed seating Wide seat and substantial support Low to moderate Heavier to transport
    Portable director chair Camp kitchens and base camps Firm arms and upright posture Moderate Can have a larger folded profile
    High-back rocking chair Relaxing at established campsites Gentle movement and back height Low Not suited to uneven ground
    Reclining camp chair Reading and longer rest periods Adjustable lounging position Low to moderate More moving parts to carry
    Heavy-duty folding stool Short rests and camp chores Simple, compact construction High No back support
    Portable bench Families and group camps Seats more than one person Low to moderate Less individual support
    Folding camp loveseat Couples and relaxed car camping Shared padded seating Low Large packed size
    Backpacking chair with elevated frame Hikers who still want support More comfort than sitting on the ground High Limited seat depth and capacity
    Tripod hunting-style chair Short stops and lightweight travel Fast setup and low packed weight High Minimal back and hip support
    Portable stadium seat Tailgating and bleachers Useful on hard, flat surfaces High Not a full-height camping chair
    Inflatable camp lounger Relaxing at low-impact campsites Soft, packable comfort Moderate Needs inflation and care around sharp surfaces

    Raised and Supportive Seating

    1. Raised High-Back Camp Chair

    Raised High-Back Camp Chair - Best Camp Seating for Tall People

    A raised high-back camp chair is often the most practical starting point for tall adults. Its elevated seat makes standing easier, while the taller back provides more support than a standard folding camping chair. This design works well around a fire ring, at a campsite table, or beside a vehicle.

    Pros

    • Improves entry and exit for users who dislike low seating.
    • High back supports the upper body during longer sitting sessions.
    • Often includes a cup holder or side pocket.

    Cons

    • May be too bulky for hiking.
    • Raised legs can feel less stable on uneven ground.

    💡 Practical Tip

    Check the seat height from the ground to the top of the compressed cushion, not just the frame. Thick padding can reduce the usable height once you sit down.

    2. Oversized Steel-Frame Chair

    An oversized steel-frame chair gives larger adults more room across the hips and shoulders. The familiar heavy-duty design, sometimes compared with a “King Kong” style chair, is aimed at stability and capacity rather than lightweight travel. It is a sensible match for car camping, tailgating, and long evenings outdoors.

    Pros

    • Wide seat accommodates different body shapes.
    • Steel construction can provide a planted, sturdy feel.
    • Usually offers generous armrests and storage.

    Cons

    • Frame weight can make long-distance carrying unpleasant.
    • A broad seat may not provide close lower-back support.

    🛠️ Practical Tip

    Measure the opening of your vehicle before choosing an oversized model. The folded chair may fit in the trunk, but its length and width can take up more space than expected.

    3. Portable Director Chair

    A director chair offers a more upright sitting position and firm arm supports. Its squared frame is useful around a camp kitchen because the arms and seat are typically easy to move around, while the side table found on some versions gives you a place for a cup, phone, or cooking notes.

    Pros

    • Encourages an upright posture for meals and conversation.
    • Often provides broad, supportive arms.
    • Works well as a camp kitchen or base-camp seat.

    Cons

    • Folded shape may be wider than a conventional camp chair.
    • Some designs offer less recline for lounging.

    ✨ Style Tip

    If you use a side table for food, choose a chair position that leaves enough clearance for your knees. A tall seat and a low table can create an awkward angle during meals.

    4. High-Back Rocking Chair

    A high-back rocking chair adds a gentle rocking motion to a supportive camping seat. It suits established campsites, porches, and level areas where relaxation matters more than compact packing. The design is less versatile than a normal folding chair, but it can be appealing for readers and campers who spend hours sitting.

    Pros

    • High back can support the shoulders and head.
    • Rocking motion is comfortable on firm, level ground.
    • Useful for slow-paced car camping.

    Cons

    • Rocking legs need a stable, reasonably smooth surface.
    • Usually too large for backpacking or long walks.

    💡 Tip

    Avoid placing a rocking chair near a steep campsite edge or loose stones. The motion is most comfortable when all contact points remain stable.

    Comfort-Focused Camp Seating

    5. Reclining Camp Chair

    A reclining camp chair is designed for campers who want more than an upright seat. Adjustable back positions can help with reading, napping, or watching a campsite, and a tall version may offer better shoulder support. Look closely at the footrest, hinge design, and folded dimensions before buying.

    Pros

    • Allows several sitting and resting positions.
    • Helpful for longer stays at a campsite.
    • May include a padded headrest or leg support.

    Cons

    • Recline mechanisms add weight and complexity.
    • Footrests can interfere with small tents or crowded shelters.

    🛠️ Practical Tip

    Test the locking positions before leaving home. A recliner should hold its angle without requiring you to lean heavily against the backrest.

    6. Folding Camp Loveseat

    A folding camp loveseat gives two adults a shared padded seat and can be useful for couples or families at a drive-in campsite. It is not the most personal or supportive arrangement, but the wider frame creates space that a single narrow chair cannot. Tall users should confirm that the back reaches high enough for both people.

    Pros

    • Provides a shared place to sit without bringing two separate chairs.
    • Can be comfortable for conversation and relaxed evenings.
    • Often folds for straightforward storage in a vehicle.

    Cons

    • Less individual adjustment than separate chairs.
    • Wide frames take up more room in storage.

    💡 Tip

    Compare the loveseat’s individual seat width with a single oversized chair. A shared bench may look wider overall but still feel restrictive if its cushion is divided by a center bar.

    7. Padded Zero-Gravity Style Chair

    Padded Zero-Gravity Style Chair - Best Camp Seating for Tall People

    A zero-gravity style chair uses a reclining frame to distribute body weight across the back and legs. It can be appealing for tall adults who want a relaxed position without a separate camp cot. Because these chairs are typically substantial, they are better suited to car camping, patios, and tailgating than trail travel.

    Pros

    • Reclined posture can reduce pressure on the lower back for some users.
    • Long leg support may suit taller campers.
    • Padded versions add softness on hard ground.

    Cons

    • Large frame and moving parts reduce portability.
    • Not ideal for dining or tasks that require an upright posture.

    ✨ Style Tip

    Use a reclined chair on a groundsheet or firm mat. That helps keep the frame cleaner and reduces the chance that one leg sinks into soft soil.

    Practical Seating for Groups and Camp Tasks

    8. Heavy-Duty Folding Bench

    A heavy-duty folding bench is useful when several people need a quick seat around a table or fire. It spreads the load across multiple legs and can be easier to arrange than a collection of individual chairs. Tall campers may appreciate the open legroom, though the bench will not provide the same back support.

    Pros

    • Seats more than one person in a compact arrangement.
    • Useful for families, group meals, and changing footwear.
    • Can double as a gear surface when appropriate.

    Cons

    • No built-in backrest on many versions.
    • Less comfortable for long periods of sitting.

    🛠️ Practical Tip

    Place a bench with its long side parallel to the flattest part of the campsite. Uneven support under one end can make the whole seat feel unstable.

    9. Folding Camp Stool with a Wide Seat

    A wide folding stool is a useful middle ground between standing and carrying a full camping chair. It works for short breaks, cooking, fishing, or keeping near a tent entrance. Taller users should prioritize seat width and frame capacity because a stool gives you fewer ways to shift your weight.

    Pros

    • Usually lighter and easier to pack than a full chair.
    • Fast to open and close during camp chores.
    • Wide versions offer more stability than narrow tripod stools.

    Cons

    • No back or shoulder support.
    • Not the best option for extended evening comfort.

    💡 Tip

    Choose a stool with feet that spread beyond the seat’s centerline. A broader stance can feel more secure when a taller adult sits down quickly.

    10. Portable Camp Bench with Backrest

    A portable bench with a backrest gives groups more support than a flat bench while preserving a shared seating layout. It fits car camping and family base camps, particularly when a table or shelter already limits the number of separate chairs you can place.

    Pros

    • Offers back support for multiple people.
    • Can simplify seating for families and group trips.
    • Often easier to organize than several single chairs.

    Cons

    • Usually heavier than individual folding chairs.
    • One person’s movement may affect another sitter.

    ✨ Style Tip

    Measure the bench against your camp table before packing it. A high backrest can prevent the bench from sliding fully underneath the table.

    Lightweight Seating for Travel and Hiking

    11. Elevated Backpacking Chair

    An elevated backpacking chair provides more support than sitting directly on a sleeping pad or log while keeping the packed load manageable. Tall hikers may need to accept a smaller seat and lower back, so this option is about improving rest without carrying a heavy steel-frame chair.

    Pros

    • More comfortable than ground-level sitting at camp.
    • Typically folds into a compact carry bag.
    • Suitable for hiking trips where weight matters.

    Cons

    • Often has a lower capacity than oversized camp chairs.
    • Seat height and back length may not suit every tall adult.

    🛠️ Practical Tip

    Pay attention to the chair’s packed length, not only its weight. A long folded frame can be awkward to attach to a hiking pack even when the listed weight looks reasonable.

    12. Lightweight Tripod Chair

    A lightweight tripod chair is a simple choice for quick stops, festivals, fishing breaks, and travel. It has a small footprint and opens rapidly, but the lack of a backrest means it should be treated as occasional seating rather than a full camp lounge chair for tall adults.

    Pros

    • Compact and easy to carry.
    • Simple folding mechanism with little setup.
    • Useful as a backup seat for day trips.

    Cons

    • Limited comfort for long sitting sessions.
    • Three-leg designs may feel less stable on uneven ground.

    💡 Tip

    Before sitting, place all three feet on firm ground and avoid the edge of a slope. A tripod is convenient, but it has less forgiveness when one leg loses contact.

    How to Choose the Right Height and Capacity

    There is no single ideal chair height for every six-foot person because leg length, mobility, seat depth, and preferred posture vary. As a starting point, compare the chair’s seat height with the height of a dining chair or household seat that already feels comfortable. If your knees sit noticeably above your hips or your thighs extend beyond the cushion, look for a taller or deeper design.

    Capacity should also be considered alongside usable dimensions. A chair rated for a heavy load may still have a narrow seat or short back. Check the seat width, seat depth, frame shape, and arm spacing, then compare those measurements with your own body dimensions and the clothing you typically wear outdoors.

    Questions to Check Before Buying

    1. Is the seat high enough for easy standing?
    2. Does the backrest reach your shoulders or upper back?
    3. Can the cushion support your thighs without cutting into the knees?
    4. Is the listed capacity appropriate for your body weight and gear?
    5. Will the folded chair fit in your vehicle or storage area?
    6. Do the feet remain stable on grass, gravel, or packed soil?
    7. Are the cup holder and side pockets positioned comfortably for your reach?

    Which Seating Style Fits Your Camping Plans?

    Car campers and tailgaters can usually prioritize comfort, a high back, padded material, and a wider seat because they do not need to carry the chair far. A raised high-back chair, oversized steel-frame model, recliner, or loveseat may make sense.

    Backpackers and hikers should focus on packed weight, folded length, setup speed, and a realistic capacity. A lightweight elevated chair offers more support than a stool, while a tripod model is better when every ounce matters.

    Families and group campers may prefer a bench or loveseat for efficient seating around a table. Check whether the frame can be carried comfortably and whether the seating arrangement leaves enough room for taller adults to stretch their legs.

    Comfort-focused buyers should look beyond the word “oversized.” A tall back, supportive seat depth, adjustable recline, and stable armrests matter just as much as width. Extra padding can help, but it may also increase packed size and make the chair harder to dry if it becomes wet.

    Frequently Asked Questions

    What is the best camp chair for tall people?

    The best option is usually a raised, high-back camping chair with enough seat depth and capacity for the user. Car campers can choose a heavier oversized or reclining model, while hikers should consider a lighter elevated chair.

    What is the ideal chair height for a six-foot person?

    There is no universal measurement because leg length and mobility differ. Compare the chair with a household seat that feels comfortable, and prioritize a position that lets your feet rest flat without your knees rising sharply.

    Are oversized camping chairs good for tall adults?

    They can be, especially when they combine a wide seat with a tall back and suitable capacity. Width alone is not enough, so check the actual seat depth, height, and backrest dimensions.

    What are good portable chairs for tall people?

    A lightweight elevated backpacking chair is a practical portable choice. For car camping, a raised high-back folding chair offers more comfort, while a tripod stool is better for short rests and minimal packing.

    Is a steel-frame camp chair too heavy for travel?

    Not necessarily, but steel generally adds weight compared with lighter frame materials. Steel is more appropriate for vehicle-based camping, while hikers should compare the complete packed weight and carry-bag dimensions.

    Final Verdict

    The best camp seating for tall people depends on the balance you want between height, support, capacity, comfort, and portability. A raised high-back chair is the strongest all-around direction for car camping, while an oversized steel-frame chair offers more room for larger adults. Recliners and rocking chairs suit relaxed base camps, whereas elevated backpacking chairs and tripod stools make more sense when carrying distance matters.

    Before buying, compare the actual seat height, depth, back length, folded size, and weight rather than trusting labels such as “tall” or “heavy-duty.” A chair that fits your body and camping style will be more useful than one with the highest capacity or most accessories. Measure carefully, then choose the seating format you’ll genuinely want to carry and use.

  • Best Camping Hammocks with Bug Net for Backpacking

    Best Camping Hammocks with Bug Net for Backpacking

    Finding the best camping hammocks with bug net means balancing insect protection, sleeping comfort, packed weight, and setup speed. A hammock that keeps mosquitoes away but weighs too much for a backpacking trip may not be useful, while an ultralight model can feel cramped or lack room for a sleeping bag and rainfly. The right choice depends on where you camp, how much protection you need, and whether you prefer a simple portable hammock or a complete shelter system.

    This roundup compares well-known hammock designs, including gathered-end models, integrated bug nets, and more spacious options. You’ll also learn which features matter most, where each hammock fits best, and what to check before buying.

    How to Choose a Camping Hammock with Bug Net

    A hammock bug net can be built into the shelter, attached as a separate layer, or included as part of a larger kit with suspension and rain protection. Integrated nets are usually convenient, but a removable design may give you more flexibility on clear nights when insects aren’t a concern.

    Start by matching the hammock to your sleeping style and travel method. A solo backpacker may prioritize low weight and a small packed size, while a car camper might prefer a wider bed, stronger fabric, and more generous storage.

    • Bug protection: Check whether the net fully encloses the sleeping area and whether the zipper or entry system is easy to operate from inside.
    • Suspension: Confirm what straps, carabiners, or tree-friendly hardware are included. Some systems require separate add-ons.
    • Weight and packed size: These matter most for backpacking, bike touring, and long approaches.
    • Sleeping space: A longer or wider hammock may be more comfortable, especially for taller users or side sleepers.
    • Rain coverage: A bug net alone doesn’t provide storm protection. You may need a separate tarp or a complete hammock shelter kit.
    • Ventilation: Mesh panels and adjustable ridgelines help reduce condensation and make warm nights more comfortable.
    • Tree protection: Wide straps reduce bark damage and make setup more responsible. Review the Leave No Trace principles for camping before choosing a campsite.

    🛠️ Practical Tip

    Check the suspension length before leaving home. A hammock can be well made and still be difficult to pitch if the included straps are too short for the trees at your usual campsites.

    Quick Comparison of Camping Hammocks with Bug Nets

    Product Best For Design Weight or Size Note Main Consideration
    ENO JungleNest Casual backpacking and camp use Integrated bug net Check current specifications Suspension may be sold separately
    Warbonnet Blackbird XLC Comfort-focused hammock camping Asymmetrical gathered-end design Multiple fabric and suspension choices More setup decisions for beginners
    Hennessy Explorer Deluxe Complete shelter-style setups Integrated net with hammock system Model configuration affects packed weight Entry style may take practice
    DD Hammocks Frontline Value-conscious campers Integrated net with two-layer body Confirm regional specifications Can be bulkier than ultralight options
    Kammok Mantis UL Lightweight integrated systems Hammock with integrated bug net Configuration affects final carry weight Higher-end system pricing may vary
    Grand Trunk Skeeter Beater Pro Simple warm-weather camping Bug-net hammock Check current packed details Rain coverage is not always included
    Sunyear Camping Hammock with Net Budget-oriented recreational use Integrated mosquito net Verify load and accessory details Long-term durability depends on construction
    COVACURE Camping Hammock Casual camping and travel Integrated net and ridgeline Review the current model listing Less suited to specialized hammock setups
    ENO SubLink Shelter System People wanting a coordinated shelter Hammock, bug net, and rain protection system System components affect total weight More equipment to pack and manage
    Warbonnet Ridgerunner Flat-lay comfort Bridge-style hammock with bug net options More structured packed shape Requires careful suspension setup

    Specifications, included accessories, and available fabric options can change by model year or retailer. Treat the table as a starting point, then confirm the exact configuration before purchasing.

    💡 Tip

    Compare complete packed systems rather than hammock bodies alone. A separate bug net, tarp, straps, insulation, and storage sack can change both the cost and the weight you carry.

    Integrated Bug-Net Hammocks for General Camping

    1. ENO JungleNest

    ENO JungleNest - Best Camping Hammocks with Bug Net

    The ENO JungleNest is designed around straightforward insect protection, with a bug net integrated into the hammock rather than carried as a separate accessory. That makes it appealing for warm-weather camping, backyard overnights, and travelers who want a familiar ENO-style setup with more protection than an open hammock. The built-in ridgeline helps keep the net positioned above the sleeper and provides a practical place for small items.

    Its main limitation is that shoppers must pay close attention to what comes in the chosen package. ENO suspension straps and rain protection may be separate, so the advertised hammock weight isn’t necessarily the weight of a ready-to-sleep system.

    Pros

    • Integrated mosquito net simplifies warm-weather setup.
    • Suitable for campers who already use ENO suspension accessories.
    • Good fit for recreational camping and short trips.

    Cons

    • Additional suspension or a rainfly may be required.
    • It may not offer the same flat-lay comfort as a bridge-style hammock.

    💡 Tip

    If you already own ENO straps, check their compatibility and packed size before ordering another suspension set. Keeping one familiar strap system can make camp setup faster.

    2. COVACURE Camping Hammock

    The COVACURE camping hammock is aimed at buyers who want an affordable, portable hammock with an integrated bug net and a relatively simple pitching process. Its enclosed design is useful for casual camping, travel, and short hikes where mosquitoes are a concern. A built-in ridgeline can help maintain the net’s shape and create a little overhead storage space.

    This type of hammock is best treated as a recreational shelter rather than a highly customizable ultralight system. Before relying on it for a remote trip, inspect the stitching, suspension hardware, net zipper, and included straps, then confirm the current load rating and materials.

    Pros

    • Combines a hammock and bug net in one portable package.
    • Accessible setup for occasional campers.
    • Useful for warm, insect-heavy environments.

    Cons

    • Exact accessories and specifications can vary by listing.
    • May lack the fabric and suspension choices offered by specialist hammock brands.

    🛠️ Practical Tip

    Practice entering and exiting while the hammock is low and unloaded. This helps you learn how the bug-net zipper opens without putting unnecessary strain on the mesh.

    3. Sunyear Camping Hammock with Mosquito Net

    Sunyear’s camping hammock format typically combines a suspended bed with a mosquito net and basic suspension components, making it attractive to beginners who don’t want to assemble a system from separate parts. The enclosed sleeping area is particularly useful for summer trips, festivals, and campsites where flying insects are active.

    Its value depends heavily on the exact version being sold. Some listings may bundle different straps or accessories, so check whether the package includes everything needed for your intended setup. It’s also sensible to view budget hammock construction conservatively until you’ve inspected the seams and hardware yourself.

    Pros

    • All-in-one format can reduce the learning curve.
    • Integrated net provides direct protection from mosquitoes and other insects.
    • Portable design suits occasional campers and travelers.

    Cons

    • Accessory bundles and specifications may differ between versions.
    • May not provide the same refinement as a dedicated backpacking hammock system.

    ✨ Style Tip

    Pack a small repair kit with needle, strong thread, and mesh-safe patch material. It adds little bulk and is useful if a zipper pull or net panel needs attention on a trip.

    Higher-Performance Hammocks for Backpacking

    4. Warbonnet Blackbird XLC

    The Warbonnet Blackbird XLC is known for its asymmetrical layout, integrated bug net, and dedicated footbox area. Instead of lying directly in the center, the sleeper uses the hammock’s shape to achieve a flatter diagonal position. That design can feel more natural for people who find ordinary gathered-end hammocks too curved.

    The Blackbird XLC is also a platform for customization. Fabric choices, suspension options, and rain protection can be selected according to the trip, but that flexibility adds decisions and can raise the final system weight. It suits experienced hammock campers and comfort-focused backpackers more than someone seeking the simplest possible kit.

    Pros

    • Asymmetrical layout supports a flatter sleeping position.
    • Integrated bug net and footbox improve organization and comfort.
    • Available configurations allow buyers to tune weight and features.

    Cons

    • More setup choices can confuse first-time hammock users.
    • Final cost and weight depend on the selected configuration.

    💡 Tip

    Learn the correct diagonal lay before judging comfort. The footbox and asymmetrical cut are intended to be used in a particular orientation, not like a basic centered hammock.

    5. Kammok Mantis UL

    The Kammok Mantis UL is built as a more complete lightweight shelter system, combining an integrated bug net with a hammock design intended for backpacking. Its appeal is convenience: a camper can carry a coordinated shelter rather than sourcing every component separately. The design also emphasizes reduced bulk for people counting grams on longer trips.

    A system this specialized still needs careful configuration. Confirm whether the package includes suspension and rain coverage, and consider the weight of insulation, stakes, and any accessories you’ll add. A lightweight hammock can lose its advantage if it’s paired with oversized straps or a heavy tarp.

    Pros

    • Integrated shelter approach reduces compatibility concerns.
    • Lightweight orientation suits backpackers and fast-moving campers.
    • Bug protection is built into the sleeping system.

    Cons

    • System pricing may be higher than basic hammock kits.
    • Exact packed weight depends on included components.

    🛠️ Practical Tip

    Lay every component on a scale before a major backpacking trip. Include straps, tarp, guylines, stakes, stuff sacks, and insulation so your carry weight reflects the real setup.

    6. Hennessy Explorer Deluxe

    The Hennessy Explorer Deluxe takes a shelter-first approach, with an enclosed bug net and a hammock system designed to work with overhead rain protection. Its asymmetrical layout is intended to create a more level sleeping position than a simple gathered-end design. The system can appeal to campers who want one coordinated package for multi-day trips.

    Hennessy hammocks often use a distinctive entry arrangement, so the first setup can feel less intuitive than a side-entry model. That isn’t necessarily a flaw, but it makes a practice pitch important. Buyers should also check the exact version, suspension method, and tarp included before comparing packed weight with other models.

    Pros

    • Complete shelter concept provides integrated insect protection.
    • Asymmetrical design can improve sleeping position for some users.
    • Well suited to campers who prefer a coordinated hammock system.

    Cons

    Cons - Best Camping Hammocks with Bug Net
    • Entry and setup may require more practice.
    • Model-specific accessories make direct comparisons less simple.

    💡 Tip

    Pitch this style in daylight before your first overnight trip. Practice adjusting the ridgeline, rainfly, and entry so you’re not learning the system in darkness or wet weather.

    7. Warbonnet Ridgerunner

    The Warbonnet Ridgerunner is a bridge-style hammock rather than a conventional gathered-end model. Its spreader bars create a broader, flatter sleeping platform, and compatible bug-net configurations provide insect protection without requiring the same curved lay found in many traditional hammocks. This makes it worth considering for side sleepers or campers who want a more bed-like feel.

    The trade-off is structure. Spreader bars and the broader design can make packing, suspension, and campsite selection more demanding than with a minimalist portable hammock. It’s a specialist option for comfort-focused users, not automatically the lightest choice.

    Pros

    • Flatter bed shape may suit side sleepers.
    • Structured design offers a different comfort profile from gathered-end hammocks.
    • Compatible bug-net options support enclosed camping.

    Cons

    • Spreader bars add structure and may affect packed size.
    • Requires careful setup and compatible accessories.

    ✨ Style Tip

    Measure your pack before choosing a bridge-style hammock. The sleeping comfort may be attractive, but the packed shape can compete for space with a tent, quilt, or cooking equipment.

    Practical and Value-Oriented Options

    8. DD Hammocks Frontline

    The DD Hammocks Frontline is a popular style for campers who want an integrated mosquito net and a more protective hammock body. Its two-layer construction is often chosen by users who want flexibility with a sleeping mat or other insulation. The design can also support a range of hammock camping configurations, including use beneath a separate tarp.

    Because the Frontline is built with versatility in mind, it may not be the smallest option for ultralight backpacking. The extra fabric can be useful in camp, but buyers should compare the packed dimensions and current suspension bundle with lighter models before choosing it for long-distance routes.

    Pros

    • Integrated bug net provides enclosed insect protection.
    • Two-layer format can help accommodate a sleeping mat.
    • Useful for campers who want a flexible platform for add-ons.

    Cons

    • May be heavier or bulkier than minimalist designs.
    • Suspension and tarp arrangements vary by package.

    🛠️ Practical Tip

    If you use a sleeping pad, test it at home before camping. Some pads move more easily in a hammock, while a two-layer body can help keep them in position.

    9. Grand Trunk Skeeter Beater Pro

    The Grand Trunk Skeeter Beater Pro focuses on straightforward warm-weather protection, pairing a hammock with a suspended mosquito net. It’s a reasonable choice for day camps, summer overnights, travel, and backyard use where the main concern is keeping insects off exposed skin. The design is less about building a fully modular shelter and more about making basic hammocking approachable.

    It may need a separate tarp for rain and additional insulation for cool conditions. That makes it more suitable for fair-weather use than for a fully equipped four-season hammock system.

    Pros

    • Simple concept for casual hammock campers.
    • Integrated net addresses the main warm-weather concern.
    • Portable format works for travel and recreational use.

    Cons

    • Additional weather protection may be necessary.
    • Not intended to replace insulation in cold conditions.

    💡 Tip

    Treat the bug net and rainfly as separate functions. If the forecast is unsettled, add a tarp with enough coverage to protect the hammock’s ends and sleeping area.

    10. Basic Portable Hammock Kits with Integrated Nets

    Several entry-level portable hammock kits are sold with an integrated bug net, tree straps, carabiners, and a storage bag. These products can be convenient for beginners, festival camping, and occasional outdoor use because the essential pieces arrive together. They also make it easier to discover whether hammock camping suits you before investing in a specialized Warbonnet, Hennessy, ENO, or other modular setup.

    The challenge is consistency. Similar-looking kits can differ substantially in fabric quality, stitching, hardware, strap width, and stated capacity. Choose the exact model based on clearly published specifications rather than relying only on product photos or a generic title.

    Pros

    • Usually simple to transport and store.
    • Bundled components can reduce setup decisions.
    • Useful for beginners and short recreational trips.

    Cons

    • Quality can vary considerably between brands and listings.
    • Rain protection and cold-weather insulation are often separate.

    🔎 Quick Tip

    Inspect the stated capacity, strap width, carabiner type, and stitching details before buying. If those specifications are missing, the listing may not provide enough information for a confident safety decision.

    Which Hammock Setup Fits Your Camping Style?

    For backpackers

    Prioritize low packed weight, compact suspension, and a bug net that doesn’t require many extra components. The Kammok Mantis UL, Warbonnet Blackbird XLC, and selected Hennessy configurations are more appropriate starting points than bulky recreational kits, but exact system weight still depends on the tarp and insulation you carry.

    For beginners

    A coordinated kit with included suspension can be easier than building a hammock shelter piece by piece. Look for clear instructions, a well-designed entry, and hardware that is easy to inspect. The ENO JungleNest and basic integrated-net kits may be less intimidating than highly customizable systems.

    For comfort-focused sleepers

    Consider the Blackbird XLC if you like an asymmetrical gathered-end layout, or the Ridgerunner if a flatter bridge-style platform appeals to you. Sleeping position is personal, so setup practice matters as much as the product description.

    For warm-weather campers

    An integrated bug net, good airflow, and a separate lightweight tarp may be all you need. Don’t assume the net provides rain protection, though. Wind-driven rain can still reach an exposed hammock from the sides and ends.

    🛠️ Practical Tip

    Choose your hammock after checking campsite suitability. You need two healthy trees with appropriate spacing, and some parks or campgrounds restrict hammock use even when the equipment is tree-friendly.

    Setup and Comfort Essentials

    Most camping hammocks work best when hung with a gentle curve rather than pulled tight. The exact suspension angle and height depend on the model, but the hammock should remain low enough for a safe exit while leaving room for a tarp and underquilt if those are part of your setup.

    1. Inspect the trees, straps, carabiners, net, and seams before loading the hammock.
    2. Attach wide tree straps without wrapping narrow cord directly around bark.
    3. Adjust the suspension so the hammock has a comfortable curve rather than a rigid line.
    4. Lie diagonally when the design supports that position, especially in asymmetrical hammocks.
    5. Add a sleeping pad, underquilt, or top quilt when temperatures require insulation.
    6. Pitch the rainfly with enough coverage to protect the hammock ends and entry.
    7. Check that the bug-net zipper closes fully and that no fabric is caught in the track.

    Cold-weather performance depends less on the hammock body than on insulation beneath and above you. Air moves underneath a suspended bed, so a sleeping bag alone may not provide the same warmth as it does on an insulated tent floor.

    💡 Tip

    Adjust insulation after lying in the hammock, not only while standing beside it. Compression underneath your body can create cold spots that are difficult to notice during setup.

    Frequently Asked Questions

    Are camping hammocks with bug nets suitable for backpacking?

    Yes, some are designed specifically for backpacking. Focus on the complete packed weight, including suspension, tarp, stakes, and insulation, rather than the hammock body alone.

    Does a bug net protect against rain?

    No. A bug net protects against insects but does not replace a rainfly or tarp. Choose a shelter system with overhead coverage for wet-weather camping.

    Is a gathered-end or bridge hammock more comfortable?

    It depends on your preferred sleeping position. Gathered-end hammocks are often lighter and simpler, while bridge hammocks can provide a flatter, more structured lay.

    Do camping hammocks include tree straps?

    Some do and some don’t. Always check the exact package contents. Wide, tree-friendly straps are preferable to thin cord because they distribute pressure more effectively.

    Can a hammock with mosquito net be used in cold weather?

    It can, provided you add suitable insulation such as an underquilt or sleeping pad, a warm top quilt or sleeping bag, and adequate wind and rain protection.

    Final Verdict

    The best camping hammocks with bug net depend on the kind of shelter you want to carry. ENO and basic integrated-net models suit casual campers, while the Warbonnet Blackbird XLC, Hennessy Explorer Deluxe, and Kammok Mantis UL offer more specialized options for backpacking and modular setups. The Ridgerunner stands apart for campers who value a flatter, structured bed, and the DD Frontline offers flexibility for people who want room for different insulation arrangements.

    Before buying, compare the complete system weight, suspension, rain protection, sleeping dimensions, and net design. Practice setup at home, confirm the current specifications, and choose a hammock that matches your campsite access and comfort priorities. The right balance of bug protection, portability, and sleeping position will matter more than a product label alone.

  • Best Tents with Built-In LED Lighting for Camping

    Best Tents with Built-In LED Lighting for Camping

    Finding the best tents with built-in LED lighting means balancing more than brightness. A lighted camping tent should also provide dependable shelter, enough sleeping space, practical ventilation, and a setup process you can manage after dark. Built-in LED systems can make it easier to find gear, read, or move around without hanging a separate lantern from the ceiling, but they may add cost, wiring, or battery considerations.

    This roundup compares popular lighted dome, instant cabin, and family tent designs, including options from CORE, Coleman, and Ozark Trail. You’ll also learn which features matter most for car camping, family trips, weekend use, and buyers who prefer simple setup over compact backpacking weight.

    How to Choose the Best Tents with Built-In LED Lighting

    A built-in lighting system is useful, but it shouldn’t distract from the tent’s primary job: keeping occupants reasonably protected and comfortable in changing weather. Look first at capacity, floor design, rainfly coverage, ventilation, doors, windows, and the packed size. Then check how the LED system is powered and controlled.

    • Capacity: Treat the stated person count as a maximum sleeping capacity. A six-person tent may feel more comfortable for fewer campers with bags inside.
    • Lighting controls: Look for a reachable switch, multiple brightness settings, or separate zones if those features are important to you.
    • Power source: Confirm whether the lights use batteries, USB power, or another system, and check whether the required power source is included.
    • Weather protection: A rainfly, sealed seams, bathtub-style floor, and covered openings generally matter more than the built-in light itself.
    • Ventilation: Mesh windows, roof vents, and adjustable openings help reduce condensation in a closed cabin tent.
    • Setup: Instant cabin and pop-up designs can save time at family campsites, while traditional pole tents may pack more compactly.
    • Portability: Built-in hardware can add bulk. Check the packed dimensions and carrying bag before choosing a tent for air travel or long walks.

    🛠️ Practical Tip

    Before buying, check the manufacturer’s current manual or product page for the light’s power requirements. Product names can remain the same while included accessories, color options, and electrical details change.

    Quick Comparison of Lighted Camping Tents

    The table below gives a starting point for comparing the main designs. Exact dimensions, packed weight, lighting controls, and availability can vary by model year or retailer, so confirm the current specification sheet before ordering.

    Product Best For Design Capacity Lighting Approach Main Consideration
    CORE 6 Person Lighted Dome Small families and weekend campers Dome 6 people Integrated LED lighting Less upright interior than a cabin tent
    CORE 9 Person Instant Cabin with LED Lighting Families wanting fast setup Instant cabin 9 people Built-in LED system Large packed size
    CORE 10 Person Instant Cabin with LED Lights Large groups and family camping Instant cabin 10 people Integrated ceiling lighting More demanding to transport
    Coleman 6-Person Lighted Instant Cabin Simple campsite setup Instant cabin 6 people Built-in tent LED lighting Not intended as a backpacking shelter
    Coleman 10-Person Lighted Instant Cabin Large families and gear-heavy trips Instant cabin 10 people Integrated lighting Requires generous campsite space
    Ozark Trail 6-Person Instant Lighted Cabin Budget-conscious car campers Instant cabin 6 people Built-in LED lights Confirm current model specifications
    Ozark Trail 10-Person Lighted Cabin Large groups seeking interior room Cabin 10 people LED ceiling lighting Bulk and weather details vary by version
    CORE 12 Person Instant Cabin with LED Lighting Extended family camping Large instant cabin 12 people Built-in lighting Needs a large, level pitch area

    💡 Tip

    Capacity labels are most useful for comparing floor area, not predicting comfort. If you’ll keep coolers, chairs, clothing bags, or a dog inside, choose a larger floor plan or reduce the expected sleeping count.

    Best Tents with Built-In LED Lighting: Product Picks

    1. CORE 6 Person Lighted Dome Tent

    CORE 6 Person Lighted Dome Tent - Best Tents with Built-In LED Lighting

    The CORE 6 Person Lighted Dome Tent is a practical middle ground for campers who want integrated illumination without moving into the very large footprint of a family cabin tent. Its dome structure is familiar, relatively straightforward to pitch, and suited to weekend car camping where a moderate sleeping area is more useful than full standing-room comfort.

    The built-in LED lighting can help with evening organization and reading, while the dome shape generally offers a lower profile than an instant cabin. That makes it a sensible option for small families, couples with extra equipment, or beginners who want a camping tent with lights built into the ceiling rather than relying on a hanging lantern.

    Pros

    • Balanced capacity for smaller groups and family weekends.
    • Dome layout is less visually bulky than a large cabin tent.
    • Integrated lighting reduces the need for a separate interior lamp.

    Cons

    • Sloping walls provide less usable headroom than a cabin design.
    • Six-person capacity may feel tight once luggage and bedding are inside.
    • It is better suited to vehicle-based camping than backpacking.

    ✨ Style Tip

    Use the dome’s lower corners for duffel bags and soft gear, leaving the center and upper wall area open for sleeping and changing clothes.

    2. CORE 9 Person Instant Cabin Tent with LED Lighting

    The CORE 9 Person Instant Cabin Tent with LED Lighting is aimed at families who value quick setup and a more upright interior. Its instant-cabin format is designed around pre-attached or integrated frame components, so the main appeal is reducing the number of separate poles and shortening the basic pitching process.

    With more vertical wall space than a dome, this tent can feel easier to live in during a longer campsite stay. The trade-off is portability: a person instant cabin tent of this size generally needs a vehicle and a reasonably open, level campsite. Verify the current rainfly design, door arrangement, ventilation openings, and lighting power details before purchase.

    Pros

    • Upright walls make changing clothes and arranging bedding easier.
    • Instant construction is useful for family campers and first-time tent owners.
    • Integrated light helps illuminate a larger interior after sunset.

    Cons

    • Large cabin frames can be awkward to transport and store.
    • The stated capacity leaves less personal space when used by adults.
    • Setup may still require two people despite the instant design.

    🛠️ Practical Tip

    Measure the storage space in your vehicle before choosing a large instant cabin. The packed bag may be short enough for a trunk but too wide for a narrow cargo compartment.

    3. CORE 10 Person Instant Cabin Tent with LED Lights

    The CORE 10 Person Instant Cabin Tent with LED Lights is built for groups that need more floor area, gear room, and vertical clearance than a standard six-person shelter provides. Its cabin shape is especially attractive for family camping because the near-vertical walls make the interior feel more like a temporary room than a low sleeping shelter.

    The extra space can support multiple air mattresses or separate sleeping zones, depending on the layout. It also means a larger footprint, heavier transport demands, and more site-selection work. This is a car-camping product rather than a practical choice for hiking into a remote campsite.

    Pros

    • Generous interior for families, children, and bulky bedding.
    • Cabin walls create useful standing and storage space.
    • Instant framing can simplify the initial setup.

    Cons

    • Requires a substantial campsite and careful staking.
    • Large tents are more difficult to dry, fold, and store at home.
    • More interior volume can mean more condensation if vents remain closed.

    💡 Tip

    Open roof vents and mesh windows whenever conditions allow. A spacious cabin tent can still feel damp overnight if warm, moist air has nowhere to escape.

    4. CORE 12 Person Instant Cabin Tent with LED Lighting

    The CORE 12 Person Instant Cabin Tent with LED Lighting is intended for the largest family groups and campers who want separate sleeping or living zones. Its appeal comes from space: the design can accommodate a crowded family campsite more comfortably than a smaller tent, particularly when children share one area and adults use another.

    That capacity brings clear practical limits. A large tent needs a broad pitching area, takes up more room in transport, and can be cumbersome to raise or reposition. Buyers should pay close attention to the current floor plan, room dividers, doors, windows, rainfly coverage, and the amount of open ceiling mesh.

    Pros

    • Excellent interior capacity for extended family trips.
    • Room dividers or separate zones may improve privacy, depending on the version.
    • Built-in LED lighting is useful across a wide interior.

    Cons

    • Not suitable for compact campsites or lightweight travel.
    • Large surface area can be more exposed to wind than a small dome.
    • Drying and packing require more time and room.

    🛠️ Practical Tip

    Check campsite dimensions before reserving a large tent. Include room for guylines, entry clearance, and a safe distance from fire rings or cooking areas.

    5. Coleman 6-Person Lighted Instant Cabin Tent

    The Coleman 6-Person Lighted Instant Cabin Tent is a compact family-oriented option for campers who prefer quick assembly and a familiar cabin layout. It sits between a traditional dome and the larger group shelters in this roundup, offering enough room for a small family while keeping the footprint more manageable.

    Coleman’s lighted tent range is worth considering when a buyer wants an established camping brand and an easy-to-understand family tent format. As with any model, current details matter: confirm the included rainfly, the floor design, the lighting switch, the battery or power arrangement, and whether the listed capacity matches your intended sleeping setup.

    Pros

    • Cabin geometry provides more usable wall height than many dome tents.
    • Six-person capacity works well for weekend family camping.
    • Instant-style construction can reduce pole confusion.

    Cons

    Cons - Best Tents with Built-In LED Lighting
    • Its packed size may be too large for backpacking or public transport.
    • Full occupancy can limit floor space for bags and personal items.
    • Model specifications can differ across retailers and release years.

    ✨ Style Tip

    Place a small storage bin near the door for shoes and headlamps. It keeps the central sleeping area clearer and gives you a backup light if the built-in system is switched off.

    6. Coleman 10-Person Lighted Instant Cabin Tent

    The Coleman 10-Person Lighted Instant Cabin Tent is made for campers who need a broader family shelter but still prefer a relatively direct setup process. Its cabin-style walls should give occupants more standing room and usable edge space than a comparably rated dome, which is helpful during rainy afternoons spent inside.

    This type of tent is best matched with established campgrounds and vehicle access. The large interior can improve comfort, but it also makes site choice, staking, ventilation, and rainfly placement more important. Buyers should not assume that an LED system replaces a headlamp or campsite lantern; built-in lights are convenient, but they depend on their own power source and controls.

    Pros

    • Large interior for families with substantial camping equipment.
    • Upright design supports standing, changing, and organizing gear.
    • Integrated lighting reduces clutter from hanging lamps.

    Cons

    • Needs a large pitch area and a vehicle for transport.
    • More interior volume can be harder to ventilate in humid conditions.
    • Not the right format for hikers prioritizing low packed weight.

    💡 Tip

    Stake the corners and guylines even on calm evenings. A large cabin tent presents more fabric to changing wind than a small shelter, and proper tension also helps the rainfly shed water.

    7. Ozark Trail 6-Person Instant Lighted Cabin Tent

    The Ozark Trail 6-Person Instant Lighted Cabin Tent is a useful option for budget-conscious car campers who want a built-in light without stepping up to a large group tent. Its instant cabin concept prioritizes straightforward setup and practical interior height, making it suitable for short campground stays and casual family trips.

    Availability and specifications for Ozark Trail models can vary, so this is a category where checking the current product listing is especially important. Confirm the exact floor dimensions, rainfly coverage, lighting controls, included stakes, and weather-related features rather than relying only on the product name.

    Pros

    • Compact cabin format is easier to manage than a ten- or twelve-person shelter.
    • Built-in LED lights provide convenient interior illumination.
    • Instant setup appeals to beginners and occasional campers.

    Cons

    • Current specifications may differ between versions or sellers.
    • Six-person capacity may be better viewed as a maximum rather than a comfort rating.
    • Buyers should inspect weather-protection details carefully before purchase.

    🛠️ Practical Tip

    Save a copy of the current setup instructions on your phone before leaving home. This is helpful when a retailer listing has limited assembly information or when you arrive after sunset.

    8. Ozark Trail 10-Person Lighted Cabin Tent

    The Ozark Trail 10-Person Lighted Cabin Tent targets large groups that want a roomy shelter with integrated ceiling illumination. The cabin shape can make a crowded campsite feel more organized by providing upright walls and room for separate bedding areas, although the stated capacity assumes efficient use of the floor.

    This option makes the most sense for vehicle-based camping where the packed size is less restrictive. Before committing, review the exact version’s window placement, ventilation, rainfly arrangement, room dividers, and LED power requirements. Large tents vary considerably in how comfortable they remain during wet weather, and the light itself does not determine waterproofing.

    Pros

    • Large floor area suits family groups and bulky sleeping equipment.
    • Cabin walls improve usable headroom and interior organization.
    • Built-in light is helpful when the tent is divided into multiple sleeping areas.

    Cons

    • Requires more campsite space than a six-person tent.
    • May be cumbersome for one person to carry and pitch.
    • Exact features should be verified because model details can change.

    💡 Tip

    Use the tent’s pockets for lightweight items such as phones, glasses, and maps rather than heavy bottles. Overloaded storage pockets can pull on the fabric and make the interior feel cluttered.

    Which Lighted Tent Style Fits Your Camping Trip?

    Best for small families and weekend campers

    A six-person dome or compact cabin tent is usually easier to fit into a standard campsite and simpler to pack away after a short trip. The CORE 6 Person Lighted Dome and Coleman 6-Person Lighted Instant Cabin are natural starting points, with the dome favoring a more familiar low-profile shape and the cabin favoring headroom.

    🛠️ Practical Tip

    For two adults, a six-person capacity can provide useful space for clothing bags and a small dog. For six adults, expect a much tighter sleeping arrangement.

    Best for families prioritizing standing room

    Instant cabin designs are generally more comfortable for changing clothes, arranging air mattresses, and spending time indoors during poor weather. The CORE 9 Person, CORE 10 Person, and Coleman 10-Person lighted cabins offer more room, but their bulk makes them better for established campgrounds than remote sites.

    ✨ Style Tip

    Plan the interior before pitching. Assign one side for sleeping and the other for bags or changing, while keeping the doorway and ventilation panels unobstructed.

    Best for large groups

    The ten- and twelve-person designs offer the most flexibility for families bringing multiple mattresses, children’s gear, and clothing containers. They also require more attention to campsite dimensions, staking, drying, and transport. Bigger is useful only when you have the space and helpers to manage it.

    💡 Tip

    For guidance on reducing campsite impact, review the National Park Service’s Leave No Trace principles, especially advice about choosing durable surfaces and respecting campsite boundaries.

    Best for backpacking and low-weight travel

    None of the larger built-in-light tents above is a natural first choice for backpacking. Integrated LED strips, instant frames, and large cabin fabrics add convenience at a campsite but usually work against the low packed weight and small carry size needed on a trail. Backpackers may be better served by a lightweight standard shelter plus a compact headlamp or separate tent light.

    🛠️ Practical Tip

    For hiking trips, compare the total weight of the tent, poles, batteries, and lighting accessories—not just the shelter’s advertised weight.

    Built-In Tent Lighting Safety and Practical Use

    LED lights inside a tent are generally intended for low-level illumination, not for heating, cooking, or replacing safe campsite lighting. Keep batteries and cables dry, avoid modifying the light system, and follow the manufacturer’s instructions for charging or replacement. Never use fuel-burning lanterns, stoves, or heaters inside an enclosed tent because of fire and carbon monoxide risks.

    A built-in switch is convenient at bedtime, but a backup headlamp remains useful if the tent light fails, the batteries run down, or you need to walk outside. Pack spare batteries or a charged power bank only when the tent’s instructions support that power method.

    💡 Tip

    Test the switch and light before leaving home, then pack a separate headlamp where you can reach it without unpacking the entire tent.

    Frequently Asked Questions

    Is there a tent with LED lights inside?

    Yes. Several family camping tents include LED strips or ceiling lights built into the interior.

    These models are commonly sold as lighted dome, instant cabin, or family tents. Check the power source and controls because the lighting system differs by model.

    What tents have built-in lights?

    Common examples include selected CORE Lighted and Instant Cabin models, Coleman Lighted Instant Cabin tents, and some Ozark Trail lighted cabin tents. Product availability and specifications can change, so verify the current listing before purchase.

    Are tents with built-in LED lighting good for backpacking?

    Usually not. Integrated lighting and instant frames add convenience but can increase packed size and weight. Backpackers typically prefer a lightweight tent paired with a headlamp or compact standalone light.

    Do built-in tent lights need batteries?

    Many do, although the exact power arrangement varies. Some use replaceable batteries, while others may support a specified external power source. Confirm the manual before using a power bank or charging cable.

    Are lighted camping tents waterproof?

    The presence of LED lighting does not determine waterproofing. Evaluate the rainfly, floor construction, seams, doors, windows, ventilation, and manufacturer specifications for the exact tent version.

    Final Verdict

    The best tents with built-in LED lighting are usually family and car-camping shelters rather than hiking tents. Smaller six-person dome and cabin designs are easier to fit into ordinary campsites, while CORE, Coleman, and Ozark Trail models with nine-, ten-, or twelve-person layouts provide more standing room and gear space at the cost of portability.

    Choose the lighted tent that matches your real sleeping capacity, vehicle storage, campsite dimensions, and expected weather. Treat the LED system as a useful convenience—not a substitute for ventilation, a rainfly, careful staking, or a backup headlamp. Check the current specifications before ordering, then you’ll be in a better position to choose comfort without carrying more tent than your trip requires.

  • Best Rugged Tents for Repeated Use: 10 Durable Picks

    Best Rugged Tents for Repeated Use: 10 Durable Picks

    Choosing the best rugged tents for repeated use means looking beyond a tall waterproof rating or a long list of features. Frequent camping puts stress on poles, zippers, seams, floors, and packed fabric, while long-term camping adds another concern: the tent must remain practical after many setups and takedowns.

    The right choice depends on where you camp, how much gear you carry, and whether you need a lightweight backpacking shelter or a roomier base-camp design. Below, you’ll find durable camping tents suited to car camping, family trips, backpacking, and extended stays, followed by buying advice that helps you compare weather protection, setup, floor space, ventilation, and portability without relying on marketing claims alone.

    What Makes a Tent Rugged Enough for Repeated Use?

    A rugged tent is built around more than heavy fabric. Its durability comes from the relationship between the canopy, floor, pole structure, guy points, zippers, and the way those parts handle regular packing and setup. A tent that is tough but awkward to pitch may be a poor choice if you use it every weekend.

    Repeated use also exposes small weaknesses. Abrasion under the floor, stretched shock cord, bent pole sections, damaged mesh, and poorly stored wet fabric can shorten the life of an otherwise capable shelter.

    • Strong pole architecture: aluminum or carefully designed composite poles can provide useful structure without unnecessary bulk.
    • Reliable weather protection: a full-coverage rainfly, sealed seams, and a well-designed floor help manage rain and wind.
    • Repairable construction: replaceable pole sections, patch materials, and accessible parts are valuable for frequent campers.
    • Practical ventilation: roof vents, mesh panels, and adjustable doors reduce condensation and improve comfort.
    • Suitable packed size: a tent that fits your vehicle, pack, or storage space is more likely to be used and cared for properly.

    Before buying, check the current specifications for the exact model and size. A two-person backpacking tent and a six-person family shelter from the same brand can have very different materials, pole systems, and weather behavior.

    💡 Tip

    Plan on using a footprint or groundsheet that matches the tent floor. It can reduce abrasion, but tuck it fully beneath the shelter so rainwater doesn’t collect underneath.

    Quick Comparison of Rugged Camping Tents

    Product Best For Design Capacity Main Strength Main Drawback
    REI Co-op Base Camp Windy car camping and base camp Structured dome Several sizes available Stability-focused architecture Heavier than ultralight shelters
    NEMO Aurora Highrise Comfortable family camping High-wall cabin design Several sizes available Headroom and livability Not aimed at minimalist backpacking
    The North Face Wawona Family car camping Large front vestibule Family-sized options Gear storage and usable space Large packed footprint
    Big Agnes Copper Spur HV UL Frequent backpacking Lightweight freestanding design Solo to group sizes Low carry weight Light fabric needs careful handling
    MSR Hubba Hubba Two-person backpacking Freestanding backpacking tent Two-person model Balance of space and portability Less room than car-camping tents
    Marmot Tungsten Budget-conscious camping trips Roomy backpacking dome Multiple capacities Good interior usability Can be bulky for long carries
    Kelty Discovery Basecamp Simple campgrounds and base camp Conventional dome Multiple capacities Approachable setup Weight favors vehicle access
    Kodiak Canvas Flex-Bow Repeated stationary camping Canvas cabin-style shelter Multiple capacities Durable canvas construction Heavy and needs careful drying
    Springbar Classic Jack 140 Comfortable canvas camping Canvas wall tent Family-oriented capacity Open interior layout Not suited to lightweight travel
    Oztent RV Series Fast vehicle-based setup Integrated folding frame Several sizes available Very quick pitching concept Bulky storage and transport

    Capacity names are not always directly comparable. A tent’s advertised sleeping capacity may leave little room for luggage, so check floor dimensions, vestibule space, door placement, and peak height before deciding.

    🛠️ Practical Tip

    Treat the table as a starting point, not a substitute for the exact product page. Brands sometimes change fabrics, pole materials, and included accessories between generations.

    Car-Camping and Base-Camp Designs

    1. REI Co-op Base Camp

    REI Co-op Base Camp - Best Rugged Tents for Repeated Use

    The REI Co-op Base Camp is designed for campers who want a structured shelter with more stability than a basic warm-weather dome. Its geometry, multiple guy-out points, and full rainfly approach make the range relevant to exposed campgrounds, shoulder-season trips, and base camp use. Different versions vary in capacity and details, so the exact model matters.

    This is a practical option for car campers who value a dependable shelter over the smallest packed size. The trade-off is weight: the Base Camp line is better suited to vehicle access than a long approach on foot.

    Pros

    • Structured design can provide useful wind resistance when properly guyed.
    • Roomier versions work well for gear-heavy camping.
    • Suitable for repeated campground and base-camp setup.

    Cons

    • Heavier than lightweight backpacking tents.
    • May offer more shelter than solo campers need.

    💡 Tip

    Practice attaching the rainfly and guylines at home. A familiar setup reduces fabric dragging and pole stress when the weather turns unpleasant.

    2. NEMO Aurora Highrise

    The NEMO Aurora Highrise focuses on comfort, usable floor space, and generous headroom. Its high-wall cabin-style design gives campers more vertical room than many low-profile backpacking shelters, while large doors and ventilation panels can make daily living easier during longer trips.

    It suits families, couples with bulky gear, and car campers who spend several nights in one place. The Aurora Highrise is not the natural pick for a fast-and-light route, but that is not its purpose.

    Pros

    • High interior walls make changing clothes and organizing gear easier.
    • Family-friendly layout offers more livable space than compact backpacking tents.
    • Ventilation and multiple access points can improve comfort in warm conditions.

    Cons

    • Large structure is less convenient for long-distance carrying.
    • More poles and fabric can mean a longer setup than a small dome tent.

    ✨ Style Tip

    Use the vestibule for footwear, cooking equipment, and wet outer layers. Keeping muddy items outside the sleeping area preserves floor space and makes cleanup easier.

    3. The North Face Wawona

    The North Face Wawona is known for putting useful storage in front of the sleeping area. Its large vestibule creates a sheltered transition zone for chairs, packs, shoes, and other gear, which can make a family campsite feel less cluttered.

    The design is especially appealing for car camping and multi-night trips where comfort matters more than a compact packed size. Before purchase, compare the capacity you need with the vehicle space available for transport and storage.

    Pros

    • Large vestibule provides valuable covered gear storage.
    • Family-oriented interior is practical for extended campground stays.
    • Multiple doors and ventilation features can improve everyday usability.

    Cons

    • Large packed volume is not ideal for backpacking.
    • Its roomy design may be excessive for one or two campers.

    🛠️ Practical Tip

    Measure your vehicle’s cargo area with the seats in the position you normally use. A comfortable tent is less useful if its storage bag crowds out essential camping gear.

    4. Kelty Discovery Basecamp

    The Kelty Discovery Basecamp is aimed at straightforward camping rather than technical alpine travel. Its conventional dome format is approachable for beginners and useful for campers who want a shelter that can be pitched at established sites without a complicated pole sequence.

    This line makes sense for weekend campers, families, and buyers who prioritize understandable setup over low trail weight. Its value depends on the exact capacity, included components, and current retail pricing, which can vary by model and season.

    Pros

    • Familiar dome construction is easy for many first-time campers to understand.
    • Roomier versions can accommodate family camping equipment.
    • Well matched to car-accessible sites and repeated weekend use.

    Cons

    • Not designed around ultralight backpacking.
    • May lack the refined interior details found on premium shelter lines.

    💡 Tip

    Lay every pole beside the tent before assembly and keep clips facing the same direction. That small habit speeds setup and reduces the chance of forcing a section into the wrong sleeve.

    Lightweight Tents for Frequent Backpacking

    5. Big Agnes Copper Spur HV UL

    The Big Agnes Copper Spur HV UL range is built for backpackers who need to carry their shelter repeatedly. It emphasizes low weight, efficient pole geometry, and a freestanding structure that can be useful on uneven campsites. Different sizes serve solo hikers, pairs, and small groups.

    Its light construction is an advantage on the trail, but lightweight materials deserve careful handling. Clear the campsite of sharp debris, avoid dragging the tent, and use sensible tension rather than over-tightening every line.

    Pros

    • Low carry weight supports repeated backpacking trips.
    • Freestanding architecture simplifies placement and repositioning.
    • Useful interior pockets and vestibule space can improve organization.

    Cons

    • Light fabric is less forgiving of rough handling than heavy canvas.
    • Limited floor space may feel tight for campers carrying substantial gear.

    🛠️ Practical Tip

    Pack the tent loosely in its storage sack rather than compressing it into a tight, repeated fold. Varying the fold lines can help reduce stress on the same areas of fabric.

    6. MSR Hubba Hubba

    The MSR Hubba Hubba is a well-known two-person backpacking format that balances livability with a manageable packed size. Its freestanding layout, dual access, and vestibule arrangement are useful for hikers who want room for two sleeping bags without carrying a large shelter.

    It is a strong fit for regular backpacking, bike touring, and compact travel. Pairs who spend most of their time car camping may prefer a wider tent with greater standing room.

    Pros

    • Two-door access reduces climbing over a partner during the night.
    • Dual vestibules provide separate storage areas for footwear and packs.
    • Portable design suits repeated trail use.

    Cons

    Cons - Best Rugged Tents for Repeated Use
    • Two-person backpacking dimensions can feel close for long stays.
    • Interior height is limited compared with family camping tents.

    💡 Tip

    Use one vestibule for cooking equipment only where local rules and ventilation make that safe; never use a stove inside a sealed sleeping tent because of fire and carbon-monoxide hazards.

    7. Marmot Tungsten

    The Marmot Tungsten range gives backpackers a more generous interior than many compact shelters. Its zone-oriented floor design and roomy dome shape can make it appealing to hikers who dislike narrow sleeping quarters but still need a tent that can travel in a pack.

    That extra livability can bring additional packed weight. It is best for backpackers who value comfort and durable everyday construction more than shaving every possible gram.

    Pros

    • Roomy floor plan is useful for campers carrying larger sleeping systems.
    • Multiple capacity options make the range adaptable to different trips.
    • Suitable for weekend backpacking and occasional car camping.

    Cons

    • May be bulky for minimalist routes or long-distance hikes.
    • Its larger interior does not replace the standing height of a family shelter.

    🛠️ Practical Tip

    Divide the load between hiking partners. One person can carry the body and rainfly while the other carries poles, stakes, and the footprint.

    Canvas and Heavy-Duty Stationary Shelters

    8. Kodiak Canvas Flex-Bow

    The Kodiak Canvas Flex-Bow is aimed at campers who want a substantial shelter for repeated use at established sites. Canvas can feel comfortable in a stationary camp, and the upright shape offers useful interior room for beds, chairs, and storage bins.

    This is a very different proposition from a lightweight camping tent. It is heavy, takes more space to transport, and must be completely dry before storage. For hunting camp, base camp, or regular vehicle-supported trips, those trade-offs may be reasonable.

    Pros

    • Canvas construction is suited to repeated stationary camping.
    • Upright interior makes longer stays more comfortable.
    • Roomy layout can accommodate substantial camp furniture and gear.

    Cons

    • Heavy packed weight rules it out for backpacking.
    • Wet canvas must be dried carefully before storage.
    • Setup can require more effort than a small synthetic dome.

    🛠️ Practical Tip

    Never pack canvas while it is damp. If rain interrupts teardown, spread the tent out as soon as possible and let every fold, seam, and corner dry fully.

    9. Springbar Classic Jack 140

    The Springbar Classic Jack 140 is another canvas shelter for comfortable vehicle-based camping. Its open interior and upright layout suit families and groups who want more practical living space than a low dome provides.

    It is best understood as a semi-permanent or frequently reused camp shelter rather than a travel tent. Campers should consider vehicle capacity, storage conditions, and the physical work involved in setup before choosing this style.

    Pros

    • Generous interior layout is useful for longer stays.
    • Canvas walls can create a more substantial shelter feel.
    • Works well for organized base camps and family camping.

    Cons

    • Heavy materials reduce portability.
    • Requires careful storage and drying routines.
    • May be more shelter than occasional weekend campers need.

    ✨ Style Tip

    Use stackable storage bins instead of soft bags inside a large canvas tent. They keep supplies organized and reduce the chance of sharp items rubbing against the floor.

    10. Oztent RV Series

    The Oztent RV Series takes a different approach to repeated use by combining a folding frame with a fast vehicle-based setup. The design is aimed at campers who want to spend less time assembling poles at camp and more time arranging their site.

    Its convenience comes with a transport penalty. The packed shape can be long or bulky, so it suits vehicles with suitable roof, trailer, or cargo storage better than small cars. Check the exact series specifications before buying because dimensions and interior arrangements vary.

    Pros

    • Folding-frame concept can simplify frequent setup and teardown.
    • Useful for touring routes with regular overnight stops.
    • Often provides a more upright interior than compact backpacking shelters.

    Cons

    • Long packed dimensions may limit vehicle compatibility.
    • Not intended for carrying between remote camps.
    • Replacement or storage considerations may be more complex than with a basic dome.

    💡 Tip

    Before ordering, measure the available storage length rather than only checking total cargo volume. Long tent bags can be difficult to fit even when a vehicle has plenty of space.

    How to Choose a Tent for Frequent Use

    Match the Tent to the Way You Travel

    Start with transport. Backpackers need a manageable packed weight, while car campers can prioritize floor space, standing height, and thicker components. A base-camp tent may be the better answer for a fixed location, but it makes little sense for a route that involves carrying gear between camps.

    🛠️ Practical Tip

    Write down your real use pattern before shopping: number of campers, average trip length, transport method, typical weather, and storage location. Those five details quickly eliminate unsuitable designs.

    Prioritize Weather Protection and Ventilation

    Repeated use does not automatically require the heaviest tent. Look for a rainfly that covers vulnerable areas, well-designed guy points, bathtub-style floor construction, and vents that can remain open during damp conditions. In windy locations, correct staking and guyline use matter as much as the fabric label.

    For trustworthy planning information, the National Park Service’s Leave No Trace principles are a useful reference for campsite selection, weather awareness, and responsible outdoor practices.

    💡 Tip

    A tent’s weather rating cannot compensate for poor site selection. Avoid low depressions, inspect overhead hazards, and orient the narrowest side toward prevailing wind where practical.

    Consider Interior Space and Storage

    Advertised sleeping capacity is only part of the story. Two people with wide sleeping pads, winter bags, and packs need more room than two minimalist hikers. Measure the floor area, compare door positions, and check whether the vestibule is large enough for footwear and wet equipment.

    ✨ Style Tip

    For comfortable family camping, choose capacity based on people plus gear, not people alone. A nominal six-person tent may be more useful for four campers with bags and bedding.

    Check Setup, Repair, and Storage Details

    A tent intended for repeated use should have a setup process you can perform confidently in poor light or light rain. Examine pole connections, clips, sleeves, zipper paths, stake loops, and included repair materials. Replacement poles and compatible parts can be especially important for frequent campers.

    🛠️ Practical Tip

    Inspect the tent after every trip, not just before the next one. Clean dirt from zippers, dry the fly, check pole sections, and repair small tears before they become larger problems.

    Which Rugged Tent Type Fits Your Needs?

    For car camping and families: The NEMO Aurora Highrise and The North Face Wawona focus on livability, storage, and headroom. The REI Co-op Base Camp is a stronger candidate for campers who expect more exposed conditions and want a structured dome.

    For frequent backpacking: The Big Agnes Copper Spur HV UL and MSR Hubba Hubba make more sense when packed weight matters. The Marmot Tungsten is worth considering if you want extra interior room and can accept more bulk.

    For stationary base camp: Kodiak Canvas and Springbar canvas tents offer a roomier, heavier approach. Oztent’s folding-frame format may suit travelers who move by vehicle often and place a high value on fast setup.

    💡 Tip

    Don’t compare a canvas base-camp shelter directly with an ultralight backpacking tent as if they serve the same job. The better option is the one whose compromises match your transport and camping style.

    Frequently Asked Questions

    What are the best tents for long-term use?

    The best choice depends on the type of long-term use. Canvas tents suit stationary base camps, while durable synthetic domes are easier to transport and dry. Frequent backpackers should prioritize repairability and sensible weight.

    Which tent brand is considered the most durable?

    No single brand is the most durable for every use. Durability depends on the model, materials, care, setup habits, and conditions. Compare the exact tent rather than relying on a brand name alone.

    Is canvas better than synthetic fabric for repeated camping?

    Canvas can provide a substantial, comfortable shelter for stationary camping, but it is heavy and must be dried thoroughly. Synthetic tents are usually easier to carry and quicker to dry.

    What is the best heavy-duty tent to live in temporarily?

    A large canvas base-camp shelter may be more suitable than a lightweight camping tent for temporary stationary living. Check ventilation, floor design, local rules, heating safety, and weather limits before relying on any tent for an extended stay.

    How can I make a camping tent last longer?

    Use an appropriate footprint, avoid dragging the tent, keep zippers clean, dry it completely before storage, and inspect poles and seams after each trip. Small repairs are easier before damage spreads.

    Final Verdict

    The best rugged tents for repeated use are not all built for the same job. Backpackers will usually favor the Copper Spur HV UL, Hubba Hubba, or Tungsten for their balance of carry weight and usable shelter.

    Families and car campers may prefer the Aurora Highrise, Wawona, Base Camp, or Discovery Basecamp for greater comfort and storage. Canvas models and folding-frame tents make more sense when the shelter stays vehicle-supported.

    Before buying, match capacity to real gear, check packed dimensions, examine the weather-protection details, and confirm that replacement parts are available. A tent that fits your transport, campsite, and maintenance habits will usually serve you better than one chosen only for impressive specifications.

  • Best Tents for Camping Near Beaches: Top Picks

    Best Tents for Camping Near Beaches: Top Picks

    Sand, salt air, bright sun, and shifting wind can turn a relaxing campsite into a difficult place to sleep. The best tents for camping near beaches need more than a waterproof floor: they should offer reliable ventilation, sensible shade, manageable setup, and enough stability for exposed ground. A compact backpacking shelter may suit a solo trip, while a family tent needs stronger organization and room to keep sandy gear outside the sleeping area.

    This article compares practical tent options across lightweight, family, and quick-setup categories, then explains which features matter most near the coast. You’ll also find advice on sand, weather, storage, sun protection, and choosing a tent that fits your actual campsite.

    What Makes a Tent Suitable for Beach Camping?

    A beach campsite is usually more demanding than a sheltered forest site. Wind can arrive without much warning, loose sand makes ordinary stakes less useful, and direct sun can heat a tent quickly. Salt and fine grit can also work into zippers, poles, and floor seams.

    The right camping tent should balance protection with airflow. A full rainfly helps during coastal showers, while mesh panels, large doors, and adjustable vents reduce condensation when the weather is warm. A vestibule is especially useful because it gives wet or sandy gear a place to stay outside the sleeping area.

    • Wind management: Look for multiple guy-out points, strong pole connections, and a shape that does not present an unnecessarily broad wall to the wind.
    • Sand handling: Sand-specific anchors, buried deadman anchors, or heavy-duty stakes may work better than short standard pegs.
    • Ventilation: Mesh, roof vents, and cross-breeze options help control heat and moisture.
    • Sun protection: A rainfly, canopy, or separate beach shade can make the tent more comfortable during daylight.
    • Storage: Vestibules, interior pockets, and gear lofts help keep bags and smaller items organized.
    • Maintenance: Rinse salt and sand from the tent after the trip, then dry it completely before storage.

    🛠️ Practical Tip

    Before choosing a pitch, check local rules about overnight camping, dunes, tides, and anchoring. Coastal conditions can change quickly, so keep the tent above the highest expected tide line and avoid fragile vegetation.

    Best Tents for Camping Near Beaches by Use Case

    1. Kelty Late Start 2

    Kelty Late Start 2 - Best Tents for Camping Near Beaches

    The Kelty Late Start 2 is a compact two-person shelter aimed at campers who want a relatively simple tent for weekend trips and short hikes. Its freestanding design and straightforward pole structure make it more approachable than many technical backpacking tents. The included vestibule provides a useful place for shoes, packs, and sandy clothing.

    For beach camping, its moderate size is an advantage when campsite space is limited. It is better suited to one person with gear or two people traveling light than to campers seeking a spacious living area. As with any lightweight tent, careful guy-line use matters in exposed wind.

    Pros

    • Freestanding design simplifies placement on mixed ground.
    • Vestibule helps keep sand outside the sleeping area.
    • Practical option for solo campers or two-person trips.

    Cons

    • Limited interior room for bulky bags or extended indoor use.
    • Lightweight construction requires sensible site selection in strong wind.

    💡 Tip

    Pack a few sand-friendly anchors or plan to use buried anchor points rather than relying only on the included stakes. Keep the vestibule zipped when wind is carrying grit across the campsite.

    2. REI Co-op Trail Hut 2

    The REI Co-op Trail Hut 2 is designed for two people who want a balance of livability and manageable packed size. Its vestibule and dual-entry layout are useful near the coast because each camper can enter without climbing over the other, while gear can remain under cover.

    The tent’s rectangular floor is more practical for sleeping mats and small bags than a very narrow minimalist shelter. It may appeal to weekend campers and hikers who want more organization than a basic one-door tent provides, although buyers should check the current version’s specifications before purchase because product details can change.

    Pros

    • Two-door access improves airflow and convenience.
    • Vestibules provide covered storage for beach gear.
    • Good middle ground between comfort and portability.

    Cons

    • May be more shelter than a solo camper needs.
    • Not intended to replace a dedicated sun canopy during hot daytime hours.

    ✨ Style Tip

    Use one vestibule for footwear and sandy items and reserve the other as an entrance. That small separation makes evening cleanup easier and reduces grit inside the sleeping compartment.

    3. Big Agnes Copper Spur HV UL2

    The Big Agnes Copper Spur HV UL2 is a lightweight two-person backpacking tent for campers who prioritize low carry weight and efficient use of space. Its dual doors and vestibules are particularly helpful when a campsite is exposed and you need to enter from the more sheltered side.

    This is a specialized choice rather than a casual family beach tent. Ultralight materials can reduce pack burden, but they also reward careful handling around sharp shells, abrasive sand, and rough surfaces. A groundsheet or footprint can help protect the floor, provided it is sized so water does not collect beneath the tent.

    Pros

    • Low-weight design suits backpacking and travel on foot.
    • Two doors and vestibules improve access and storage.
    • Efficient interior shape offers useful space for its category.

    Cons

    • Ultralight materials need more care around abrasive ground.
    • Higher-spec construction may not be necessary for occasional car campers.

    🛠️ Practical Tip

    Clear shells, sticks, and sharp stones before pitching. A lightweight footprint should sit inside the tent’s floor outline rather than extending beyond it, where it could collect rainwater.

    4. NEMO Hornet 2P

    The NEMO Hornet 2P is another backpacking-focused option for people who value a small packed size and a low-load shelter. Its twin entrances and covered storage areas make it more convenient for two campers than many compact one-door designs.

    It is most appealing for hiking trips that include a beach stop, not for campers who plan to spend the entire day inside the tent. The relatively streamlined layout keeps weight down, so interior headroom and gear capacity are more limited than in larger freestanding camping tents.

    Pros

    • Compact format suits backpacking and lightweight travel.
    • Separate entrances reduce disturbance at night.
    • Covered storage helps keep wet and sandy items outside.

    Cons

    • Less comfortable for extended indoor lounging.
    • Needs careful anchoring in open coastal wind.

    💡 Tip

    Pitch the narrow end toward the prevailing wind when possible. This reduces the broad side exposed to gusts and leaves the doors more comfortable to use.

    5. Sea to Summit Telos TR2

    The Sea to Summit Telos TR2 is built around flexible ventilation and a two-person layout with useful access points. Its design is suited to campers who want more than a basic backpacking bivouac, including people who expect warm nights and need to adjust airflow.

    Near the beach, adjustable vents and mesh can help manage condensation, but no tent eliminates moisture in humid coastal conditions. Its combination of portability and comfort makes it a reasonable fit for active couples, solo campers with extra room requirements, and travelers moving between campsites.

    Pros

    • Ventilation-focused design is useful in warm, humid settings.
    • Two-person layout provides better access than many minimalist shelters.
    • Versatile for backpacking and organized campsite travel.

    Cons

    • More feature-rich than necessary for very short, simple trips.
    • Lightweight fabrics still require protection from rough sand and shells.

    🌬️ Quick Tip

    Open upper vents before condensation builds overnight, but keep low doors partially closed if blowing sand is entering the campsite. Airflow works best when it is adjustable rather than fully open.

    6. Coleman Sundome 4

    The Coleman Sundome 4 is a familiar dome-style tent aimed at casual car camping. Its appeal comes from a straightforward structure, a floor area suitable for a small family or group, and a setup process that is generally less involved than larger cabin tents.

    It can work for a protected beach campground or a short weekend near the shore, particularly for buyers who want an accessible camping tent rather than a technical backpacking shelter. Its basic shape and capacity are practical, but families should account for bags, coolers, and beach gear rather than assuming the listed sleeping capacity equals comfortable living space.

    Pros

    • Simple dome format is familiar to beginner campers.
    • Suitable for car camping and short coastal trips.
    • More interior room than a compact two-person backpacking tent.

    Cons

    • Less specialized for strong exposed wind than a low-profile technical tent.
    • Four-person capacity may feel crowded with large amounts of gear.

    🏕️ Practical Tip

    Use a separate beach shade or canopy for daytime sitting instead of leaving the tent doors open all day. That keeps sand and direct sun away from sleeping bags and reduces unnecessary wear on zippers.

    7. NEMO Aurora Highrise 4

    The NEMO Aurora Highrise 4 is a comfort-oriented family tent with more vertical interior space than a low dome. That extra headroom helps when changing clothes, organizing children’s gear, or waiting out a short coastal shower.

    It is a better match for car campers who value livability over the smallest packed size. The taller profile may be less desirable on an exposed beach site during strong wind, so pitching location, guy lines, and the local forecast should influence the decision.

    Pros

    • Standing-height interior improves comfort for families.
    • Roomy layout supports changing clothes and organizing gear.
    • Appropriate for campground-based beach trips.

    Cons

    Cons - Best Tents for Camping Near Beaches
    • Taller walls can be less forgiving in exposed gusts.
    • Less suitable for backpacking or public transport travel.

    💡 Tip

    Choose a sheltered campsite rather than relying on height alone. If a coastal forecast calls for strong gusts, a lower-profile tent may offer a calmer and safer setup.

    8. MSR Habitude 4

    The MSR Habitude 4 is a family-sized tent designed with comfort and organized campsite living in mind. Its interior height, storage features, and family-friendly layout can make longer stays more manageable than a compact backpacking model.

    This tent makes sense for car campers who want a dependable base near the beach and expect to bring more than sleeping equipment. It is not the most convenient choice for a remote campsite reached on foot, and its larger structure should be fully guyed in coastal conditions.

    Pros

    • Family-friendly interior gives occupants more usable space.
    • Storage features help organize clothing and small items.
    • Better suited to multi-night campsite stays than minimalist tents.

    Cons

    • Size and packed bulk limit portability.
    • Requires thoughtful anchoring in open weather.

    🛠️ Practical Tip

    Assign one interior pocket or corner to each camper before bedtime. Keeping sand-covered footwear and damp swim items in the vestibule prevents the generous interior from becoming cluttered.

    9. Marmot Tungsten 4P

    The Marmot Tungsten 4P is a four-person tent that emphasizes a practical floor layout and usable interior space. It suits couples who want room for equipment or small families who prefer not to sleep shoulder-to-shoulder.

    Its larger footprint works best at established campgrounds where the pitch area is known in advance. Near a beach, confirm that the site has enough room for the tent, guy lines, and a safe distance from dunes or changing water levels.

    Pros

    • Comfortable capacity for small families or gear-heavy couples.
    • Useful floor space for bags and sleeping equipment.
    • Versatile for general three-season camping.

    Cons

    • Needs more campsite room than a two-person tent.
    • Not a natural choice for carrying long distances across sand.

    ✨ Style Tip

    Create a small “dirty zone” just inside the entrance with a mat or folded ground cloth. It gives sandy feet a place to land before anyone steps onto the sleeping floor.

    10. CORE 9-Person Instant Cabin Tent

    The CORE 9-Person Instant Cabin Tent targets large groups and families who want fast setup with substantial interior space. Its cabin-style walls provide useful headroom, and the generous capacity can accommodate sleeping arrangements that would feel cramped in a smaller family tent.

    This is a car-camping shelter, not a backpacking tent. Its tall, spacious design is convenient at an organized campground but can be difficult to protect on a wide-open beach if wind increases. Buyers should also consider whether their vehicle and storage area can handle the packed size.

    Pros

    • Fast setup can be helpful for families arriving with many bags.
    • Large interior supports groups and generous sleeping layouts.
    • Cabin shape offers strong everyday livability.

    Cons

    • Large walls and height need careful wind management.
    • Bulky for small cars, hiking routes, or compact storage.

    🛠️ Practical Tip

    Don’t judge setup by the word “instant” alone. Practice opening and folding the tent at home, and identify every guy point before a windy arrival makes the process harder.

    11. Quechua 2 Seconds Fresh & Black

    The Quechua 2 Seconds Fresh & Black range is designed around rapid pitching and a fabric system intended to reduce light and heat inside the shelter. That can be appealing for warm beach trips, late sleepers, and campers who want a simple tent for short stays.

    Its pop-up format can save time, but packed shape and folding technique matter. It is worth practicing the repacking process before traveling, especially if the tent will be carried with other bags or transported on public transit.

    Pros

    • Quick pitching is convenient for short breaks and weekend camping.
    • Darkened interior can improve daytime comfort for sleeping.
    • Suitable for campers who dislike complicated pole assembly.

    Cons

    • Pop-up packed shape may be awkward to transport.
    • Folding it away correctly can require practice.

    💡 Tip

    A darker tent can still become warm if airflow is restricted. Open vents on mild days and use a separate sun shelter for sitting, cooking, or storing beach items.

    12. Gazelle T4 Plus Hub Tent

    The Gazelle T4 Plus Hub Tent is aimed at campers who want a fast-opening structure with a roomy interior and a separate screened area. That extra space can be valuable near the beach, where wet towels, chairs, coolers, and sandy gear quickly overwhelm a basic sleeping tent.

    Its hub design is convenient for car camping and family trips, but the larger footprint and vertical walls call for a suitable campsite. It is best viewed as a comfortable base camp option rather than a shelter for carrying over long stretches of sand.

    Pros

    • Rapid hub-style setup reduces pole assembly.
    • Additional room supports families and bulky beach equipment.
    • Screened living space can improve comfort in warm weather.

    Cons

    • Large packed size limits portability.
    • Broad walls should be secured carefully in coastal wind.

    🏖️ Practical Tip

    Treat the screened room as a gear transition area rather than a place to pile everything. Put chairs and coolers where they won’t block doors, and keep sleeping spaces clear for nighttime airflow.

    Quick Comparison of the Featured Tents

    Product Best For Key Feature Capacity Main Drawback
    Kelty Late Start 2 Solo campers and pairs Simple freestanding design Two-person Limited space for bulky gear
    REI Co-op Trail Hut 2 Weekend hikers Two doors and vestibules Two-person Not a daytime shade shelter
    Big Agnes Copper Spur HV UL2 Lightweight backpackers Low-load design Two-person Needs careful handling
    NEMO Hornet 2P Minimalist backpackers Compact two-person layout Two-person Less interior headroom
    Sea to Summit Telos TR2 Warm-weather backpacking Adjustable ventilation Two-person More features than some casual campers need
    Coleman Sundome 4 Beginner car campers Familiar dome format Four-person Basic wind protection
    NEMO Aurora Highrise 4 Comfort-focused families High interior walls Four-person Taller profile in exposed wind
    MSR Habitude 4 Multi-night family camping Organized living space Four-person Bulky for transport
    Marmot Tungsten 4P Small families and couples Usable floor area Four-person Requires a larger pitch
    CORE 9-Person Instant Cabin Large car-camping groups Fast cabin-style setup Large group Large and wind-exposed
    Quechua 2 Seconds Fresh & Black Short warm-weather trips Rapid pitching and darkened fabric Varies by model Folding and packed shape
    Gazelle T4 Plus Hub Families with beach gear Fast setup and extra living room Family-sized Large packed footprint

    📋 Quick Tip

    Use the table to narrow the field, then verify the current manufacturer specifications for weight, packed dimensions, included accessories, and season rating. Those details can vary between versions or regional listings.

    How to Set Up a Tent Near the Coast

    Good placement matters as much as the tent itself. Choose firm, level ground away from dunes, loose debris, and the reach of waves. Wind direction, tide information, and local regulations should be checked before unpacking.

    1. Inspect the ground for shells, sticks, sharp stones, and damp areas.
    2. Point the tent’s narrow end or strongest side toward prevailing wind when practical.
    3. Use sand stakes, buried anchors, or deadman anchors if ordinary pegs do not hold.
    4. Attach the rainfly and guy lines even when the forecast appears dry.
    5. Keep doors and vents positioned to encourage airflow without inviting blowing sand.
    6. Store food, toiletries, and loose items securely according to local wildlife rules.
    7. Shake sand from the tent away from the sleeping area and dry all fabric before packing.

    For coastal safety information, consult the National Weather Service guidance on rip currents before swimming near an unfamiliar beach. A good tent cannot compensate for changing surf, tides, or unsafe water conditions.

    ⚠️ Safety Tip

    Never use a stove, lantern, or fuel-burning appliance inside a sleeping tent. Keep cooking and flame-producing gear outside, well away from fabric and sleeping equipment.

    Which Tent Type Fits Your Trip?

    For solo beach campers

    A compact two-person backpacking tent often gives one person enough room for sleeping, clothing, and a small pack. Kelty Late Start 2, NEMO Hornet 2P, and similar models are easier to carry than family shelters, but they offer less space for daytime use.

    For couples and backpackers

    Prioritize two doors, vestibules, ventilation, and a manageable packed weight. A tent that lets each person enter independently is more comfortable when the ground is sandy and gear needs to stay outside.

    For families

    Capacity should be judged by usable living space, not just the maximum sleeping number. Families may prefer the NEMO Aurora Highrise 4, MSR Habitude 4, or a larger instant cabin if they are driving to an established campsite.

    For quick weekend setup

    Instant and pop-up designs reduce assembly time, which is useful when arriving late or traveling with children. They still need proper anchoring, and their larger walls may be less forgiving in strong coastal wind.

    🧭 Planning Tip

    Write down the distance from your vehicle to the campsite, the number of sleepers, and the amount of beach gear you carry. Those three details often identify the right tent category faster than comparing dozens of features.

    Frequently Asked Questions

    What type of tent is best for beach camping?

    A suitable beach tent has good ventilation, secure guy-out points, a durable floor, and a practical way to anchor in sand. The best option depends on whether you’re backpacking, car camping, or bringing a family.

    Can I use a regular camping tent near the beach?

    Yes, provided local rules allow overnight camping and the tent is suitable for the expected weather. Use appropriate sand anchors, protect the floor from sharp debris, and rinse salt and sand away after the trip.

    Do I need a separate beach shade shelter?

    Often, yes. A sleeping tent is designed for nighttime shelter, while a canopy or sun shelter provides more comfortable daytime shade and keeps the tent cooler and less cluttered.

    How do I keep sand out of a camping tent?

    Place footwear and beach items in the vestibule, use a small mat near the entrance, and shake gear outside before bringing it in. Keeping doors closed during windy periods also helps.

    Are pop-up tents good for coastal camping?

    They can be convenient for short trips, especially when fast setup matters. Check how they are anchored, practice folding the tent, and avoid exposed sites if the structure has broad walls and limited guy points.

    Final Verdict

    The best tents for camping near beaches depend on how you reach the campsite and how much room you need once you arrive. Lightweight models such as the Kelty Late Start 2, NEMO Hornet 2P, and Big Agnes Copper Spur HV UL2 suit hikers who value portability. Family and car campers may prefer the extra comfort of the NEMO Aurora Highrise 4, MSR Habitude 4, or a larger instant shelter.

    Before buying, compare packed size, ventilation, vestibule space, floor protection, anchoring options, and the forecast for your destination. A carefully pitched tent, a separate sun shelter, and a plan for handling sand will usually matter as much as the brand name. Choose for the actual campsite—not just the number printed on the capacity label.