Category: camping

  • Best Camping Cooking Tools for Open Flame: Top Picks

    Best Camping Cooking Tools for Open Flame: Top Picks

    Choosing the best camping cooking tools for open flame starts with matching the gear to your fire, cookware, and campsite routine. A grill grate may suit burgers and vegetables, while a Dutch oven or cast iron skillet handles stews, bread, and one-pot meals. The right setup should also be stable, easy to pack, simple to clean, and safe to use around shifting heat.

    Below, you’ll find practical options for campfire cooking, from portable cooking surfaces to heavy-duty utensils and fire stands. You’ll also see which tools make sense for solo trips, family camps, car camping, and minimalist backpacking, plus the trade-offs that matter before buying.

    How to Choose Camping Cooking Tools for Open Flame

    Open-fire cooking is less predictable than using a controlled camp stove. Logs burn unevenly, flames move with the wind, and cookware can become extremely hot. A useful kit therefore needs more than one pan: it needs a stable cooking surface, heat-resistant handling tools, and equipment that can tolerate direct heat.

    • Match the tool to the meal: A grill grate works well for direct grilling, while a Dutch oven is better for slow, covered cooking.
    • Prioritize stability: Legs, a tripod, or a broad grate can help prevent cookware from tipping into the fire.
    • Consider material: Cast iron stores heat effectively, while stainless steel is lighter and usually easier to maintain.
    • Check packability: Car campers can carry heavier gear, but backpackers need compact, multipurpose tools.
    • Plan for cleanup: Removable handles, nesting cookware, and washable storage bags make camp chores easier.

    Before lighting a fire, check local restrictions and use an established fire ring where permitted. The National Park Service campfire safety guidance is a useful reference for fire placement, supervision, and extinguishing procedures.

    Cooking Surfaces and Open-Fire Supports

    A dependable cooking surface keeps food above the hottest coals and gives pots or pans a more stable position. These options suit different fire pit layouts, from a simple weekend campfire to a permanent backyard pit grill.

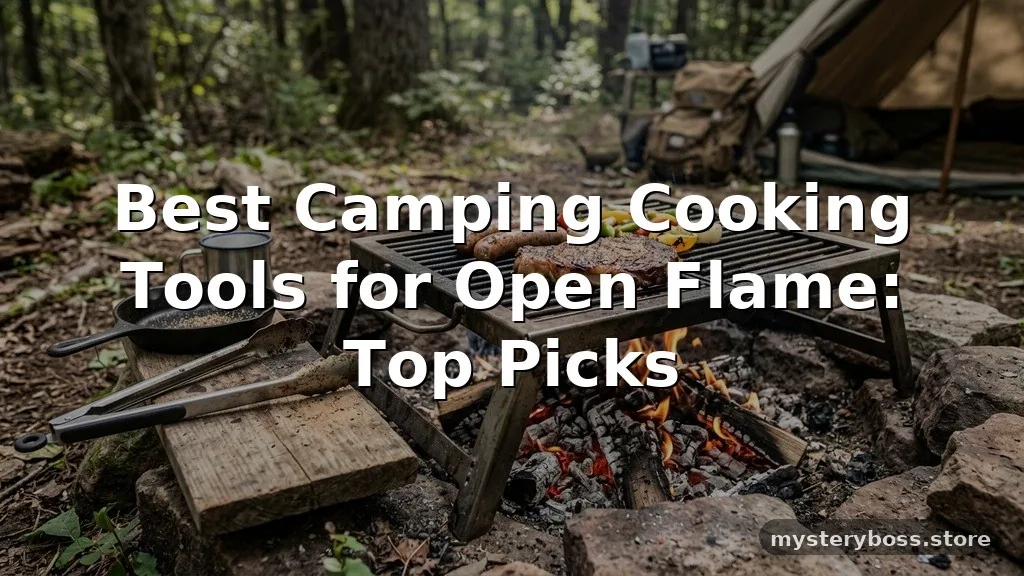
    1. Folding Campfire Grill Grate

    Folding Campfire Grill Grate - Best Camping Cooking Tools for Open Flame

    A folding grill grate is one of the most versatile pieces of open-fire cooking equipment. It sits over a fire ring or bed of coals and provides a direct surface for a pan, kettle, meat, corn, or vegetables. Look for a broad cooking area, folding legs, and a design that can be cleaned without awkward corners.

    💡 Tip

    Set the grate over glowing coals rather than tall flames whenever possible. You’ll get steadier heat and less soot on the underside of your cookware.

    2. Adjustable Tripod Cooking Stand

    An adjustable tripod gives you height control without requiring a perfectly level fire pit. Many designs suspend a pot, kettle, or Dutch oven from a chain, allowing you to raise the cookware as the fire gets hotter. This makes the stand especially useful for soups, beans, and slow campfire cooking.

    🛠️ Practical Tip

    Keep the tripod feet outside the hottest section of the fire ring and check that the chain hangs centrally before adding food.

    3. Fire Pit Cooking Ring

    A cooking ring rests around or across a fire pit and creates a dedicated support for pans and pots. It’s a good fit for campsites where you want cookware to sit securely without balancing it directly on logs. Because designs vary, check the ring’s diameter and the size of your usual cookware before ordering.

    🔥 Quick Tip

    Measure the inside and outside dimensions of your fire pit. A ring that is too narrow may crowd the cookware, while one that is too wide may not sit securely.

    4. Heavy-Duty Campfire Grill

    A heavy-duty grill is designed for campers who cook larger meals or use cast iron cookware. Its thicker frame can provide a more stable platform for a skillet, griddle, or Dutch oven, although it may take up more room in a vehicle. This is a practical choice for family camping and regular car-camping trips.

    ✨ Style Tip

    Choose a grill with enough clearance for your largest pan, but avoid bringing a surface so large that it becomes difficult to position over the coals.

    5. Rotisserie Campfire Spit

    A rotisserie spit adds a slow-turning option for larger cuts of meat, whole poultry, or vegetables. It requires more setup than a simple grate and works best where the fire pit has room for sturdy supports. A hand-operated model is simpler; powered versions may need batteries or another power source.

    💡 Tip

    Balance food near the center of the spit before placing it over the fire. Uneven weight makes turning harder and can strain the supports.

    Cookware for Direct Heat and Coals

    Cookware determines what meals you can make and how much fuel they require. Cast iron is excellent for heat retention, while stainless steel and lighter alloys are easier to carry. No single pan handles every camp meal, so consider whether you mainly grill, fry, boil, or simmer.

    6. Cast Iron Skillet

    A cast iron skillet is a reliable open-flame pan for eggs, bacon, vegetables, cornbread, and one-pan meals. It holds heat well and can move from a grill grate to a bed of coals. The main drawback is weight, along with the need to dry and maintain the cooking surface after washing.

    🛠️ Practical Tip

    Use a dedicated heat-resistant handle cover or thick glove, and never assume the handle has cooled just because the pan is off the fire.

    7. Camp Dutch Oven

    A camp Dutch oven is built for covered cooking over coals, making it useful for stews, casseroles, baked dishes, and slow-cooked meals. Many models include a lid with a raised rim for holding coals and a bail handle for suspension. It is highly versatile, but its weight and cleaning demands make it better suited to car camping than backpacking.

    🔥 Quick Tip

    Use a lid lifter instead of a knife or improvised stick. It lets you check food while keeping your hands farther from hot coals.

    8. Stainless Steel Camping Pot

    A stainless steel pot is a practical choice for boiling water, cooking pasta, heating soup, and preparing larger portions. It is generally easier to wash than seasoned cast iron and often works well in a nested camping cookware set. Stainless steel can develop hot spots, so stirring matters when cooking directly over flame.

    💡 Tip

    Choose a pot with a secure lid and folding or removable handles if storage space is limited. Those details often matter more than decorative accessories.

    9. Campfire Grill Basket

    A grill basket keeps small or delicate foods contained while they cook over a grate. It works well for sliced vegetables, shrimp, fish, and foods that might otherwise fall between grill bars. A locking handle or removable handle can make turning and storage easier.

    🛠️ Practical Tip

    Lightly oil the basket before adding food, then leave space between pieces so heat can circulate instead of steaming the ingredients.

    10. Folding Campfire Kettle

    A folding kettle is useful for coffee, tea, dehydrated meals, and boiling water for several people. Its lid and pouring spout reduce mess around the fire, while collapsible or folding parts can improve packability. Verify that the handle stays positioned away from direct flame and that the kettle is intended for stovetop or open-fire use.

    ☕ Quick Tip

    Fill the kettle before placing it over the fire, but leave room for boiling. A partially filled kettle is also easier to lift safely than one filled to the rim.

    Utensils, Handling Tools, and Camp Prep Gear

    Small tools have a large effect on safety and convenience. Long handles help keep hands away from heat, while multipurpose utensils reduce the number of items in your camp kitchen bag.

    11. Long-Handle Camp Tongs

    Long-Handle Camp Tongs - Best Camping Cooking Tools for Open Flame

    Long-handled tongs are essential for turning meat, moving vegetables, and repositioning food on a grill grate. Stainless steel versions are easy to clean, while locking designs take up less space in a storage bag. Choose a grip that remains comfortable when wearing gloves.

    🛠️ Practical Tip

    Keep one pair of tongs for raw food and another for cooked food if you’re preparing meat. It reduces cross-contamination during a busy meal.

    12. Heat-Resistant Campfire Gloves

    Heat-resistant gloves protect hands while moving grates, lifting cookware, or adjusting logs. They should provide enough dexterity to grip handles without becoming loose around the fingers. Gloves are not a substitute for careful handling, and their heat rating should be checked against the manufacturer’s instructions.

    🔥 Safety Tip

    Use gloves only when they are dry and in good condition. Moisture, worn seams, or exposed fabric can reduce protection around hot metal.

    13. Campfire Lid Lifter

    A lid lifter provides a safer way to open a Dutch oven or covered pot sitting over coals. Its long shaft keeps your hand away from steam and hot metal. This is a small tool, but it becomes particularly useful when baking or simmering food under a heavy lid.

    💡 Tip

    Lift the lid slightly away from your face first so steam can escape on the opposite side. Keep the lid level to avoid spilling hot food.

    14. Multipurpose Camp Utensil Set

    A compact utensil set may include a spoon, spatula, fork, serving tool, and sometimes a bottle opener or knife. It suits campers who want one organized kit instead of loose kitchen items. Check the handle length and material before buying; tiny backpacking utensils can feel awkward over a large fire.

    ✨ Style Tip

    For group camping, favor full-size serving utensils. For solo trips, a compact spork or folding tool may save space without limiting simple meals.

    15. Camp Cutting Board and Prep Knife

    A small cutting board paired with a dependable camp knife makes food preparation cleaner and more controlled. The board should pack flat and resist sliding, while the knife needs a secure grip and a protective sheath. This combination is useful for slicing vegetables, trimming meat, and portioning bread before food reaches the fire.

    🛠️ Practical Tip

    Pack the knife in a sheath or closed container, and keep the cutting board separate from ready-to-eat food if it has been used for raw meat.

    Quick Comparison of Open-Flame Cooking Tools

    Tool Best For Main Strength Portability Main Drawback
    Folding grill grate Direct grilling and pan cooking Simple, versatile cooking surface Moderate Needs a suitable fire pit or support
    Tripod cooking stand Suspended pots and slow cooking Adjustable height Moderate Requires room around the fire
    Cast iron skillet Frying and one-pan meals Strong heat retention Low to moderate Heavy and requires maintenance
    Camp Dutch oven Stews, baking, and covered meals Highly versatile Low Heavy and slower to clean
    Stainless steel pot Boiling and larger portions Easy-care construction Moderate to high May develop hot spots
    Grill basket Vegetables, fish, and small foods Keeps food contained High Limited to grill-style cooking
    Long-handled tongs Turning and serving food Improves reach and control High Not a cooking surface by itself

    Best Setups by Camping Style

    Solo Backpacking

    Keep the kit compact: a small stainless steel pot, lightweight utensil, compact tongs, and a stable cooking surface if fires are permitted. Heavy cast iron and large tripod systems usually make more sense for vehicle-supported trips.

    Family Car Camping

    A folding grill grate, Dutch oven, skillet, kettle, gloves, and long-handled utensils provide more meal flexibility. Extra serving tools and a separate prep board are useful when several people are eating at once.

    Weekend Campfire Cooking

    A skillet, grill basket, tongs, and a basic grate cover most quick meals. Add a kettle if hot drinks or boiled water are part of the routine.

    Frequent Outdoor Cooks

    Frequent users may prefer a dedicated fire pit cooking ring, adjustable tripod, or heavier grill that stays stable through repeated setup. Durable construction matters more than saving a few ounces.

    Advantages and Limitations of Open-Flame Cooking Gear

    Pros

    • Supports grilling, boiling, frying, roasting, and slow cooking with the same fire.
    • Many tools work without fuel canisters or a separate stove.
    • Cast iron and heavy-duty grills can provide excellent heat retention and stability.
    • Simple gear such as tongs, a grate, and a skillet can prepare a wide range of meals.

    Cons

    • Heat is less predictable than it is with a controlled burner.
    • Large cookware can be heavy and inconvenient to carry.
    • Soot, grease, and ash make cleanup more demanding.
    • Fire restrictions may limit where open-flame cooking is allowed.
    • Improperly supported cookware can tip, spill, or cause burns.

    How to Cook Safely Over an Open Fire

    1. Build or use the fire only in an approved location and keep water or an appropriate extinguishing method nearby.
    2. Allow the fire to develop a stable bed of coals before placing cookware over it.
    3. Check that the grate, tripod, or cooking ring is level and firmly positioned.
    4. Use long-handled tools and heat-resistant gloves when moving food or cookware.
    5. Keep raw ingredients, cooked food, and preparation tools separated.
    6. Extinguish the fire completely and confirm that ashes are cool before leaving the campsite.

    Frequently Asked Questions

    What is the best camping cookware for cooking on an open fire?

    For broad meal flexibility, a cast iron skillet or camp Dutch oven is a strong option. A stainless steel pot is easier to carry and clean, especially for boiling water and making simple meals.

    What are the best cooking utensils for open fires?

    Long-handled tongs, a heat-resistant spatula, a large spoon, a lid lifter, and protective gloves cover most tasks. A separate knife and cutting board help with food preparation.

    How do you cook on an open fire while camping?

    Let the fire burn down to steady coals, position a stable grate or stand above them, and adjust the cookware’s height to control heat. Stir food regularly and keep a safe distance from the flames.

    Is there a camp grill that can cook over an open fire?

    Yes. Folding campfire grill grates, fire pit cooking rings, and heavy-duty camp grills are designed to support cookware or food above a fire. Confirm that the size matches your fire ring.

    Is cast iron better than stainless steel for campfire cooking?

    Cast iron retains heat well and suits frying, searing, and Dutch oven cooking, but it is heavy and needs drying and care. Stainless steel is lighter and easier to clean, though it may heat less evenly.

    Final Verdict

    The best camping cooking tools for open flame depend on your meals, fire setup, and transport limits. A folding grate and long-handled tongs form a useful foundation, while a cast iron skillet or Dutch oven adds more cooking options for car campers. Backpackers should keep the kit lighter and simpler, with a compact pot and multipurpose utensil.

    Before purchasing, check compatibility with your fire pit, packed size, material, handle design, and cleanup needs. Start with the tools you’ll use every trip, then add a tripod, kettle, grill basket, or specialized stand when your cooking style calls for it.
  • Best Soft-Sided Coolers for Camping: 12 Top Picks

    Best Soft-Sided Coolers for Camping: 12 Top Picks

    Finding the best soft-sided coolers for camping means balancing ice retention, carrying comfort, usable capacity, and packability. A cooler bag that works for a short hike may feel too small at a family campsite, while a large tote can become awkward once it’s full of food and ice. Construction matters, too: insulated walls, a dependable closure, leak-resistant lining, and practical pockets all affect how well a cooler fits real outdoor use.

    This roundup compares 12 well-known soft coolers across backpack, tote, lunch, and traditional cooler designs. You’ll see which options suit car camping, day trips, boat use, travel, and short hikes, plus the trade-offs to consider before you shop.

    How to Choose Among Soft-Sided Coolers for Camping

    The right soft cooler depends less on its advertised size than on how you plan to carry and load it. A solo camper may value a compact cooler bag that fits inside a vehicle or tent vestibule, while a family may need a large model with a wide opening and enough space for separate meals.

    • Capacity: Match the cooler to the number of people and the length of the trip. Bigger is not always better if you’ll carry it far.
    • Ice retention: Thick insulation and a tight closure generally help maintain cold temperatures, but results also depend on pre-chilling, ambient heat, opening frequency, and ice type.
    • Portability: Padded shoulder straps, backpack harnesses, grab handles, and wheels can make a heavy load easier to move.
    • Leak resistance: A leakproof or leak-resistant liner is useful for drinks and melting ice, but the manufacturer’s care instructions still matter.
    • Opening design: A wide lid is convenient at camp. A roll-top or zipper opening can help contain cold air and reduce spills.
    • Storage: Exterior pockets are handy for utensils, napkins, sunscreen, and small everyday items.
    • Cleaning: Look for an interior that can be wiped clean and dried thoroughly after use.
    • Packability: A collapsible cooler is easier to store between trips, especially in a small apartment, camper, or crowded vehicle.

    Food safety should also be part of the decision. A cooler that keeps food cold is only useful if it is packed correctly and not left open for long periods. For general handling guidance, review the USDA’s food refrigeration recommendations before planning meals for a longer trip.

    💡 Tip

    Measure the space where the cooler will travel before choosing capacity. A cooler that fits beneath a vehicle seat or inside a storage compartment can be more useful than one with a larger stated volume that has to stay outside.

    Best Soft Coolers for Traditional Camping Loads

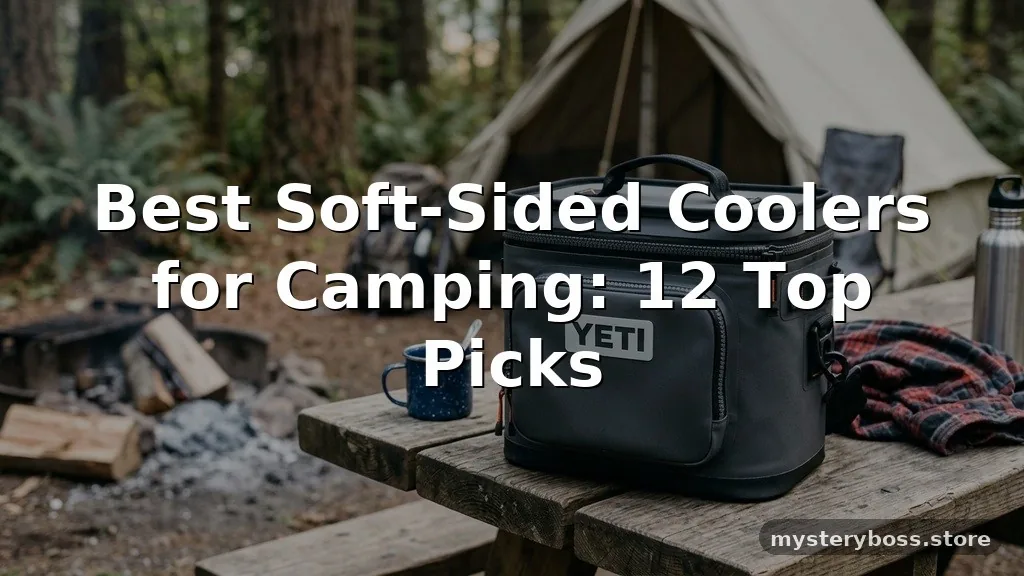
    1. YETI Hopper Flip 12

    YETI Hopper Flip 12 - Best Soft-Sided Coolers for Camping

    The YETI Hopper Flip 12 is a compact soft cooler built around a box-shaped design, a shoulder strap, and a wide opening. Its insulated construction and waterproof-style exterior make it suitable for carrying drinks, lunch ingredients, and snacks to a campsite, picnic area, or fishing spot. The smaller footprint is easier to handle than a large cooler, though that also limits how much food it can carry for a group.

    Its design is particularly appealing to campers who want a structured cooler bag rather than a soft tote that collapses around its contents. The zipper can be firm to operate, especially when the cooler is new or packed tightly, so it rewards careful loading rather than overstuffing.

    Pros

    • Compact shape is manageable for short carries.
    • Wide opening makes food and drinks easier to reach.
    • Structured insulation provides more support than a simple lunch tote.

    Cons

    • Capacity may be limited for families or multi-day group trips.
    • Premium construction comes with a higher purchase commitment than basic soft bags.
    • A full cooler can become uncomfortable to carry over longer distances.

    🛠️ Practical Tip

    Use a layer of ice or frozen bottles at the bottom, then place frequently needed drinks near the top. This reduces the time the zipper stays open during the day.

    2. RTIC Soft Pack Cooler 20 Can

    The RTIC Soft Pack Cooler 20 Can is aimed at buyers who want a conventional soft-sided cooler with a relatively generous drink-and-food load. Its rectangular format suits car camping, beach trips, tailgating, and day outings where a shoulder strap is more useful than a backpack harness.

    The stated can capacity is a helpful reference, but real capacity changes once you add ice packs, containers, and oddly shaped food. This model makes more sense for people who need a flexible camp cooler that can carry a shared supply without moving into the bulk of a hard cooler.

    Pros

    • Useful middle-ground capacity for couples and small groups.
    • Soft construction is easier to lift and store than a rigid cooler.
    • Shoulder-carry format works well for short transfers from a vehicle to camp.

    Cons

    • A full load may be heavy without a wheeled base.
    • It takes up more room than a small lunch cooler when packed.
    • Ice and food organization require separate containers or dividers.

    💡 Tip

    If the cooler will stay at a campsite, pack meals in flat containers instead of loose bags. The rectangular interior will be easier to use and you’ll spend less time searching through the ice.

    3. Engel HD30

    The Engel HD30 is a heavy-duty soft cooler designed for buyers who place a high value on insulation and rugged construction. Its larger capacity makes it a better fit for vehicle-based camping, fishing, hunting, and group day trips than for backpacking. The boxy build also gives it a more stable shape when placed on a picnic table or cargo floor.

    That additional structure can be useful, but it means the cooler is not the most compact option for storage. It is best considered when keeping food and drinks cold is a priority and carrying distance is modest.

    Pros

    • Large format suits shared food and drink supplies.
    • Durable construction is appropriate for demanding outdoor settings.
    • Structured sides help it hold its shape when loaded.

    Cons

    • Less convenient for long hikes or lightweight travel.
    • Large soft coolers can become cumbersome when filled with ice.
    • Storage space matters because the insulated body does not pack as flat as a simple tote.

    ✨ Style Tip

    Treat a large soft cooler as part of the vehicle-camping kit rather than as a hiking pack. Keeping it close to the car preserves its capacity advantage without turning a short trip into a tiring carry.

    4. AO Coolers 24 Pack Canvas Cooler

    The AO Coolers 24 Pack Canvas Cooler has a straightforward tote-style layout with a canvas exterior and insulated interior. It is a practical choice for campers who prefer a soft, flexible bag that can carry a substantial amount of food and drinks without the more technical look of some premium soft coolers.

    The simple design can be an advantage: there are fewer mechanisms to manage, and the wide opening is useful when loading meal containers. Buyers should still check the current care instructions and product details, since canvas finishes, lining construction, and included features can vary by version.

    Pros

    • High stated capacity is useful for family day trips.
    • Flexible shape can fit into irregular vehicle storage spaces.
    • Simple tote format is easy to load and carry short distances.

    Cons

    • Canvas-style exteriors may require more care after wet or muddy trips.
    • Not the most suitable choice for extended backpack carries.
    • Large food loads can make the shoulder straps feel strained.

    🧽 Practical Tip

    After a damp trip, empty the cooler completely and leave it open until the lining and seams are dry. This is especially important when the exterior fabric can hold moisture.

    Best Backpack Coolers and Carry-Friendly Designs

    5. YETI Hopper M12 Backpack

    The YETI Hopper M12 Backpack converts the soft cooler into a hands-free carry system. Its backpack format is useful for hiking to a remote picnic spot, carrying lunch on a day trail, or transporting drinks while both hands are occupied with other gear. The upright shape can also be easier to manage than a wide cooler with a shoulder strap.

    As with any backpack cooler, comfort depends on the load. Ice is heavy, and a completely full pack may feel bulky on a longer route. It is better suited to short or moderate-distance carries than to minimalist backpacking where every item must serve several purposes.

    Pros

    • Hands-free design leaves room for trekking poles or other equipment.
    • Useful for day hikes, beach access, and dispersed picnic areas.
    • Vertical format can fit more easily in some vehicle spaces.

    Cons

    • Weight becomes noticeable as ice and drinks are added.
    • Backpack straps do not make a soft cooler suitable for ultralight travel.
    • Less convenient to access while wearing it than a top-opening tote.

    💡 Tip

    Use frozen water bottles instead of loose ice when carrying the pack on a trail. They reduce shifting, provide drinking water later, and are easier to remove without emptying the whole interior.

    6. Hydro Flask Carry Out Soft Cooler 20 L

    The Hydro Flask Carry Out Soft Cooler 20 L offers a tote-like carry format with a capacity aimed at day trips and shared meals. It suits campers who want a cooler that can move from the vehicle to a picnic table, campground, or park without feeling like a rigid chest.

    Its broad format makes loading practical, especially for containers and reusable food storage. That same width may be less comfortable for a long walk, so this is primarily a car-camping and everyday travel option rather than a backpacking cooler.

    Pros

    • 20-liter capacity provides useful room for day-trip food.
    • Tote-style access is convenient when several people share the contents.
    • Soft walls are easier to store than a hard-sided chest.

    Cons

    • Wide loads can become awkward to carry over distance.
    • It may be more capacity than a solo camper needs.
    • Meal containers can take up space quickly when packed with ice.

    🛠️ Practical Tip

    Place flat meal containers upright along the sides and use smaller items to fill the center. This makes the wide tote easier to organize than filling it with loose cans.

    7. Hydro Flask Day Escape Soft Cooler 18 L

    The Hydro Flask Day Escape Soft Cooler 18 L is a more portable option for people who want a soft-sided cooler with enough space for a full day of food and drinks. Its design is well suited to beach trips, campground lunches, road travel, and short walks from a vehicle.

    An 18-liter cooler sits in a useful middle range: larger than a personal lunch bag but not as imposing as a large family cooler. Buyers should consider how much of the space will be occupied by ice packs, because insulated capacity is always lower than the empty-bag figure.

    Pros

    • Balanced capacity for couples, small families, and day outings.
    • Soft format is easier to store than a rigid box.
    • Suitable for both camping and everyday food transport.

    Cons

    Cons - Best Soft-Sided Coolers for Camping
    • Not designed for long-distance backpacking loads.
    • May feel too large for a single lunch or short solo outing.
    • Internal organization may require separate food containers.

    💡 Tip

    For mixed meals, divide food into reusable containers before leaving home. You’ll get a more predictable fit and avoid crushing softer items beneath cans or ice packs.

    8. Arctic Zone Titan Deep Freeze 30 Can Cooler

    The Arctic Zone Titan Deep Freeze 30 Can Cooler is made for buyers who want a large soft cooler with a generous stated drink capacity. It can make sense for car camping, family picnics, sports events, and basecamp use where the cooler does not need to travel far from the vehicle.

    Its larger size gives it more flexibility for shared supplies, but capacity can work against portability once fully loaded. This is a model to consider when space for food matters more than a compact packed footprint.

    Pros

    • Large capacity supports group meals and drinks.
    • Suitable for camping trips that begin and end near a vehicle.
    • Soft construction is easier to store than a comparable hard chest.

    Cons

    • A full 30-can load can be tiring to carry.
    • Large interiors need deliberate organization to avoid digging.
    • Less practical for hikers who need to carry every item over distance.

    🧊 Quick Tip

    Pre-chill drinks and food before loading a large cooler. Ice has less work to do when the contents start cold, particularly during warm-weather camping.

    Useful Soft Cooler Totes, Lunch Bags, and Travel Options

    9. Coleman Soft Cooler with Removable Liner

    The Coleman Soft Cooler with Removable Liner is a practical choice for buyers who want a straightforward cooler bag for lunch, short day trips, or supplemental food storage at camp. A removable liner can make cleaning easier than dealing with a fixed interior, especially after spills.

    This style is more suitable for modest loads than for carrying a full family’s food supply. It works well as a second cooler for snacks, breakfast items, or drinks that need to stay separate from the main camp provisions.

    Pros

    • Removable liner can simplify cleaning and drying.
    • Useful for lunch, short outings, and secondary storage.
    • Usually easier to carry than a large soft cooler.

    Cons

    • Capacity may be limited for multi-day camping.
    • Basic designs may offer less insulation and structure than premium models.
    • Not intended to replace a larger cooler for group use.

    🧽 Practical Tip

    Use this type of cooler for items that need frequent access, such as fruit, sandwiches, or condiments. Keeping those foods separate can help the main cooler stay closed longer.

    10. Igloo MaxCold Soft Cooler 30 Can

    The Igloo MaxCold Soft Cooler 30 Can is a roomy soft cooler designed for larger day-trip loads. Its capacity makes it suitable for car campers, families, and groups who want a flexible bag for drinks and packed food without bringing a hard-sided chest.

    The wide, soft format should be easy to load, but it may not provide the same organization as a cooler with built-in compartments. If you use one for camping, reusable containers or smaller insulated bags can prevent the contents from becoming a single loose pile.

    Pros

    • Generous size is useful for shared food and beverages.
    • Soft walls make storage easier between trips.
    • Good match for campground and picnic-table use.

    Cons

    • Full loads may be difficult to carry far.
    • Loose contents can be hard to find without internal organization.
    • May be more cooler than a solo or couple camper needs.

    💡 Tip

    Pack food in groups—breakfast, lunch, drinks, and snacks—using separate bags or containers. The system works like a simple drawer arrangement inside a large cooler.

    11. Pelican Dayventure Sling Cooler

    The Pelican Dayventure Sling Cooler is aimed at lightweight day use rather than large camp provisioning. Its sling format gives it a casual, compact profile for carrying a drink and a few snacks on a short walk, at a campsite, or during travel.

    This type of cooler makes sense when convenience and low bulk matter more than maximum ice capacity. It is also a sensible companion to a larger cooler: use it for the items that need to stay portable while leaving the main food supply at the vehicle.

    Pros

    • Compact sling design is convenient for short outings.
    • Works well as a personal cooler rather than a group cooler.
    • Small size can fit into crowded travel or camping storage.

    Cons

    • Limited capacity is not suitable for family meals.
    • Small coolers generally have less room for large ice loads.
    • A sling may feel unbalanced if packed with dense cans.

    ✨ Style Tip

    Use a small sling cooler for the active part of the day and keep reserve drinks in the vehicle. That approach avoids carrying a large bag every time you leave camp.

    12. RTIC Backpack Cooler

    The RTIC Backpack Cooler provides a hands-free alternative to a tote or shoulder cooler. Its backpack format is useful for short hikes, beach access, travel days, and campsites where the route from the car includes uneven ground or stairs.

    A backpack cooler can distribute weight more evenly than a single shoulder strap, but it still becomes substantial when filled with ice and drinks. Buyers should think about the packed weight, not just the empty bag, before choosing this format for trail use.

    Pros

    • Hands-free carry is practical for active day trips.
    • Backpack format can feel more balanced than a one-sided shoulder bag.
    • Useful for both camping and everyday travel.

    Cons

    • Access is less immediate while the cooler is being worn.
    • Full loads can be heavy for extended walks.
    • Interior capacity may be less convenient for bulky food containers than a tote.

    🛠️ Practical Tip

    For a trail carry, leave a little room at the top so the zipper can close without pressure. An overfilled backpack cooler is harder to balance and may place unnecessary strain on the closure.

    Comparison Table: Soft Coolers for Camping

    The table below separates the main use cases rather than declaring one universal winner. Capacity labels are manufacturer-style references and do not equal the amount of food you can carry after adding ice, containers, and packaging.

    Product Best For Format Stated Size or Capacity Main Drawback
    YETI Hopper Flip 12 Compact day trips Shoulder cooler 12-class design Limited room for groups
    RTIC Soft Pack Cooler 20 Can Couples and small groups Shoulder cooler 20-can class Heavy when full
    Engel HD30 Large camp loads Heavy-duty soft cooler 30-class design Bulky for hiking
    AO Coolers 24 Pack Canvas Cooler Flexible family day trips Canvas tote 24-pack class Needs care after wet use
    YETI Hopper M12 Backpack Hands-free carrying Backpack cooler Backpack format Heavy when fully loaded
    Hydro Flask Carry Out Soft Cooler 20 L Car camping and shared meals Soft tote 20 liters Wide to carry over distance
    Hydro Flask Day Escape Soft Cooler 18 L Day outings and travel Carry cooler 18 liters Limited for large groups
    Arctic Zone Titan Deep Freeze 30 Can Family and basecamp use Large soft cooler 30-can class Awkward when filled
    Coleman Soft Cooler with Removable Liner Lunch and supplemental storage Soft cooler bag Model-dependent Not for large provisions
    Igloo MaxCold Soft Cooler 30 Can Large day-trip loads Soft tote 30-can class Needs internal organization
    Pelican Dayventure Sling Cooler Personal snacks and drinks Sling cooler Small format Limited capacity
    RTIC Backpack Cooler Short hikes and travel Backpack cooler Backpack format Not ideal for long carries

    Which Soft Cooler Format Fits Your Camping Style?

    For car campers and families

    Large tote-style coolers and structured soft coolers are generally the most convenient when the vehicle is close to camp. Models in the 20- to 30-can range can hold shared food and drinks, although they become heavy once ice is added. Wide openings and a stable base are often more useful here than backpack straps.

    For solo campers and couples

    A compact shoulder cooler or medium carry cooler usually provides a better balance. Smaller models take less ice, fit more easily in a vehicle, and are less tempting to overpack. A 12-class cooler may handle personal meals, while an 18- or 20-liter design offers more flexibility for two people.

    For hiking and short trail walks

    Choose a backpack cooler or compact sling only if you genuinely need chilled food away from the vehicle. A backpack cooler keeps both hands free, but it does not make a heavy load light. For longer backpacking trips, a lightweight insulated bag may be more practical than a heavily structured cooler.

    For lunch, travel, and everyday use

    Small coolers with removable liners or simple tote designs can pull double duty. They are useful for work lunches, road trips, campground breakfasts, and day-use snacks. A collapsible model may be especially helpful if storage space is limited.

    How to Pack a Soft-Sided Cooler More Effectively

    1. Pre-chill food and drinks before placing them in the cooler.
    2. Use frozen bottles or reusable ice packs to reduce loose water inside the bag.
    3. Put the coldest items near the bottom and surround the food with ice.
    4. Pack meals in sealed containers to prevent leaks and simplify cleanup.
    5. Keep frequently used drinks near the top.
    6. Open the cooler briefly and close it fully after each use.
    7. Drain or wipe moisture as needed, then dry the cooler completely after the trip.

    🧊 Quick Tip

    A cooler works best when it is reasonably full. If there is a lot of empty air, fill gaps with ice packs or tightly sealed frozen bottles rather than leaving warm air circulating inside.

    Final Verdict

    The best soft-sided coolers for camping vary by the way you travel. The YETI Hopper Flip 12 suits compact day use, while the RTIC Soft Pack 20 Can and medium Hydro Flask models offer a useful balance for couples and small groups.

    Large options from Engel, Arctic Zone, Igloo, and AO Coolers make more sense for car camping and shared meals. Backpack designs such as the YETI Hopper M12 and RTIC Backpack Cooler are better when hands-free carrying matters, but they still become heavy with ice.

    Before you buy, decide how far the cooler will travel, how many people it must serve, and whether easy cleaning or maximum insulation matters most. For short trips, a small cooler bag may be all you need; for a basecamp, a large soft tote can be more practical. Choosing around your actual load will usually matter more than choosing the biggest model.

    Frequently Asked Questions

    Which soft-sided cooler keeps ice the longest?

    Ice retention depends on insulation, closure design, pre-chilling, ice quantity, weather, and how often the bag is opened. Larger, well-insulated coolers typically provide more room for ice, but no soft cooler can maintain the same conditions indefinitely in every environment.

    Are soft coolers as good as hard coolers?

    Soft coolers are easier to carry and store, while hard coolers usually provide more rigid protection and may hold ice longer in some conditions. A soft cooler is often the better fit for day trips, short carries, and limited storage space.

    What is a good soft cooler for the money?

    The best value depends on the capacity, insulation, and carry system you actually need. A basic cooler with a removable liner may be enough for lunch and short outings, while frequent campers may benefit from stronger construction and better closure hardware.

    Are backpack coolers useful for camping?

    Yes, especially for short hikes, beach access, and campsites away from the parking area. They distribute the load across both shoulders, but ice and drinks add significant weight, so they are not automatically suitable for long-distance backpacking.

    Can a soft cooler be waterproof?

    Some soft-sided coolers use water-resistant or leak-resistant materials and closures, but waterproof performance varies by product and does not always mean the cooler can be submerged. Follow the manufacturer’s cleaning and handling instructions.

    How should a soft cooler be cleaned after camping?

    Empty it, wipe the liner with mild soapy water, remove food residue, and let the cooler dry fully with the opening wide. Avoid storing it damp, since trapped moisture can create unpleasant odors and damage some fabrics over time.

  • Best Camping Storage Boxes for Kitchens: 12 Smart Picks

    Best Camping Storage Boxes for Kitchens: 12 Smart Picks

    A messy camp kitchen slows down meal prep, wastes space in the vehicle, and makes small items surprisingly easy to lose. The best camping storage boxes for kitchens bring structure to cooking gear, dry goods, bottles, and cleanup supplies without turning packing into a puzzle. Some are better for a car-camping trunk, while others suit overland travel, folding camp kitchens, or compact weekend setups.

    This roundup compares 12 practical options across heavy-duty trunks, modular gear cases, and lighter organizer-style boxes. You’ll see which designs handle rough transport, which offer quick grab access, and where waterproofing, weight, compartments, and portability create trade-offs.

    How to Choose Camping Kitchen Storage

    A useful camp kitchen box should do more than hold equipment. It should make packing predictable, protect contents during transport, and help you find a bottle opener or spice container without emptying the whole vehicle. Start by deciding whether the box will stay in a trunk, ride in a roof or cargo system, or travel by hand from the car to the cooking area.

    • Capacity: Match the box to your stove, cookware, fuel accessories, plates, utensils, and pantry items rather than choosing the largest container available.
    • Protection: Look for a rigid body, secure lid, and reliable seal when dust, rain, or muddy gear may be a concern.
    • Organization: Removable trays, dividers, pockets, and smaller storage pods reduce rummaging.
    • Portability: Handles, stackability, wheels, and manageable weight matter once the box is full.
    • Cleaning: Smooth plastic surfaces are generally easier to wipe down after spills than fabric organizers.
    • Vehicle fit: Measure the trunk, drawer, camper cabinet, or roof-mounted system before buying.

    Think about the way you cook. A family may need one large box for cookware and another for dry food, while a solo camper may prefer a compact case with a few carefully chosen compartments. For food safety, keep raw ingredients, ready-to-eat food, and cleaning chemicals separated; the USDA’s food-safety basics are a useful reference when planning a camp kitchen.

    🛠️ Practical Tip

    Before ordering, place your most-used cookware on the floor and measure the footprint it occupies. Add room for handles and a little clearance so the lid closes without forcing the contents into place.

    Best Camping Storage Boxes for Kitchens by Category

    1. Plano Sportsman’s Trunk

    Plano Sportsman’s Trunk - Best Camping Storage Boxes for Kitchens

    The Plano Sportsman’s Trunk is a strong candidate for car campers who want one large, lidded container for cookware, stove accessories, plates, and camp kitchen hardware. Its molded plastic construction and substantial latching design make it more protective than a soft bag, while the broad trunk shape uses vehicle cargo space efficiently. The main limitation is organization: a large open interior may need smaller bins or pouches inside.

    Pros

    • Rigid construction protects kitchen gear during transport.
    • Large trunk-style layout suits family or group equipment.
    • Useful for stacking with other vehicle storage.

    Cons

    • Bulky when carried a long distance from the vehicle.
    • Open space does not automatically separate small items.

    💡 Tip

    Use a small removable container for spices, fire starters, and utensils inside the trunk. That gives you a quick-grab kit without unpacking the main cookware load.

    2. Rubbermaid ActionPacker

    The Rubbermaid ActionPacker is a familiar hard-sided storage choice for camping, work sites, and vehicle organization. Its lockable-style lid design and solid body make it suitable for storing heavier kitchen equipment, including cookware that might crush a fabric organizer. It is less specialized than a camp kitchen organizer, so dividers and internal pouches are helpful for keeping smaller gear structured.

    Pros

    • Durable-feeling hard case for repeated transport.
    • Useful capacity for bulky kitchen items.
    • Works beyond camping as a general storage box.

    Cons

    • Can become disorganized if packed without smaller cases.
    • Its weight and shape may be excessive for backpacking.

    ✨ Style Tip

    Assign one ActionPacker to cooking hardware and a separate container to food. That simple split prevents greasy pans, dry ingredients, and cleaning products from sharing the same space.

    3. Front Runner Wolf Pack Pro

    The Front Runner Wolf Pack Pro is designed around modular vehicle storage, making it particularly relevant to overland trips and organized cargo systems. Its stackable format and compatible ecosystem can help create a tidy kitchen station in the back of an SUV, truck, or expedition vehicle. Buyers should check the exact box size and compatibility with their existing rack, drawer, or storage platform before committing.

    Pros

    • Modular shape suits structured vehicle packing.
    • Stackable design can make better use of cargo height.
    • Appropriate for frequent travel and overland-style organization.

    Cons

    • Modular systems can cost more than a basic plastic tote.
    • The box alone may not provide enough small-item organization.

    🛠️ Practical Tip

    Place the most frequently used box nearest the tailgate. A modular system works best when access order is planned rather than treating every storage box as interchangeable.

    4. RUX 70L

    The RUX 70L takes a different approach from a conventional trunk. Its flexible body, rigid base, and lid system are intended to combine easier carrying with compact storage when not fully loaded.

    That makes it interesting for campers who move between a vehicle and a campsite or need gear storage that can collapse somewhat between trips. It is not the obvious choice for delicate cookware that needs a rigid box around every side.

    Pros

    • Flexible format can be easier to carry than a rigid trunk.
    • Useful for bulky soft goods and mixed camp equipment.
    • Can suit changing loads from trip to trip.

    Cons

    • Less protective than a fully rigid case.
    • Its larger format may be unnecessary for a minimalist kitchen.

    💡 Tip

    Use a separate padded sleeve for glass jars, enamelware, or sharp tools. The flexible format is most effective when the contents are already grouped and protected.

    5. Stanley Adventure Easy Carry Outdoor Cooler

    The Stanley Adventure Easy Carry Outdoor Cooler is primarily a cooler rather than a general-purpose kitchen storage box, but its insulated construction and carrying handle can make it useful for chilled food, drinks, and temperature-sensitive ingredients. It should be treated as one part of a camp kitchen system, not as a replacement for a dry-goods case. Its best role is a separate cold-storage box that keeps food away from dirty cookware.

    Pros

    • Separates chilled ingredients from dry kitchen gear.
    • Handle-focused design supports short carries.
    • Useful for drinks and perishable food on day trips.

    Cons

    • Insulated cooler space is not ideal for pans or utensils.
    • Capacity and cooling performance depend on the specific model and packing method.

    🧊 Quick Tip

    Reserve the cooler for food and drinks, then place utensils and dry ingredients in a separate box. This keeps condensation away from paper goods and cookware.

    6. YETI LoadOut GoBox

    The YETI LoadOut GoBox is a hard-sided gear case aimed at protecting equipment in demanding transport conditions. For a camp kitchen, it can hold cookware, a stove, fuel accessories, or cleanup supplies, depending on the chosen size and internal layout. Its protective construction is appealing for frequent vehicle-based campers, although the case may be more than a casual weekend camper needs.

    Pros

    • Protective hard-shell design for valuable or delicate gear.
    • Suitable for repeated vehicle transport.
    • Can be assigned to a complete cooking setup.

    Cons

    • May be heavy or bulky when fully packed.
    • A rigid case can waste space if your gear changes substantially between trips.

    🛠️ Practical Tip

    Pack the case by task rather than by object: cooking, serving, and cleanup. A box arranged this way lets one person prepare dinner while another finds plates or wash supplies.

    7. Pelican Cargo Case

    Pelican cargo cases are built for protective equipment transport and are available in formats that can suit camping storage. A case in the right size may protect a compact stove, coffee setup, or specialist cooking gear from knocks and dust. The trade-off is that protective cases typically prioritize security over lightweight portability and low-cost simplicity.

    Pros

    Pros - Best Camping Storage Boxes for Kitchens
    • Strong protection for sensitive cooking equipment.
    • Useful for compact, high-value, or electronic kitchen gear.
    • Professional-style case design supports organized transport.

    Cons

    • Not the most space-efficient choice for loose cookware.
    • Case weight can matter during campsite carries.

    💡 Tip

    Choose a case size around the gear you actually own. Excess empty space allows equipment to shift, while an overfilled case can make the lid difficult to close and reduce protection.

    8. Plano Guide Series 3600 StowAway

    The Plano Guide Series 3600 StowAway is a small compartment organizer rather than a full kitchen trunk. Its divided interior is useful for spices, tea bags, repair items, fishing-style accessories, small utensils, and stove parts that otherwise disappear at the bottom of a larger box. It works best inside a broader camping storage system.

    Pros

    • Small compartments keep tiny kitchen items visible.
    • Compact size fits larger boxes and camp drawers.
    • Helpful for building a repeatable packing system.

    Cons

    • Not large enough for cookware or a complete kitchen kit.
    • Many small compartments can slow packing if over-organized.

    ✨ Style Tip

    Use a compartment organizer only for small pieces. Large utensils and cooking tools are easier to grab from a vertical pouch or open-top bin.

    9. Stanley Classic Lunch Box

    The Stanley Classic Lunch Box is compact, recognizable, and suited to a small food or coffee kit rather than a complete camp kitchen. Its metal construction gives it a structured feel, while the lunch-box shape makes it easy to place on a camp table. Solo campers, hikers using a vehicle as a base, and people carrying a simple breakfast setup may appreciate its straightforward format.

    Pros

    • Compact footprint for small cooking or snack kits.
    • Rigid structure protects contents better than a thin bag.
    • Easy to use as a dedicated coffee or breakfast case.

    Cons

    • Limited capacity for family-sized kitchen equipment.
    • Metal construction may add weight compared with soft storage.

    ☕ Practical Tip

    Create a dedicated morning box with coffee, tea, filters, a lighter, and a mug. It can come out first while the rest of the kitchen remains packed.

    10. IKEA SAMLA Storage Box

    IKEA SAMLA boxes are lightweight plastic storage containers available in several sizes, making them adaptable for dry goods, utensils, and general camp equipment. They are better suited to protected vehicle storage than exposed, wet environments unless paired with an appropriate lid and additional protection. Their plain shape is a benefit: you can use separate bins for food, cookware, and cleaning supplies without paying for a specialized camping system.

    Pros

    • Simple format works for dividing a camp kitchen into categories.
    • Lightweight compared with many heavy-duty cargo cases.
    • Useful for home-to-campsite packing and storage.

    Cons

    • Not every version is intended for rugged outdoor exposure.
    • Small items need pouches or inner organizers.

    💡 Tip

    Label the short ends rather than only the lids. Labels remain visible when boxes are stacked in a dark vehicle trunk or under a camp table.

    11. Really Useful Box

    Really Useful Boxes are clear or translucent plastic organizers that can be practical for small camp kitchen supplies. Visibility is their main advantage: you can often identify packets, utensils, and accessories without opening every container. They are more appropriate for organized car camping, cabin trips, or home-to-camp transport than for rough overland use where maximum impact protection is the priority.

    Pros

    • Visible contents make quick item retrieval easier.
    • Multiple sizes support a layered storage system.
    • Useful for small ingredients and lightweight kitchen accessories.

    Cons

    • Clear plastic may show dirt and wear more readily.
    • Not a substitute for a rugged cargo box in demanding conditions.

    🔎 Quick Tip

    Use transparent boxes for low-mess items such as napkins, tea, and utensils. Keep greasy or muddy tools in darker, washable containers where stains are less distracting.

    12. DeWalt ToughSystem 2.0 Tool Box

    The DeWalt ToughSystem 2.0 Tool Box comes from a modular tool-storage family, but its stackable format can translate well to camp kitchens built around vehicle travel. It is particularly useful for separating a stove, cookware, electrical accessories, and repair gear into labeled cases. The tool-box design favors modular packing and protection, though it may feel excessive for a light weekend setup.

    Pros

    • Modular stacking supports systematic vehicle organization.
    • Useful for separating cooking, power, and repair equipment.
    • Hard-sided protection suits frequent transport.

    Cons

    • Tool-storage features may be unnecessary for basic camping.
    • Individual cases can take up more space than one open tote.

    🛠️ Practical Tip

    Keep one modular case permanently assigned to camp cooking. Repacking only the food and fuel between trips saves time and reduces the chance of leaving a key utensil at home.

    Comparison of Camping Kitchen Storage Boxes

    The table below shows how the options differ in their intended role. Exact dimensions, weights, internal layouts, and weather-sealing details can vary by model or revision, so check the current manufacturer listing before buying.

    Product Best For Format Organization Main Drawback
    Plano Sportsman’s Trunk Family car camping Large rigid trunk Open interior Needs inner bins
    Rubbermaid ActionPacker General vehicle storage Hard-sided tote Open interior Can be bulky
    Front Runner Wolf Pack Pro Overland systems Stackable cargo box Modular ecosystem Check system compatibility
    RUX 70L Flexible vehicle-to-campsite use Soft-sided hybrid Flexible interior Less rigid protection
    Stanley Adventure Cooler Cold food and drinks Insulated cooler Cooler interior Not a cookware box
    YETI LoadOut GoBox Protected gear transport Hard gear case Model-dependent May be heavy
    Pelican Cargo Case Specialist equipment Protective case Model-dependent Less flexible for loose gear
    Plano Guide Series 3600 Small accessories Compartment organizer Divided trays Limited capacity
    Stanley Classic Lunch Box Compact solo kits Metal lunch box Simple interior Small capacity
    IKEA SAMLA Budget-style home-to-camp organization Plastic bin Open interior Model-specific protection
    Really Useful Box Visible small-item storage Plastic organizer Clear interior Not for harsh transport
    DeWalt ToughSystem 2.0 Modular vehicle setups Stackable tool box System-based More structure than some campers need

    💡 Tip

    Use the table to choose a format first, then compare brands within that format. A cooler, compartment case, and large trunk solve different storage problems and shouldn’t be judged by capacity alone.

    Which Type Fits Your Camping Style?

    Families and Group Campers

    Families usually benefit from a large trunk or two stackable boxes. One can hold cookware and serving items, while another carries dry food, drinks, and cleanup supplies. A broad rigid box is convenient, but small inner bins stop the contents from becoming a mixed pile.

    👨👩👧 Practical Tip

    Pack serving equipment at the top: plates, cups, utensils, and napkins are needed before the stove or cookware is fully unpacked.

    Solo Campers and Backpackers

    Backpackers should be cautious about large storage boxes. A small pouch, lightweight case, or dry bag is generally easier to carry than a rigid cargo box. Compact organizers make more sense for solo car campers who want a tidy coffee, breakfast, or cooking kit without carrying a full family kitchen.

    🎒 Quick Tip

    For walking campsites, weigh the empty container before buying. A box that seems manageable at home can become awkward once filled with cookware and food.

    Frequent Car Campers and Overland Travelers

    Frequent travelers gain more from modular systems than from one oversized tote. Stackable boxes, labeled cases, and repeatable packing zones make it easier to load a vehicle quickly. A rugged cargo box can also protect gear from the movement and clutter that come with longer trips, though measurements and compatibility matter.

    🧭 Practical Tip

    Create a packing map for the vehicle: food near the kitchen, fuel separated as appropriate, and the first-use box closest to the hatch or tailgate.

    How to Organize a Camp Kitchen Box

    A storage box becomes far more useful when every item has a predictable place. Group gear by the order in which it is used, not simply by size. Keep knives and sharp tools protected, place wet or dirty equipment in washable bags, and separate food from chemicals and fuel.

    1. Empty the box and group cookware, utensils, ingredients, drinks, and cleanup gear.
    2. Remove duplicate items that rarely earn their space.
    3. Place heavy cookware low and fragile pieces inside protective sleeves.
    4. Use small organizers for spices, matches, tea, coffee, and repair items.
    5. Leave a little space so the lid closes without pressure.
    6. Label the box and record anything that needs replacing after a trip.

    🧼 Practical Tip

    Let wet cookware dry before closing a sealed container for storage. After a trip, open the box at home so trapped moisture doesn’t leave odors or encourage residue buildup.

    Frequently Asked Questions

    What is the best camp kitchen storage box?

    There isn’t one universal choice. A large rigid trunk suits families, a modular cargo box suits vehicle travelers, and a small compartment case works better for utensils, spices, and other accessories.

    Which storage box is best for a kitchen?

    Choose a box with enough capacity for your actual cookware, a secure lid, manageable weight, and a layout that matches your packing style. Internal pouches can make an open trunk much more practical.

    What is the best cooking box for camping?

    A cooking box should hold the equipment used together, such as a stove, fuel accessories, pot, utensils, lighter, and cleaning cloth. For a larger setup, splitting cooking gear from food usually improves access and hygiene.

    Are camping storage boxes waterproof?

    Some offer weather-resistant construction or sealing, but protection varies by model and closure design. Treat “water-resistant” and “weather-resistant” differently from fully waterproof, and protect food in separate sealed bags when conditions are uncertain.

    Are boxes with wheels useful for camping kitchens?

    Wheels can help with heavy loads on smooth ground, especially at organized campgrounds. They are less useful on sand, gravel, mud, or uneven trails, where handles and a manageable total weight may matter more.

    Final Verdict

    The best camping storage boxes for kitchens depend on how you travel and what you cook. Large trunks are practical for families, modular cargo boxes suit organized vehicle and overland systems, and smaller cases help solo campers keep essential items easy to grab. A cooler should handle chilled food, while a compartment organizer is better for small accessories than pans and plates.

    Before purchasing, measure your vehicle space, estimate the loaded weight, and decide whether protection or light portability matters more. Choose the simplest box that supports your packing routine, then add small organizers only where they solve a real problem. A well-planned system saves time packing and makes camp cooking calmer without adding unnecessary gear.

  • Best Camping Coffee Presses for Travel: 10 Top Picks

    Finding the best camping coffee presses for travel means balancing good flavor with packability, cleanup, and the simple realities of making coffee outdoors. A press that works beautifully at home may be too bulky for a backpack, while an ultralight brewer may not suit a family campsite or a long drive.

    The right choice depends on how much coffee you make, what kind of mug you carry, and whether you prefer French press brewing, AeroPress-style pressure, or a compact coffee maker that does both. Below, you’ll find ten practical options across several designs, plus buying advice, comparisons, cleaning tips, and answers to common questions about portable coffee for camping and travel.

    How to Choose a Camping Coffee Press

    The best camping coffee press is rarely the same for every traveler. Backpackers usually prioritize low weight and a small packed size, while car campers may prefer insulation, a larger capacity, and a sturdier body. Your preferred flavor also matters: French press brewing produces a fuller cup with more oils, while pressure brewers typically use a paper or fine filter for a cleaner result.

    • Portability: Check the packed size and whether the brewer fits inside your cooking kit or travel mug.
    • Capacity: A compact press may suit one person, but groups need a larger brew chamber or multiple brewing cycles.
    • Materials: Stainless steel and tough plastic handle outdoor use differently. Glass can deliver a familiar French press experience but is less suitable for rough transport.
    • Heat retention: Insulated models help keep coffee hot, especially at a chilly camp or during a slow breakfast.
    • Filter design: Fine mesh filters allow some sediment, while paper filters generally make cleanup and cup clarity easier.
    • Cleaning: Removable parts and simple grounds disposal are valuable when water is limited.
    • Brewing style: Decide whether you want a traditional plunger, pressure extraction, or a hybrid coffee maker.

    Water quality is another practical concern. If you’re collecting water outdoors, follow current backcountry treatment guidance such as the CDC’s backcountry water treatment advice before brewing.

    🛠️ Practical Tip

    Measure your coffee and water at home for the first few trips. A small scoop or marked container saves time at camp and makes it easier to repeat a brew you already enjoy.

    The options below are grouped by their strongest use case rather than ranked by one universal score. Product specifications and included accessories can vary by model version, so check the current manufacturer listing before purchasing.

    Compact Pressure Brewers

    1. AeroPress Go

    The AeroPress Go is one of the most recognizable portable coffee makers for travel. Its compact brewer, paper filters, stirrer, scoop, and drinking cup are designed to nest together, making it convenient for solo campers, hikers, and travelers with limited packing space. The pressure-based brewing method is quick and can produce a concentrated coffee that some users dilute with hot water.

    It isn’t a traditional French press, and the paper filter means you’ll need a supply of replacement filters unless you choose a compatible reusable alternative. Still, the simple setup and low mess make it appealing when you want one fresh cup without carrying a full kitchen.

    Pros

    • Compact nesting design for travel and backpacking.
    • Fast brewing with straightforward controls.
    • Paper filtration can reduce sediment in the cup.

    Cons

    • Designed mainly for individual servings.
    • Requires filters and a separate way to heat water.
    • Pressure brewing tastes different from a classic French press.

    💡 Tip

    Pack used paper filters in a small sealable bag until you can dispose of them properly. This keeps coffee grounds and damp waste away from clothing and sleeping gear.

    2. AeroPress Go Plus

    The AeroPress Go Plus builds on the compact pressure-brewer format with a travel-oriented storage and drinking setup. It is aimed at people who want portable coffee without carrying a separate brewing vessel, although the exact kit contents and dimensions should be confirmed for the version available in your market.

    Its main appeal is convenience: the brewer can serve as part of a contained travel system rather than one loose item among several. It remains a single-cup solution, so groups may find the brew cycle repetitive.

    Pros

    • Useful all-in-one approach for travel coffee.
    • Pressure brewing offers flexibility with grind size and strength.
    • More streamlined for commuting, road trips, and solo camp use than a large press.

    Cons

    • Not the most efficient option for serving several people.
    • Paper filters add a recurring packing and disposal consideration.
    • Some campers may prefer the richer body of a mesh-filter press.

    ✨ Style Tip

    If you already carry a travel mug, compare its opening with the brewer’s output and support requirements. A stable mug prevents spills during the final pressing step.

    3. Wacaco Pipamoka

    The Wacaco Pipamoka uses a pressure-based brewing system with a reusable metal filter and an insulated vessel. That combination makes it interesting for travelers who want a compact coffee maker without carrying paper filters. It can brew directly into its own container, which reduces the number of loose parts in a day pack.

    The reusable filter may allow more oils and fine particles into the cup than paper filtration. Its capacity is also oriented toward personal use, so it suits one traveler better than a family breakfast.

    Pros

    • Reusable filter reduces dependence on paper supplies.
    • Integrated vessel supports a tidy travel setup.
    • Insulated construction is useful when coffee needs to stay warm during a journey.

    Cons

    • Small serving format is less suitable for groups.
    • More moving parts than a basic pour-over cone.
    • Fine grounds may require careful cleaning of the filter.

    ☕ Quick Tip

    Carry a small brush or rinse bottle for the reusable filter. Removing grounds before they dry is much easier than scrubbing them from the mesh later.

    Lightweight French Press Options

    4. Espro P0 Ultralight Travel Coffee Press

    The Espro P0 Ultralight is made for people who want a travel French press with a more controlled filtration system than a basic mesh plunger. Its insulated, lightweight format is intended to combine portability with a hot-drink vessel, making it a logical fit for day hikes, work travel, and compact camp kitchens.

    The dual-filter approach associated with Espro presses is designed to reduce sediment and limit continued extraction after plunging. That may appeal to drinkers who like French press body but want a cleaner finish. It can cost more than a simple plastic press, and replacement components may be a consideration.

    Pros

    • Designed to combine brewing and drinking in one travel vessel.
    • Insulated construction helps support heat retention.
    • Fine filtration can produce a cleaner French press-style cup.

    Cons

    • More specialized and potentially more costly than basic presses.
    • Filter components need careful rinsing after use.
    • Capacity is better suited to individual or small-serving use.

    🛠️ Practical Tip

    Avoid forcing the plunger if the grind is too fine or the coffee bed is packed tightly. A slightly coarser grind usually makes pressing easier and reduces stress on the filter assembly.

    5. Espro P1 Travel Coffee Press

    The Espro P1 is another travel-focused French press designed around insulated construction and fine filtration. It is a good option for people who want a familiar steep-and-plunge process but don’t want to transfer coffee from a brewing carafe into a separate mug.

    This style is particularly convenient for commuting from a campsite or preparing coffee before a long drive. Compared with ultralight pressure brewers, it may take more space in a pack, and its filter system deserves a thorough rinse after each brew.

    Pros

    • Familiar French press technique with travel-friendly construction.
    • Insulated vessel can serve as the drinking mug.
    • Fine filtration is useful for people who dislike heavy sediment.

    Cons

    • Less compact than some pressure brewers.
    • Cleaning the filter takes more attention than discarding a paper filter.
    • May be more brewer than a minimalist backpacker needs.

    💡 Tip

    Leave a little room below the lid rather than filling the vessel to the rim. This gives the plunger space to move and makes the brewing process less messy.

    6. GSI Outdoors JavaPress

    The GSI Outdoors JavaPress uses a straightforward French press design aimed at camping and travel. Its appeal is simplicity: add coffee and hot water, wait for the grounds to steep, then press the plunger. It is a practical choice for car campers and weekend users who want a dedicated outdoor coffee press without a complicated extraction system.

    Because designs and sizes can differ across JavaPress versions, check the current capacity and materials before buying. A larger model may work well for two or more cups but will take more room in a backpack than a single-serving brewer.

    Pros

    • Simple French press process that is easy to learn.
    • Outdoor-oriented product line with practical camping appeal.
    • Can be more suitable for shared coffee than a single-cup pressure brewer, depending on size.

    Cons

    • Mesh filtration may leave more sediment than paper filters.
    • Capacity, packed size, and construction vary by model.
    • Requires a separate mug unless the selected version is designed for direct drinking.

    ✨ Style Tip

    For camp use, choose a grind that is coarse enough to separate easily from the plunger. Very fine coffee can slow the press and leave a muddy layer at the bottom of the cup.

    Durable Presses for Car Camping and Road Trips

    7. Stanley Adventure All-in-One Boil + Brew French Press

    The Stanley Adventure All-in-One Boil + Brew French Press is aimed at campers who want one rugged vessel for heating water and preparing coffee. Its stainless-steel construction and multi-use design can reduce the number of items in a camp kitchen, although it is more suitable for a vehicle-supported trip than ultralight backpacking.

    The ability to brew several servings can be useful around a campsite. You should still check the exact model instructions before placing any vessel directly over heat, since not every part of a coffee press is necessarily intended for the same cooking method.

    Pros

    • Combines camp-kitchen utility with French press brewing.
    • Durable metal construction is appropriate for rougher transport.
    • More practical for shared coffee than most single-serving travel presses.

    Cons

    • Likely too bulky for weight-conscious backpacking.
    • Metal can become hot during handling and requires care around campfires or stoves.
    • Multi-use construction may be unnecessary for people who only need a personal cup.

    🛠️ Practical Tip

    Use a cloth or heat-resistant grip when handling a metal press near a stove. Set aside a dedicated spot for the lid and plunger so they don’t pick up grit while the coffee steeps.

    8. BruTrek Double Shot 3-Cup French Press

    The BruTrek Double Shot is a compact stainless-steel French press made for travelers who want a tougher alternative to glass. Its double-wall construction and smaller format make it appropriate for road trips, camp tables, and short outdoor outings where durability matters more than the lightest possible pack.

    The “3-cup” naming convention should not be assumed to equal three large mugs; coffee industry cup measurements are often smaller than a standard serving. Check the listed capacity and dimensions before deciding whether it will meet your group’s needs.

    Pros

    • Stainless-steel body is less fragile than glass.
    • Compact format fits small camp kitchens and travel bags.
    • Useful for people who prefer a traditional French press routine.

    Cons

    • Metal construction makes the coffee level harder to see.
    • Small capacity may require multiple brews for a group.
    • Mesh filtration can leave some sediment in the mug.

    ☕ Quick Tip

    Preheat a steel press with a small amount of hot water before brewing. Empty that water, add the grounds, and then begin the main brew to help reduce heat loss.

    9. Bodum Travel Press

    The Bodum Travel Press combines a French press mechanism with a travel mug format. It is convenient for commuters and campers who want to brew and drink from the same container, with no separate carafe to pack. The familiar plunger method also makes it approachable for beginners.

    Its travel-mug shape can fit cup holders more naturally than a traditional camp carafe, but compatibility depends on the vehicle and the particular version. The press is best for personal servings and may not satisfy campers who want a large shared pot.

    Pros

    • Brews and serves from one travel-oriented vessel.
    • Simple technique with no specialized brewing equipment.
    • Useful for car camping, commuting, and hotel travel.

    Cons

    • Not designed for serving a full group at once.
    • Some coffee sediment may remain in the drink.
    • Travel-mug lids and seals should be cleaned carefully after brewing.

    💡 Tip

    Don’t seal and shake a travel press containing very hot coffee. Let the brew finish, press gently, and check that the lid is fully seated before carrying it in a vehicle.

    10. Frieling Double-Walled Stainless Steel French Press

    A Frieling double-walled stainless steel French press is a sensible option for campers who want a substantial, insulated carafe rather than a tiny personal brewer. Its metal construction avoids the breakage concern associated with glass, and the larger format can make it useful for serving more than one person.

    This type of press is better suited to car camping, cabins, and road trips than backpacking. It may also be heavier and less compact than the other options here, so the value depends on whether durability and shared capacity matter more than minimum pack weight.

    Pros

    • Large-press format can serve multiple people.
    • Double-wall stainless steel is practical for transport and heat retention.
    • Traditional plunger brewing is easy to understand and adjust.

    Cons

    • Too large for many solo backpacking setups.
    • Metal hides the coffee level during brewing.
    • Heavier than compact plastic or pressure-brewing alternatives.

    🛠️ Practical Tip

    For a group brew, bring a second insulated container if coffee will sit for a while. Pressed grounds left in the carafe can continue affecting flavor even when the vessel retains heat.

    Comparison Table

    Product Best For Brewing Style Portability Main Drawback
    AeroPress Go Solo backpackers Pressure brewing Very compact Single-serving format
    AeroPress Go Plus Travel coffee in a contained kit Pressure brewing Compact Needs replacement filters
    Wacaco Pipamoka Paper-free solo brewing Pressure brewing Compact Reusable filter needs cleaning
    Espro P0 Ultralight Lightweight French press users French press Lightweight travel design Specialized filter parts
    Espro P1 Insulated personal brewing French press Moderate Less minimal than a basic press
    GSI Outdoors JavaPress Weekend and car campers French press Varies by model Specifications differ by version
    Stanley Adventure All-in-One Camp-kitchen versatility French press and boil/brew Moderate to bulky Not aimed at ultralight travel
    BruTrek Double Shot Durable personal brewing French press Moderate Limited shared capacity
    Bodum Travel Press Car travel and commuting Travel French press Compact Personal serving size
    Frieling Stainless Steel Press Groups and car camping French press Lower for backpacking Heavier and larger

    Which Camping Coffee Press Fits Your Trip?

    Best for backpacking

    The AeroPress Go, AeroPress Go Plus, and Wacaco Pipamoka are the most natural starting points for weight-conscious travelers. They take up little room and focus on individual servings. The AeroPress options are particularly attractive if you don’t mind paper filters, while the Pipamoka is worth considering if a reusable filter matters more.

    Best for traditional French press flavor

    The Espro, GSI, Bodum, BruTrek, and Frieling models use a more familiar steep-and-plunge approach. Choose between them based on capacity, insulation, and packed size. A personal travel press works well for one camper; a larger stainless model makes more sense when coffee is shared.

    Best for car camping

    The Stanley Adventure All-in-One and larger stainless-steel presses are better suited to campsites with a vehicle. Their extra weight matters less when equipment travels in a trunk, and a larger capacity can save time during breakfast.

    Best for beginners

    A basic French press such as the Bodum Travel Press or GSI JavaPress is easy to understand: add grounds, pour hot water, steep, and plunge. Pressure brewers are also approachable, but they have a different workflow and may require more attention to filter supplies.

    How to Brew Coffee With a Travel Press

    1. Heat clean water using your camp stove, kettle, or another appropriate method.
    2. Add coffee grounds suited to the brewer. A medium-coarse grind is a reasonable starting point for a French press.
    3. Pour in the hot water and stir only if the instructions call for it.
    4. Allow the coffee to brew for the recommended time for your chosen press.
    5. Press slowly and steadily. Resistance usually means the grind is too fine or the filter is clogged.
    6. Drink promptly, or transfer the coffee if the grounds would otherwise continue steeping.
    7. Empty the grounds into a waste container and rinse the filter as soon as practical.

    For pressure brewers, follow the product-specific instructions because water volume, filter placement, and pressing technique vary. Don’t force a plunger, and avoid using boiling water if the manufacturer recommends a lower brewing temperature.

    💡 Tip

    A small digital scale is useful at a base camp but unnecessary for every hike. For lightweight trips, pre-portion coffee into labeled bags and adjust the recipe later based on taste.

    Cleaning and Storage at Camp

    Coffee grounds are easier to manage when they don’t enter the campsite soil, drains, or waterways. Knock used grounds into a designated waste bag, then rinse the press with a small amount of water. Reusable filters and plungers should be separated when possible so oils don’t build up around seals and threads.

    Dry the components before storing them for the trip home. If you pack a damp press in a closed bag, odors can develop quickly, especially in warm weather.

    🧼 Practical Tip

    Pack a small zippered cleaning kit with a cloth, soft brush, and waste bag. Keeping those items together prevents coffee residue from spreading through the rest of your cooking gear.

    Frequently Asked Questions

    What is the best portable travel coffee press?

    The best option depends on your priorities. The AeroPress Go is a strong fit for compact solo brewing, while the Bodum Travel Press and Espro models suit people who prefer brewing directly in a travel mug.

    What is the best portable coffee maker for camping?

    For backpacking, choose a small pressure brewer with a low packed weight. For car camping, a larger stainless or insulated French press may be more convenient because it can make several servings.

    Is an AeroPress better than a French press for camping?

    An AeroPress is often easier to pack and produces a cleaner cup with paper filtration. A French press can offer fuller body and simpler batch brewing, but it may be heavier and leave more sediment.

    How much coffee should I use in a camping press?

    Start with the ratio recommended by the manufacturer, then adjust for strength. A coarse grind is commonly used for French press brewing, while pressure brewers may work with a finer grind depending on the recipe.

    How do I dispose of coffee grounds while camping?

    Collect the grounds and pack them out unless local regulations clearly allow another method. Don’t scatter grounds around camp, place them in streams, or leave them near wildlife.

    Final Verdict

    The best camping coffee presses for travel fall into three practical groups: compact pressure brewers for solo backpackers, personal French press mugs for convenient travel, and larger stainless presses for car camping or shared coffee. AeroPress models and the Wacaco Pipamoka emphasize small size and quick individual brews. Espro, Bodum, GSI, and BruTrek options keep the familiar plunge method, while Stanley and Frieling models make more sense when durability or group capacity matters.

    Before buying, compare packed size, serving capacity, filter type, cleanup, and the way you’ll heat water. Choose the brewer that fits your actual trip rather than the one with the most features. A simple press that packs easily and cleans quickly is often the one you’ll use most.

  • Best Camping Food Containers — Bear Safe Picks

    Choosing the best camping food containers — bear safe enough for your destination — takes more than finding a box with a tight lid. You need to match the container to local rules, bear species, trip length, carrying method, and the amount of food your group needs. A hard bear canister may be the safest straightforward option for backpacking, while a certified bear-resistant bag can save space for some trips.

    This article compares well-known food-storage products, explains where each fits, and highlights important limitations. You’ll also learn how to check approval requirements, pack efficiently, and reduce odors around camp without relying on a container as your only layer of bear safety.

    What Makes a Camping Food Container Bear Safe?

    A genuinely bear-resistant food container is designed to prevent a bear from opening it and reaching the contents. That doesn’t mean it makes food invisible or removes the need for careful camp habits. Bears can still smell food inside a container, move it around, or damage nearby gear.

    The safest choice depends on the rules for your destination. Some parks require a specific approved bear canister, while others accept products tested through the Interagency Grizzly Bear Committee’s bear-resistant product guidance. Always check the current requirements for the park, forest, or trail before buying.

    • Hard canisters: Rigid, stackable, and easy to inspect, but often bulky in a backpack.
    • Bear-resistant bags: Lighter and easier to compress, although they still need correct closure and placement.
    • Bear kegs: Large rigid containers suited to car camping or group food storage.
    • Odor-control bags: Helpful as an inner layer, but not a replacement for an approved bear-resistant container.

    Quick Comparison of Bear-Resistant Food Storage

    Product Best For Type Key Advantage Main Drawback
    BearVault BV500 Backpacking and small groups Hard canister Clear body and broad capacity Bulky when packed
    BearVault BV450 Solo trips and short outings Hard canister Smaller, lighter format Limited food volume
    Garcia Machine Bear-Resistant Container Regulated backcountry trips Hard canister Established screw-top design Less convenient access
    Counter Assault Bear Keg Group camping and base camps Large hard container Useful volume for shared supplies Not backpack-friendly for everyone
    Ursack Major Lightweight food storage Bear-resistant bag Lower packed bulk than a canister Approval varies by location
    Ursack Major XL Longer trips and groups Bear-resistant bag More capacity in a soft format Large loads need careful packing
    Ursack AllMitey Food plus scented items Bear-resistant bag Broader storage use Still requires approved use
    LOKSAK OPSAK Odor reduction inside storage Odor-barrier bag Useful secondary layer Not bear proof on its own
    Sea to Summit Lightweight Dry Bag Water protection Dry bag Protects contents from moisture Not a bear-resistant container
    Gamma Seal Food Storage Bucket Vehicle-based camping Sealed bucket Convenient lid access Not automatically bear resistant
    Bear-resistant food locker Established campsites Fixed storage High capacity when provided Not portable
    Certified bear-resistant food bag Weight-conscious trips Soft container Flexible packing Certification and closure vary

    Product names and approval status can change by park or region. Treat the table as a starting point, then verify the current rules for your route.

    Hard Canisters for Backpacking and Compact Camps

    1. BearVault BV500

    The BearVault BV500 is one of the most recognizable hard bear canisters for backpacking. Its transparent body makes it easier to see what remains inside, and the wide opening is practical for organizing meal bags, snacks, and small cooking supplies. The rigid shape also doubles as a camp seat on many trips, although comfort depends on the user and the surface.

    Its main trade-off is exterior bulk. A canister holds its shape even as food is consumed, so it may occupy nearly the same amount of pack space on the final day as it did at the trailhead. The lid’s locking system should be checked before departure, especially if the container has been exposed to dirt or grit.

    Pros

    • Clear construction helps with food inventory.
    • Wide opening simplifies packing and cleaning.
    • Useful capacity for solo hikers or smaller groups.

    Cons

    • Rigid shape can compete with sleeping gear in a backpack.
    • May be more container than a short solo trip requires.
    • Acceptance depends on the rules of the destination.

    💡 Practical Tip

    Pack dense foods in flat pouches rather than bulky packets. The BV500’s cylindrical space is easier to use when meals can be stacked and compressed.

    2. BearVault BV450

    The BearVault BV450 takes the same general approach as the larger model but suits shorter trips, solo campers, and hikers who carry less food. Its clear body and broad access make meal planning straightforward, while the smaller size is easier to fit in a daypack or compact backpacking load.

    The limitation is simple: reduced capacity means less flexibility. It may work well for a brief trip, but a group or a longer route may need another container or a second storage method. Confirm the current model details and local approval before relying on it.

    Pros

    • More manageable for smaller food loads.
    • Transparent design supports quick inventory checks.
    • Suitable for hikers who prefer a rigid container without the largest format.

    Cons

    • Can fill quickly with high-calorie meals and snacks.
    • Still has the fixed shape associated with hard canisters.
    • Not every area accepts every canister model.

    🌲 Quick Tip

    Estimate food by volume as well as calories. Dense trail food may meet energy needs but still fill a smaller canister faster than expected.

    3. Garcia Machine Bear-Resistant Container

    The Garcia Machine bear canister is a traditional rigid option used by backpackers who want a sturdy, enclosed food-storage solution. Its screw-top format is intentionally less casual than a household container, which is useful when the priority is keeping wildlife from accessing food rather than opening the lid quickly.

    Compared with a transparent canister, the opaque body makes it harder to check supplies at a glance. Packing discipline matters. Organize meals in separate bags and keep a written inventory so you don’t need to empty the container at camp.

    Pros

    • Rigid construction provides a durable food-storage shell.
    • Useful for trips where a conventional canister is required.
    • Can protect food from crushing inside a packed load.

    Cons

    • Opaque construction makes visual inventory less convenient.
    • Screw-top access may take more effort than a household lid.
    • Its shape may be awkward in smaller packs.

    🛠️ Packing Tip

    Place the foods you’ll eat first near the top and reserve the bottom for meals planned later in the trip. This reduces unnecessary unpacking at camp.

    Large Containers for Car Camping and Group Food

    4. Counter Assault Bear Keg

    The Counter Assault Bear Keg is a larger rigid food container aimed at camps that need more storage than a compact backpacking canister provides. It can make sense for vehicle-supported camping, base camps, and groups sharing cookware, snacks, or packaged meals.

    Its size is also its defining weakness. A large bear keg is difficult to carry far from a vehicle, and its capacity can encourage people to bring more scented items than they can manage properly. Use it as part of a wider food-storage plan, not as permission to leave loose food around camp.

    Pros

    • Provides more room for shared food supplies.
    • Rigid walls help protect contents from crushing.
    • Better suited to stationary camps than lightweight backpacking.

    Cons

    • Heavy or bulky for long-distance carrying.
    • May be unnecessary for one or two campers.
    • Approval should be checked for the exact destination.

    🏕️ Camp Tip

    Separate cooking equipment, fuel, and personal items from food before loading the keg. A simple inventory prevents the container from becoming an unorganized communal box.

    5. Bear-Resistant Food Locker

    A fixed bear-resistant food locker can be the most convenient option at an established campground when one is provided and maintained by the site operator. It offers generous space for coolers, dry goods, toiletries, and other scented items without adding a container to your vehicle load.

    This is not a product to purchase for remote backpacking. Availability, cleanliness, and condition vary by campground, so inspect the door and latch before storing food. Never assume a locker is available unless the site information confirms it.

    Pros

    • High-capacity storage for families and car campers.
    • Removes the need to transport a large canister between vehicle and campsite.
    • Can accommodate more than food when local rules allow it.

    Cons

    • Only useful where a suitable locker is provided.
    • Condition and cleanliness may vary.
    • Not an option for dispersed or backcountry camping.

    🔍 Inspection Tip

    Before placing food inside, check that the latch closes fully and that the door does not sit ajar. Report damaged hardware to the campground host or managing agency.

    6. Gamma Seal Food Storage Bucket

    A Gamma Seal bucket is convenient for organizing dry food during car camping because its rotating lid is easier to open than many snap-on bucket covers. It can keep flour, grains, snacks, and packaged meals together and may help protect contents from rain or accidental spills.

    However, a sealed household-style bucket should not automatically be treated as bear proof. Unless the exact product is approved for bear resistance in your destination, use it inside a required locker or approved container. Its value is organization and weather protection, not a substitute for wildlife-rated storage.

    Pros

    • Convenient lid access for campsite meal preparation.
    • Useful for sorting dry goods in a vehicle.
    • Rigid sides protect delicate packages from crushing.

    Cons

    • Not necessarily resistant to bears or other wildlife.
    • Can be awkward to carry over uneven ground.
    • Requires an approved secondary storage method where rules demand one.

    🧼 Storage Tip

    Use separate washable bags inside the bucket for greasy snacks and powdered foods. That makes spills easier to contain and cleanup less unpleasant.

    Soft Bear-Resistant Bags for Weight-Conscious Trips

    7. Ursack Major

    The Ursack Major uses a flexible fabric format instead of a hard canister. That can be attractive to backpackers who want lower bulk and a bag that becomes easier to pack as food is consumed. It can also fit into irregular spaces around clothing or a sleeping bag.

    Soft bear-resistant storage requires more attention to closure, placement, and local rules. A bag may be easier to carry, but it doesn’t provide the same rigid protection for fragile food or the same simple visual check as a clear canister. Verify whether the specific model is accepted where you plan to camp.

    Pros

    • Flexible shape uses backpack space efficiently.
    • Often more convenient for irregular loads than a rigid canister.
    • Useful for hikers prioritizing packability.

    Cons

    • Correct closure is essential.
    • Soft sides don’t protect contents from crushing as well as hard plastic.
    • Approval varies by agency and destination.

    🪢 Closure Tip

    Practice closing the bag at home with gloves or cold hands. The method should be familiar before you’re trying to secure food after dark or in wet weather.

    8. Ursack Major XL

    The Ursack Major XL extends the soft-bag concept for campers carrying more food or traveling with a partner. Its flexible construction can be easier to distribute through a large pack than one oversized hard container, though the load still needs to be packed carefully.

    Large soft bags bring a practical compromise: they can hold more, but a full load may become difficult to fit into the available exterior attachment points or storage area. Do not attach food storage to the outside of a pack unless the manufacturer and local land manager allow that arrangement.

    Pros

    • More practical for larger food loads than a small soft bag.
    • Flexible format can fit changing pack contents.
    • Suitable for hikers who dislike the dead space around hard canisters.

    Cons

    • A full bag can be cumbersome to position securely.
    • Not accepted everywhere a hard canister is required.
    • Does not offer hard-sided protection for breakable food.

    🎒 Pack Tip

    Keep the heaviest food close to the center of your pack rather than at the bottom or far outside. That helps preserve balance while the flexible container changes shape.

    9. Ursack AllMitey

    The Ursack AllMitey is intended for campers who want a soft storage system that covers a wider range of scented supplies than a food-only bag. That may include toiletries, snacks, and other items that should be secured together at camp.

    Its broader purpose can simplify organization, but it doesn’t remove the need to separate fuel, food, and chemical products where required. Campers should also distinguish between bear resistance and protection from every animal. Local rules and the specific product label remain decisive.

    Pros

    • Useful for consolidating multiple scented categories.
    • Flexible construction suits backpacking loads.
    • Can reduce the number of separate storage units needed.

    Cons

    • May be more capacity or complexity than a solo camper needs.
    • Soft storage requires careful closure and placement.
    • Not a universal solution for all bear species or regulations.

    🧴 Organization Tip

    Make a short scent inventory before leaving home. Include sunscreen, lip balm, toothpaste, medicines, and trash—not just meals.

    Secondary Containers for Odor and Moisture Control

    10. LOKSAK OPSAK

    The LOKSAK OPSAK is best understood as an odor-control and moisture-barrier layer, not as a standalone bear canister. It can be useful inside a hard container or approved bear-resistant bag, particularly for coffee, snacks, dehydrated meals, and trash that may carry strong smells.

    The bag’s usefulness depends on keeping the closure clean and undamaged. It also cannot stop a bear from accessing food if it is left by itself. Think of it as part of a layered food-storage system rather than the main security device.

    Pros

    • Helps separate smelly foods and waste inside primary storage.
    • Flexible and easy to pack around other items.
    • Useful for reducing leaks and moisture exposure.

    Cons

    • Not bear proof on its own.
    • Closure performance depends on proper use and condition.
    • Adds an extra packing step.

    🗑️ Waste Tip

    Use a separate odor-barrier bag for wrappers and used meal packaging, then place it back inside the approved primary container before leaving camp.

    11. Sea to Summit Lightweight Dry Bag

    A lightweight dry bag can protect food from rain, splashes, and damp ground during canoe trips, wet-weather camping, and vehicle travel. It is also handy for grouping meal ingredients inside a larger food-storage system.

    Most ordinary dry bags are not bear-resistant products. The roll-top closure is designed for water protection, not necessarily for stopping a bear. Use one inside a certified container or campsite locker when wildlife rules require stronger protection.

    Pros

    • Helps keep packaged food dry.
    • Flexible shape works well in backpacks and dry boxes.
    • Useful for separating meals from clothing and equipment.

    Cons

    • Not a replacement for a bear canister or approved bear-resistant bag.
    • Roll-top closures can be inconvenient when frequently opened.
    • Soft fabric does not protect delicate items from heavy pressure.

    💧 Weather Tip

    Dry the outside of the bag before placing it inside a pack or canister. Trapped condensation can affect paper labels and cardboard meal packaging.

    12. Certified Bear-Resistant Food Bag

    A certified bear-resistant food bag can offer a middle ground between a rigid bear canister and a basic odor-control sack. The flexible shape may suit backpackers who need to use every available pocket, while the tested construction is intended to address wildlife access more directly than an ordinary dry bag.

    The phrase “bear resistant” is not enough by itself. Check the exact model, closure method, certification or agency acceptance, and storage instructions. A product approved in one area may not meet the requirements of another park, particularly where grizzly bear management rules are stricter.

    Pros

    • Can reduce packed bulk compared with a rigid container.
    • Flexible storage may suit long or irregular backpacking loads.
    • Potentially useful for campers who need more capacity than a small canister.

    Cons

    • Approval details require careful verification.
    • Loading and closure technique matter greatly.
    • May not protect food from crushing as well as hard-sided storage.

    ✅ Verification Tip

    Save a screenshot or note of the park’s approved-products list before your trip. Product names can look similar, while acceptance may apply only to a specific model.

    How to Choose Food Storage for Your Trip

    Match the Container to the Rules

    Start with the land manager, not the product shelf. Search the official regulations for the exact trail, campground, or wilderness zone. Requirements may differ between black bear habitat and grizzly bear country, and a container that works for car camping may not satisfy backpacking rules.

    Estimate Volume Realistically

    Count meals, snacks, drink mixes, cooking ingredients, toiletries, and trash. High-calorie foods can be compact, but bulky packaging wastes valuable space. Repackage dry goods at home when allowed, label them clearly, and keep emergency food separate from the meals you expect to eat first.

    Consider Weight and Pack Shape

    A hard canister is simple and protective, but it keeps a fixed shape. A soft bag may use space more efficiently, yet it demands better closure discipline. For a short solo trip, a smaller container may be easier; for families, vehicle-based camps, or longer routes, capacity may matter more than minimum weight.

    Plan Where It Will Stay at Camp

    Bear safety includes storage location and camp behavior. Follow local instructions about lockers, hanging systems, distance from sleeping areas, and whether food can be left unattended.

    Don’t leave food in a tent, and never count pepper spray or counter assault bear spray as a food-storage method. Bear spray is an emergency deterrent, not a container.

    Common Mistakes to Avoid

    • Assuming a waterproof dry bag is automatically bear resistant.
    • Buying a container before checking current park approval.
    • Ignoring toothpaste, sunscreen, medicine, cookware residue, or trash.
    • Leaving a full food container beside the tent overnight.
    • Using loose bags inside a canister without an inventory system.
    • Attaching food storage outside a backpack without checking local guidance.
    • Putting hot, wet, or leaking food directly into long-term storage.

    Frequently Asked Questions

    What are some good bear-proof food containers for camping?

    Hard canisters such as the BearVault BV500, BearVault BV450, and Garcia container are common choices, while approved soft bags may reduce pack bulk. The right option depends on the destination’s rules, trip length, and food volume.

    How do you keep food safe from bears while camping?

    Use the required bear-resistant container or campsite locker, keep all scented items together, maintain a clean cooking area, and follow local instructions about storage distance and placement. Never store food in a tent.

    Can bears smell food in bear canisters?

    Yes. A bear canister is designed to block access, not eliminate scent. Keep the container closed, avoid spills, clean cookware properly, and store it as the land manager directs.

    Do bear-proof containers work?

    Approved bear-resistant containers can prevent access when used correctly, but they are not magic shields. Closure, condition, placement, and compliance with local guidance all matter.

    Is a bear bag better than a bear canister?

    A bag may be lighter and more flexible, while a canister is rigid, easy to inspect, and sometimes required by regulation. Choose based on approved products first, then compare weight, capacity, and packability.

    Final Verdict

    The best camping food containers — bear safe for your trip — are the ones approved for the destination and large enough for every scented item you’ll carry. A hard canister is usually the simpler choice for regulated backpacking and straightforward organization. A certified soft bag can appeal to weight-conscious hikers, while a bear keg, locker, or sealed bucket is more practical around a vehicle.

    Before purchasing, check the current rules, calculate food volume, and decide whether weather protection, low bulk, or rigid protection matters most. Add odor-barrier bags only as a secondary layer, and remember that careful camp storage is just as important as the product itself.

  • Best Camping Blankets for Cool Nights: 10 Top Picks

    Finding the best camping blankets for cool nights means balancing warmth, packed size, weather resistance, and comfort. A blanket that feels cosy beside a campfire may be too bulky for a backpack, while an ultralight quilt may not offer enough coverage for two people or a windy campsite. The right choice depends on how you camp, how much space you have, and whether you need a simple layer or a true sleeping-system supplement.

    Below, you’ll find ten well-known camping blanket styles and products, from puffy synthetic designs to down quilts and practical double-size options. You’ll also see which features matter, where each blanket fits best, and what limitations to consider before adding one to your outdoor kit.

    How to Choose a Camping Blanket for Cool Weather

    A camping blanket is usually more versatile than a sleeping bag. You can drape it over your shoulders, use it around a fire, spread it inside a tent, or add it on top of a sleeping bag. That flexibility is useful, but blankets don’t always provide the same edge-to-edge insulation or draft control as a zipped sleeping bag.

    Start by matching the blanket to the trip rather than choosing by appearance alone. A car camper can carry a full-size, heavily insulated option, while a backpacker may need a lighter blanket that compresses into a small stuff sack.

    • Insulation: Down is light and compressible, while synthetic fill usually handles damp conditions more forgivingly.
    • Shell fabric: A water-resistant outer can help with dew, light moisture, and accidental spills.
    • Size: Check the open dimensions if you want full-body coverage or room for two people.
    • Weight and packability: These matter most for hiking, bike touring, and air travel.
    • Attachment points: Snaps, corner loops, and foot pockets can stop the blanket from sliding away overnight.
    • Care: Confirm whether the blanket can be machine washed and how the manufacturer recommends drying it.
    • Temperature expectations: A blanket’s warmth depends on clothing, wind, ground insulation, and the rest of your sleep system.

    🛠️ Practical Tip

    Check the blanket’s open dimensions, not just its packed size. A compact bag can hide a narrow sleeping surface, which may be fine for sitting outside but frustrating when used as a bed layer.

    For safety in genuinely cold conditions, don’t treat a blanket as a substitute for a properly rated sleeping bag or insulated sleeping pad. The National Park Service guidance on hypothermia explains why staying dry, insulated, and protected from wind matters in cold environments.

    Quick Comparison of the Best Camping Blankets for Cool Nights

    Product Best For Insulation Style Useful Feature Main Limitation
    Rumpl Original Puffy Versatile camp use Synthetic Corner loops and cape-style use May be bulkier than down
    Rumpl NanoLoft Puffy Packable synthetic warmth Synthetic Compact construction Specific versions vary
    Kelty Bestie Car camping and lounging Synthetic Soft, blanket-like feel Less focused on ultralight travel
    Horizon Hound Down Camping Blanket Lightweight warmth Down High warmth-to-weight potential Needs more care around moisture
    Therm-a-Rest Argo Sleeping-system use Down or synthetic, depending on version Bed-focused design Not as casual as a simple throw
    NEMO Victory Blanket Picnics and campsite comfort Insulated blanket construction Durable outdoor surface Can be less compact than backpacking quilts
    Kammok Mountain Blanket Multi-use outdoor comfort Synthetic Wearable and ground-use features Heavier than minimalist quilts
    Sea to Summit Ember Ultralight backpacking Down Quilt-style attachment system Requires careful setup
    Enlightened Equipment Revelation Custom sleep systems Down Adjustable quilt configuration Less instant to use than a throw blanket
    Rumpl Everywhere Towel Light camp coverage and travel Lightweight textile Packable, multipurpose format Not a replacement for a cold-weather quilt

    Insulated Puffy Blankets

    1. Rumpl Original Puffy

    The Rumpl Original Puffy is one of the most recognisable camping blanket designs, built around a quilted puffy exterior and synthetic insulation. Its corner loops help secure it to a sleeping pad or attach it to other gear, and the cape-style arrangement makes it useful while sitting around camp. The blanket is aimed at people who want one adaptable piece for festivals, road trips, backyard use, and cool evenings outdoors.

    Its synthetic construction is a practical choice for users who may encounter dew, damp grass, or unpredictable camp conditions. It generally won’t compress as small as a comparable down blanket, but it avoids some of the moisture sensitivity associated with down. The exact size, shell fabric, and fill can vary by version, so check the current product details before buying.

    Pros

    • Versatile shape for sitting, wrapping, and layering over a sleeping bag.
    • Corner loops add useful attachment options.
    • Synthetic fill suits general outdoor use and variable moisture conditions.

    Cons

    • Likely to take more room in a backpack than a lightweight down quilt.
    • May provide less built-in draft control than a sleeping bag.
    • Different sizes and editions can make direct comparisons confusing.

    💡 Tip

    Use the corner loops to anchor the blanket over a sleeping pad on breezy nights. This reduces sliding and can make the same blanket more useful inside a tent.

    2. Rumpl NanoLoft Puffy Blanket

    The NanoLoft Puffy is designed for people who like the feel and flexibility of a puffy blanket but want a more packable synthetic option. Its construction makes it suitable for travel, camping, and shoulder-season lounging, especially when you don’t want to carry down around damp ground or wet gear. It can also work as an extra layer over another sleep system.

    The main appeal is convenience. Synthetic insulation is usually easier to live with in mixed outdoor conditions, though the trade-off is that packability and weight may not match the smallest down quilts. The product family includes different sizes and editions, so make sure the version you’re considering has the coverage you need.

    Pros

    • Packable synthetic format for travel and general camping.
    • Useful as a blanket, wrap, or extra top layer.
    • More forgiving than down if exposed to occasional dampness.

    Cons

    • Not every version offers the same dimensions or features.
    • May be more insulation than needed for warm-weather lounging.
    • Still lacks the full draft protection of an enclosed sleeping bag.

    ✨ Style Tip

    For car camping, choose the size that gives you comfortable shoulder coverage rather than automatically selecting the smallest packed option. A little extra surface area is useful when the blanket is shared or draped across a bed.

    3. Kammok Mountain Blanket

    The Kammok Mountain Blanket takes a more rugged, multi-use approach. It is intended for outdoor lounging and can be used as a ground cover, wrap, or campsite layer, making it a practical option for people who move between a camp chair, picnic area, and tent. Its design is less focused on ultralight backpacking and more focused on day-to-day versatility.

    This type of blanket works well for car campers, festival visitors, and families who want a durable piece of camp gear that can handle varied use. Before buying, confirm the current material details and dimensions, because models and regional listings may differ. It may feel like too much blanket for a solo hiker counting every gram.

    Pros

    • Designed for more than one campsite use.
    • Good fit for lounging, picnics, and relaxed camp setups.
    • Practical for users who value versatility over minimum weight.

    Cons

    • Less suited to strict ultralight packing lists.
    • May not provide the same sleep-focused features as a quilt.
    • A larger, tougher design can take up more storage space.

    🏕️ Practical Tip

    If the blanket will touch grass, sand, or picnic tables, look for a care routine that suits frequent washing. A versatile camp blanket is only useful if you’re comfortable cleaning it after messy outings.

    Soft Synthetic Options for Car Camping

    4. Kelty Bestie Blanket

    The Kelty Bestie is built for comfort-first camping rather than gram-counting. Its soft feel and straightforward rectangular shape make it easy to spread over a camp chair, use inside a tent, or share beside a fire. The design is especially appealing to weekend campers who want something that feels more like a familiar blanket than technical sleep equipment.

    It is a sensible match for car camping, casual outdoor gatherings, and cool evenings when convenience matters more than the smallest packed size. The Bestie may not be the first pick for long-distance backpacking, and you should verify the exact dimensions and packed weight for the model available in your area.

    Pros

    • Comfort-oriented design for relaxed campsite use.
    • Simple to spread, fold, and share.
    • Suitable for beginners who don’t want a complicated quilt system.

    Cons

    • Not aimed at the lightest backpacking setups.
    • May be less weather-focused than a dedicated technical blanket.
    • Rectangular designs can leave more exposed edges in strong drafts.

    💡 Tip

    Pair a soft camp blanket with an insulated sleeping pad rather than placing it directly beneath you. The ground can draw away warmth, and a pad is designed to create a more reliable barrier.

    5. NEMO Victory Blanket

    The NEMO Victory Blanket is a good example of a campsite blanket designed to handle more than one role. Its outdoor-oriented construction is useful for sitting on the ground, covering a picnic area, or adding comfort to a tent floor. That makes it more attractive to families and car campers than to hikers seeking a minimal sleep layer.

    Its value lies in convenience and coverage. A blanket that can move from the campsite to a picnic or tailgate earns its space in a vehicle, but it may be too large or heavy for a small backpack. Check the current product information for the exact surface materials, dimensions, and packed format.

    Pros

    • Useful for ground sitting, picnics, and camp comfort.
    • Outdoor-focused design offers more flexibility than a household throw.
    • Good choice for car campers carrying shared family gear.

    Cons

    • Not primarily an ultralight sleeping blanket.
    • Ground-use features may be unnecessary for minimalist campers.
    • Coverage and insulation priorities can vary by version.

    🛠️ Practical Tip

    For family camping, measure the floor space in your tent or shelter before choosing a large blanket. A wide design is comfortable, but it shouldn’t block door access or cover ventilation areas.

    6. Rumpl Everywhere Towel

    The Rumpl Everywhere Towel is not a deep-winter blanket, but it deserves consideration for lightweight camping and travel. It offers a compact textile layer for drying, sitting, covering gear, or taking the chill off during mild evenings. Its multipurpose format can be useful when every item in a small pack needs to do more than one job.

    Don’t confuse portability with heavy insulation. This type of product is better for warm-season camping, beach trips, festivals, and travel than for cold overnight sleeping. It may complement a warmer blanket, but it shouldn’t be selected as the only thermal layer for cool or exposed campsites.

    Pros

    • Lightweight and easy to pack for travel.
    • Serves several practical campsite functions.
    • Useful for warm conditions and quick outdoor stops.

    Cons

    • Limited insulation compared with puffy blankets and quilts.
    • Not intended to replace a cold-weather sleep system.
    • Less suitable when wind protection and warmth are priorities.

    ✨ Style Tip

    Use a lightweight multipurpose layer as a daytime accessory, then reserve your insulated blanket for the coldest part of the evening. This keeps the main warmth layer cleaner and reduces unnecessary wear.

    Down Blankets and Backpacking Quilts

    7. Horizon Hound Down Camping Blanket

    The Horizon Hound Down Camping Blanket is aimed at campers who want down’s low weight and compact packability. A down blanket can be particularly appealing for backpacking, travel, and cool-weather camp use because it provides substantial warmth without the bulk of many synthetic alternatives. Its open design also lets you use it as a wrap rather than locking you into a sleeping-bag shape.

    Down does require more care around moisture. Condensation, wet ground, and rain can reduce its practical performance, so it works best with a dry shelter and sensible storage. Check the current fill details, size, and shell specifications before purchase, since listings can differ.

    Pros

    • Strong warmth-to-weight potential for hikers and backpackers.
    • Compact format can save space in a pack.
    • Flexible for sleeping, sitting, and layering.

    Cons

    • Needs protection from prolonged moisture.
    • May cost more than basic synthetic blankets, depending on the model.
    • Open sides can allow drafts if used without tucking or attachment.

    💡 Tip

    Store a down blanket in a loose storage sack at home rather than leaving it compressed between trips. Follow the manufacturer’s washing and drying instructions, since incorrect care can damage loft.

    8. Sea to Summit Ember Quilt

    The Sea to Summit Ember is a quilt-style sleep system for backpackers who want to reduce weight without giving up the ability to adjust coverage. Attachment points and a footbox-style arrangement help it function more like bedding than a basic camp throw. It can be opened wider in milder weather and drawn closer when the temperature drops.

    This flexibility comes with a small learning curve. Quilt users need to manage the edges, attachment system, and drafts more actively than sleeping-bag users. For experienced backpackers or people building a lightweight sleep kit, that trade-off can make sense; beginners may prefer a simpler blanket or enclosed bag.

    Pros

    • Designed specifically for lightweight sleep systems.
    • Adjustable format can suit changing temperatures.
    • Packable choice for backpacking and long-distance travel.

    Cons

    • Requires more setup than a standard rectangular blanket.
    • Draft control depends on correct attachment and positioning.
    • Exact warmth and dimensions vary by version.

    🛠️ Practical Tip

    Practice attaching the quilt to your sleeping pad before a trip. A few minutes at home can reveal whether the straps, footbox, and edge adjustments feel intuitive in the dark.

    9. Enlightened Equipment Revelation

    The Enlightened Equipment Revelation is an adjustable down quilt rather than a casual festival blanket. It is built for people who want to tune their sleeping setup through features such as a footbox and adaptable opening. Depending on the selected configuration, it can be tailored to different users, climates, and packing priorities.

    This customisable approach suits frequent backpackers who understand their sleeping preferences and are willing to make more detailed choices. It may be unnecessary for a first-time car camper who simply needs something to throw over their shoulders. Because specifications can be selected or vary by configuration, review the exact version carefully before ordering.

    Pros

    • Adjustable design supports different sleeping styles.
    • Strong fit for backpackers building a lightweight sleep system.
    • Can offer more control than a fixed-format blanket.

    Cons

    • More decisions are involved than with a ready-to-use camp blanket.
    • Open quilt construction requires attention to draft management.
    • Custom options can make direct price and specification comparisons difficult.

    ✨ Style Tip

    Choose quilt dimensions based on your sleeping position and shoulder width, not just your height. Side sleepers often benefit from enough width to pull the top edge around their shoulders.

    10. Therm-a-Rest Argo Blanket

    The Therm-a-Rest Argo sits between a conventional camping blanket and a sleep-focused quilt. Its design is intended to provide comfortable coverage in a shelter, and it can be useful for people who want a more structured bed layer without carrying a full sleeping bag. This makes it worth considering for lightweight campers who still prefer a familiar blanket shape.

    The Argo’s appeal depends on how you sleep. It is more purpose-built than a simple puffy camp blanket, but it may not offer the same casual flexibility around a fire. Verify the model’s current insulation type, dimensions, and attachment features because product specifications can change across editions.

    Pros

    • More sleep-focused than a basic outdoor throw.
    • Can add warmth without fully enclosing the user.
    • Potentially useful for campers who prefer blanket-style bedding.

    Cons

    • May not be the best choice for casual daytime use.
    • Open coverage can still allow drafts in exposed conditions.
    • Product versions should be checked carefully for exact specifications.

    🏕️ Practical Tip

    If you tend to move around during sleep, compare the blanket’s width and attachment options with your sleeping pad. A little extra room can improve comfort, but too much loose fabric may shift during the night.

    Which Camping Blanket Style Fits Your Trip?

    The best option changes with the kind of camping you do. A family at a drive-in campsite usually has different priorities from a solo backpacker carrying a full sleep system on their back. Use the following quick matches as a starting point:

    • For car camping: Kelty Bestie, NEMO Victory, or Kammok Mountain Blanket offer convenient coverage and relaxed campsite use.
    • For versatile everyday camp use: Rumpl Original Puffy and Rumpl NanoLoft are adaptable choices for wrapping, lounging, and layering.
    • For backpacking: Horizon Hound, Sea to Summit Ember, Enlightened Equipment Revelation, or a comparable down quilt prioritise packability.
    • For damp or changeable conditions: Synthetic options are often easier to manage than down, though a waterproof shelter and dry storage still matter.
    • For beginners: A simple rectangular blanket is easier to use than a quilt with multiple straps and adjustments.
    • For cold sleeping: Focus on an appropriate sleep system, insulated pad, dry shelter, and clothing rather than relying on a blanket alone.

    💡 Tip

    Think about your coldest realistic use, not the warmest afternoon. A blanket chosen for a mild festival may not provide enough coverage for an exposed mountain campsite or late-season overnight trip.

    Care, Storage, and Safe Use

    Camping blankets stay useful longer when they’re kept dry and stored according to their insulation type. Shake out dirt before packing, avoid dragging delicate shells over rough surfaces, and let damp gear dry fully before putting it away. Down generally needs more careful washing and drying, while many synthetic blankets are easier to maintain, though the label should always take priority.

    At night, combine the blanket with the rest of your system. Clothing, a hat, a sleeping pad, a wind-protected shelter, and a properly rated sleeping bag or quilt all influence warmth. If conditions are colder than expected, don’t rely on a loose blanket alone.

    🛠️ Practical Tip

    Pack a waterproof liner or dry bag for any insulating blanket on a hike. Even a well-designed shell can become less effective if the insulation is soaked inside a wet pack.

    Frequently Asked Questions

    What is the best blanket to use on cold nights?

    The best option depends on the temperature, moisture, and your sleep system. For casual camping, a well-insulated synthetic blanket is versatile; for backpacking, a down quilt can reduce weight and packed size. In truly cold conditions, use a properly rated sleeping bag or quilt rather than relying on a blanket alone.

    Are camping blankets warmer than sleeping bags?

    Usually not in terms of draft control. A sleeping bag encloses more of the body and is designed to retain heat around the edges. Camping blankets are more flexible, but they can leave gaps that allow cold air in.

    Is down or synthetic insulation better for camping?

    Down generally offers excellent warmth for its weight and packs compactly, while synthetic insulation is usually more forgiving around damp conditions and easier to choose for general-purpose camping. Your climate, packing style, and care habits should guide the decision.

    What size should a camping blanket be?

    Choose a size that covers your shoulders and legs when seated or lying down. For two people, check the fully opened dimensions rather than assuming a standard single blanket will provide enough coverage.

    Can a camping blanket replace a sleeping bag?

    It can in mild, sheltered conditions if the blanket is appropriate for the temperature and used with a suitable pad. For colder, windy, or unpredictable trips, a sleeping bag or adjustable quilt usually provides better draft protection and more dependable coverage.

    How do I keep a blanket warm and dry at camp?

    Keep it off wet ground, use a shelter with good ventilation, and store it in a dry bag during transport. Dry damp insulation before long-term storage, and follow the manufacturer’s care instructions for washing and compression.

    Final Verdict

    The best camping blankets for cool nights aren’t all designed for the same job. Puffy synthetic blankets such as the Rumpl Original, Rumpl NanoLoft, Kelty Bestie, and similar options make sense for car camping, festivals, and flexible campsite use. Down blankets and quilts from brands such as Horizon Hound, Sea to Summit, Enlightened Equipment, and Therm-a-Rest are more appealing when low weight and compact packing matter.

    Before buying, decide whether you need a cosy camp layer, a two-person blanket, or a true sleep-system component. Check the open size, insulation type, packed weight, attachment features, and moisture-management needs. With those trade-offs in mind, you’ll have a better chance of choosing a blanket that keeps you comfortable without carrying more gear than your trip requires.

  • Best Heavy-Duty Camping Chairs for Adults: 10 Top Picks

    A weak frame, narrow seat, or awkward carry bag can ruin an otherwise comfortable campsite setup. The best heavy-duty camping chairs for adults need to do more than support extra weight: they should feel stable, fold without a fight, and suit the way you actually camp. Some are oversized and padded for fireside comfort, while others trade a little cushioning for easier transport to a trailhead, sports field, or outdoor event.

    This roundup compares ten well-known options by support, portability, design, setup, and likely use. You’ll also find practical buying advice for choosing a camping chair that fits your body, vehicle, storage space, and preferred level of comfort.

    What Makes a Heavy-Duty Camping Chair Different?

    A heavy-duty chair generally combines a stronger frame, reinforced fabric, and a higher stated weight capacity than a standard folding chair. That doesn’t automatically make it comfortable or portable. A chair can support a high load yet still have a short back, a cramped seat, or a bulky folded shape.

    Pay attention to the manufacturer’s stated capacity, but don’t treat that number as the only measure of quality. Frame geometry, fabric tension, hinges, feet, armrests, and the way the chair distributes weight all affect how secure it feels.

    • Capacity: Choose a published weight limit with a sensible margin above the user’s body weight.
    • Seat dimensions: An oversized seat can improve comfort, especially with winter clothing, but it may take more room in a vehicle.
    • Frame construction: Steel is common for sturdy camp chairs, while aluminum can reduce carry weight.
    • Padding and support: Padded backs and seats feel better around camp, but they can add bulk and retain moisture.
    • Portability: Check the folded size, included bag, carry straps, and total chair weight.
    • Stability: Wide feet and a rigid frame are useful on grass, packed soil, and uneven lawn areas.

    🛠️ Practical Tip

    Measure the space between your vehicle’s wheel wells before buying an oversized chair. A model that fits comfortably at camp may be inconvenient if it cannot slide into your storage area.

    Best Heavy-Duty Camping Chairs for Adults Compared

    Product Best For Notable Design Portability Main Drawback
    ALPS Mountaineering King Kong Chair Maximum support and storage Wide seat, strong frame, side pockets Best for car camping Bulky to carry
    Coleman Big-N-Tall Quad Chair Large adults wanting a familiar camp chair Oversized seat and cup holder Moderate Less compact than standard chairs
    Kijaro XXL Dual Lock Chair Camping and sporting events Locking frame and ventilated mesh Moderate Rigid lock can add folded bulk
    GCI Outdoor Big Comfort Relaxed sitting around camp Wide seat and padded support Moderate Not aimed at backpacking
    Timber Ridge XXL Director’s Chair Table-side meals and base camps High seat and broad armrests Vehicle transport Director-style frames are sizable
    YETI Trailhead Camp Chair Frequent campers prioritizing finish quality Supportive seat and refined folding design Moderate Usually a bigger investment
    NEMO Stargaze Reclining Camp Chair Reclining comfort Suspended seat and rocking motion Moderate More moving parts
    Helinox Chair One XL Portable comfort with lower carry weight Lightweight folding frame Strong portability Less traditional padding
    KingCamp Oversized Padded Moon Saucer Lounging and fireside use Deep padded seat Best for car camping Wide packed profile
    GCI Outdoor RoadTrip Rocker XL Rocking outdoors Spring-action rocking base Moderate Rocking hardware adds weight

    Specifications and availability can change between versions and retailers, so confirm the current capacity, dimensions, and packed weight before ordering. The comparison is most useful for narrowing the design that matches your priorities.

    💡 Tip

    If a chair will stay in a tent vestibule or under a tarp, compare its folded length as well as its width. Packed shape often matters more than listed chair height.

    Heavy-Duty Camping Chair Reviews

    1. ALPS Mountaineering King Kong Chair

    The ALPS Mountaineering King Kong is one of the most recognizable oversized camp chairs for adults who want a broad seat and a sturdy feel. Its steel frame, durable fabric, padded armrests, and multiple storage pockets make it particularly practical for car camping, tailgating, and long evenings around a fire. The chair is commonly listed with an 800-pound weight capacity, though buyers should verify the current product listing and instructions.

    The main trade-off is portability. This is not a lightweight camp chair for backpacking or a long walk from a parking area.

    It makes more sense when storage space and comfort matter more than every ounce. The side pockets are useful for a phone, book, bottle, or small camp accessories.

    Pros

    • High listed weight capacity for a wide range of adult users.
    • Roomy seat and padded arms support longer sitting sessions.
    • Several storage pockets reduce the need for a separate side table.

    Cons

    • Heavy and bulky beside lightweight folding chairs.
    • Too large for many backpacking or compact travel setups.

    🛠️ Practical Tip

    Use the chair’s storage pockets for lightweight items only. Keeping hard bottles or metal tools in a side pocket can make the chair feel unbalanced when you stand up.

    2. Coleman Big-N-Tall Quad Camping Chair

    Coleman’s Big-N-Tall Quad is designed for adults who find standard camping chairs too narrow or too low. The oversized seat, sturdy-looking construction, cup holder, and carry bag give it the familiar format many people expect from a folding camp chair, with more room than a conventional model. It suits campsites, outdoor concerts, sports sidelines, and lawn use.

    Its traditional four-leg design is straightforward to open and close, which is helpful for beginners. It does, however, take up more packed space than Coleman’s standard chairs. Buyers should also check the current version because product dimensions, fabric details, and capacity information may vary by listing.

    Pros

    • Familiar folding-chair setup with no complicated assembly.
    • Roomier seat than a standard camping chair.
    • Useful cup holder and included carry bag.

    Cons

    • Not a practical choice for long-distance carrying.
    • Limited ventilation compared with chairs that use large mesh panels.

    ✨ Style Tip

    A roomy quad chair works well beside a camp table because its upright seat makes meals and card games easier than a deep lounge chair.

    3. Kijaro XXL Dual Lock Portable Sports and Camping Chair

    The Kijaro XXL Dual Lock combines an oversized seat with a locking frame intended to improve rigidity once the chair is open. Its ventilated mesh panels can be appealing in warm weather, especially at sporting events, outdoor festivals, and summer camps where a fully padded seat may feel hot. The design also includes practical features such as a cup holder and carry strap or bag, depending on the model.

    The dual-lock mechanism is its defining feature. It can make the chair feel more secure when properly engaged, but users need to confirm that the frame is fully open before sitting. This is a good middle ground for people who want a heavy-duty folding chair without moving all the way to a very deep lounge design.

    Pros

    • Locking frame helps create a firm open position.
    • Mesh sections improve airflow in warm conditions.
    • Useful for both camping and portable spectator seating.

    Cons

    • The locking structure may make folding less quick than a basic chair.
    • Mesh is cooler but may feel less plush than a fully padded design.

    💡 Tip

    Practice releasing the dual-lock mechanism at home before taking the chair to an event. Learning the release points prevents forcing the frame or pinching fingers during breakdown.

    4. GCI Outdoor Big Comfort Camping Chair

    The GCI Outdoor Big Comfort is built around a broad seat and relaxed sitting position rather than minimum packed weight. It is a sensible fit for car campers, backyard gatherings, and people who want extra room without choosing a recliner. GCI’s folding designs often focus on simple opening mechanisms and practical carry features, making this type of chair approachable for first-time buyers.

    Its comfort advantage comes from the seat width and supportive proportions, not necessarily from thick cushioning. That may be preferable in hot weather, since less padding can dry faster and feel less warm. As with any oversized chair, check the folded dimensions before assuming it will fit easily in a small trunk.

    Pros

    • Wide seating area supports a more relaxed posture.
    • Simple format is suitable for routine camp use.
    • More breathable than some deeply padded lounge chairs.

    Cons

    • Not intended for backpacking or minimalist packing.
    • Exact features can differ between Big Comfort versions.

    🛠️ Practical Tip

    For damp campsites, let the fabric dry fully before storing the chair in its bag. This is especially important when the chair has a large seat area that can trap moisture after morning dew.

    5. Timber Ridge XXL Director’s Chair

    A director’s chair brings a different shape to the heavy-duty camping category. The Timber Ridge XXL version is aimed at adults who prefer a higher seat, broad armrests, and a more upright position for eating at a table or preparing food. Its side-table style features, where included on a particular version, can also reduce the need for a separate camp surface.

    This design is less lounge-like than a moon chair and generally has a larger folded profile than a simple sling chair. That makes it better suited to vehicle-based camping, base camps, outdoor workshops, and long stays where sitting at a usable height matters.

    Pros

    • Upright position works well at camp tables.
    • Higher seat can be easier to enter and leave.
    • Broad arms and substantial proportions suit larger adults.

    Cons

    • Director-style frames can be awkward to pack tightly.
    • Less suitable for reclining or stretching out around a fire.

    ✨ Style Tip

    Pair a director’s chair with a stable folding table if you cook or eat outdoors often. The upright back and raised seat are more functional for table work than a low, relaxed camp chair.

    6. YETI Trailhead Camp Chair

    The YETI Trailhead is aimed at buyers who want a refined camp chair with supportive seating and a less basic folding mechanism. Its design emphasizes a comfortable sitting position, durable-feeling materials, and a frame that folds for transport without looking like a traditional oversized quad chair. It can suit regular car campers, tailgaters, and people who use outdoor seating at home as well as at camp.

    This chair is not the obvious choice for buyers focused purely on the lowest weight or smallest packed size. It also tends to appeal more to shoppers willing to pay attention to finish quality and long-term handling than to those choosing solely by capacity.

    Pros

    • Supportive design for extended sitting.
    • More polished construction than many basic folding chairs.
    • Useful for camping, tailgating, and general outdoor seating.

    Cons

    • May be a larger investment than a conventional camp chair.
    • Not the strongest fit for ultralight travel.

    💡 Tip

    Before paying more for a premium chair, decide whether you value smoother operation, better materials, or simply a higher weight capacity. Those are different benefits and don’t always come together.

    7. NEMO Stargaze Reclining Camp Chair

    The NEMO Stargaze is a reclining camp chair for people who want more than an upright seat. Its suspended design allows a gentle rocking or swinging motion, and the high back supports a relaxed posture around a campfire, beside a lake, or under a canopy. The chair folds into a transportable package, though its moving parts and reclining hardware make it more involved than a basic folding chair.

    This is a comfort-focused choice rather than a simple heavy-duty workhorse. Users who want to lean back and read will appreciate its design, while anyone who needs a very wide flat seat or a table-height position may prefer a traditional oversized chair.

    Pros

    • Reclining position adds comfort for relaxed camp use.
    • Suspended seat creates a distinctive rocking experience.
    • High back provides more upper-body support than many low chairs.

    Cons

    • More mechanisms mean more parts to inspect and handle.
    • Not ideal for upright dining or minimalist packing.

    🛠️ Practical Tip

    Set a reclining chair on level ground and keep its rocking clearance clear of rocks, coolers, and tent walls. The motion needs more usable space than a stationary camp chair.

    8. Helinox Chair One XL

    The Helinox Chair One XL is for buyers who want more room than the standard Chair One while keeping a relatively portable, packable format. Its lightweight frame and fabric seat make it attractive for travel, car-to-campsite walks, and compact outdoor kits. The design is more like a supportive sling than a padded armchair, so comfort comes from the shape and fabric tension rather than thick cushioning.

    This chair makes the most sense when portability is a major concern but a tiny backpacking seat feels too restrictive. Check the current stated capacity and packed dimensions carefully, especially if the chair will be used by a larger adult or carried with other lightweight gear.

    Pros

    • More portable than many steel-frame oversized chairs.
    • Quick assembly once the frame and seat are familiar.
    • Good fit for compact travel and mobile campsites.

    Cons

    • Less padded than plush car-camping chairs.
    • Assembly is required rather than simply unfolding the seat.

    💡 Tip

    Insert the frame poles into the seat corners gradually instead of forcing one corner all the way at once. Even tension makes setup easier and reduces strain on the fabric sleeves.

    9. KingCamp Oversized Padded Moon Saucer Chair

    The KingCamp Oversized Padded Moon Saucer is shaped for lounging. Its deep, rounded seat and substantial padding can feel more like outdoor furniture than a standard camp chair, which makes it appealing for fireside conversations, backyard use, and relaxed base camps. The broad frame also gives larger adults more lateral room than a narrow sling-style chair.

    Its comfort comes with predictable compromises. A moon chair usually occupies more floor space, has a wider folded bundle, and is less useful at a table. Buyers should confirm the current model’s capacity and packed size because KingCamp sells several oversized saucer-style chairs with different specifications.

    Pros

    • Deep padded seat is well suited to lounging.
    • Wide shape offers a comfortable alternative to narrow chairs.
    • Useful for car camping and home outdoor spaces.

    Cons

    • Bulky for small vehicles and crowded storage areas.
    • Low, deep seating may be less convenient for some users to exit.

    ✨ Style Tip

    Use a saucer chair on a groundsheet or outdoor mat rather than directly on wet soil. The wide base can collect mud and grass more readily than narrow chair feet.

    10. GCI Outdoor RoadTrip Rocker XL

    The GCI Outdoor RoadTrip Rocker XL adds spring-action rocking to a larger camp-chair format. That movement can be relaxing at a campsite, sports field, or lawn gathering, while the broad seat gives it a more accommodating feel than a standard rocker. It suits adults who value motion and comfort but still want a chair that opens without complicated assembly.

    Rocking hardware adds structure and weight, so it is not the best choice for hiking into a remote site. It also needs enough clearance to move safely. For car campers who like to rock beside the fire or on a porch, though, the design offers a useful middle ground between a stationary chair and a recliner.

    Pros

    • Rocking action adds comfort during relaxed outdoor use.
    • XL proportions offer more space than many compact rockers.
    • Simple folding format is convenient for vehicle transport.

    Cons

    • Heavier and bulkier than a stationary lightweight chair.
    • Needs level, clear ground for comfortable rocking.

    🛠️ Practical Tip

    Check the rocker’s front and rear clearance after opening it. A chair that touches a cooler, step, or tent wall can stop abruptly and feel less stable.

    How to Choose the Right Heavy-Duty Camp Chair

    Start With the User and the Setting

    A chair for a large adult at a drive-in campsite can be very different from one carried to a remote lake. Car campers can reasonably choose a steel-frame, padded, oversized model. Backpackers and travelers need a lower packed weight, compact poles, and a carry system that won’t become a burden.

    Think about where your feet will land, too. A low lounge chair may be comfortable beside a fire but awkward at a standard camp table. A director’s chair is more functional for meals, while a recliner or rocker is better for unwinding.

    Check Capacity and Seat Measurements

    Weight capacity is usually expressed in pounds or lbs, but it doesn’t describe the whole sitting experience. Compare seat width, seat depth, back height, and arm placement. A very deep seat may feel spacious for one person and difficult for another to exit.

    Look for a clear manufacturer specification rather than relying on a retailer’s vague “heavy-duty” label. If the product listing doesn’t provide a capacity, dimensions, or care instructions, that lack of information is itself a reason to be cautious.

    Consider Frame, Fabric, and Weather Exposure

    Steel frames often provide a substantial feel, but they can be heavy. Aluminum frames reduce carry weight but may be paired with a narrower seat or a lower published capacity. Fabric choices vary from mesh to tightly woven polyester and padded panels; each affects ventilation, comfort, drying time, and packed size.

    No folding camp chair should be treated as permanent outdoor furniture unless the manufacturer says otherwise. Store chairs dry, inspect hinges and rivets, and avoid leaving them exposed to rain for days at a time.

    Inspect Setup and Storage Features

    Basic folding chairs open quickly, while assembled chairs such as the Chair One XL use poles and a fabric shell. Recliners and rocking chairs include more hardware, so check that the moving parts operate smoothly and that the instructions are easy to follow.

    Storage features can be genuinely useful: a cup holder, phone pocket, insulated sleeve, side table, or carry strap may eliminate extra equipment. They can also add weight and create snag points, so prioritize the accessories you’ll actually use.

    Think About Campsite Safety

    Place a chair on firm, reasonably level ground and make sure all legs are fully open. Never exceed the stated capacity, stand on the seat, or use a damaged frame. Before packing for a public campsite, it can also help to review the Leave No Trace principles so your seating setup doesn’t damage vegetation or obstruct shared areas.

    💡 Tip

    Inspect the hinge points at the start of each season. Look for bent tubing, loose rivets, torn fabric sleeves, or feet that no longer sit evenly before loading the chair.

    Which Chair Type Fits Different Campers?

    • For maximum room: Start with the ALPS King Kong, Coleman Big-N-Tall, or a moon saucer design.
    • For hot-weather comfort: A mesh-backed option such as the Kijaro XXL may provide better airflow than thick padding.
    • For dining and camp tables: Consider a director’s chair with an upright back and higher seat.
    • For reclining: The NEMO Stargaze is designed around a relaxed, suspended sitting position.
    • For portability: The Helinox Chair One XL is more appropriate than a large steel-frame camp chair.
    • For rocking: The GCI RoadTrip Rocker XL adds movement but needs clear, level ground.
    • For budget-conscious shoppers: Compare basic oversized quad chairs before paying for premium mechanisms or materials.
    • For frequent car campers: A heavier padded chair may be worthwhile if it stays in the vehicle and gets used often.

    🛠️ Practical Tip

    Choose by your most common trip, not your most ambitious one. If nearly every outing is car camping, shaving a few pounds may matter less than having the seat width and back support you’ll use every evening.

    Frequently Asked Questions

    What kind of camping chair is best for a heavy person?

    The best option has a clearly stated weight capacity, a wide seat, a stable frame, and dimensions that allow comfortable entry and exit. Oversized chairs such as the ALPS King Kong or Coleman Big-N-Tall are common starting points, but always confirm the current specifications.

    Which camping chairs are the most durable?

    Durability depends on frame construction, fabric quality, hinges, stitching, and care. A chair with a high capacity is not automatically more durable, so inspect the warranty, care instructions, replacement-part policy, and user manual before buying.

    What is the most comfortable camping chair for adults?

    Comfort is personal. Deep padded chairs and moon saucers suit lounging, director’s chairs suit table use, and reclining models suit reading or relaxing. Seat width and back support usually matter more than padding alone.

    Are heavy-duty camping chairs suitable for backpacking?

    Most oversized steel-frame chairs are better for car camping because their packed weight and bulk are substantial. A lightweight assembled chair, such as the Helinox Chair One XL, is a more practical option when you must carry it any distance.

    How much weight can a heavy-duty camp chair hold?

    Capacity varies widely by model. Use the manufacturer’s published limit, not a retailer’s general description, and leave a sensible margin rather than choosing a chair rated exactly at the user’s body weight.

    Final Verdict

    The best heavy-duty camping chairs for adults depend on the balance you need between support, space, comfort, and portability. The ALPS King Kong and Coleman Big-N-Tall favor roomy car-camping comfort; the Kijaro and GCI options add practical everyday features; recliners and rockers focus on relaxation; and the Helinox Chair One XL makes more sense when packed size matters.

    Before buying, check the current capacity, seat dimensions, folded size, frame material, and carry weight. Pick the design that matches your real campsite routine rather than the chair with the biggest label. A well-matched chair should feel stable, be easy to store, and remain comfortable after the first few minutes of sitting.

  • Best Portable Camping Benches: 12 Practical Picks

    A good camping bench gives you more than a place to sit: it can create shared seating around a picnic table, support muddy boots at a tent entrance, or provide a stable surface for cooking gear. The best portable camping benches balance weight, folded dimensions, comfort, weight capacity, and setup speed without taking over your vehicle or pack.

    This roundup compares 12 useful bench styles for car camping, beaches, festivals, family trips, and occasional backpacking. You’ll see where aluminum frames, folding legs, roll-top surfaces, backrests, carry bags, and adjustable height make a real difference, along with the compromises that separate a comfortable camp bench from a merely convenient one.

    How to Choose the Best Portable Camping Benches

    Start with how you’ll transport the bench. A compact camp bench that rides in a car can be wider and more padded than one carried to a remote campsite. Backpackers need a low packed weight and a narrow shape, while families may care more about seating capacity and stability.

    Check the manufacturer’s stated weight capacity rather than judging strength by appearance. A bench rated for two people may still feel cramped if its surface area is limited. Also inspect the locking mechanism, leg spread, foot design, fabric tension, and whether the carry bag is included.

    • Portability: Compare the total weight, folded dimensions, handle, and storage bag.
    • Frame material: Aluminum is light and resists corrosion, while steel often adds weight but can feel substantial.
    • Seat construction: Fabric is packable and forgiving; slats or solid panels are easier to wipe clean.
    • Stability: Wide feet, cross-bracing, and positive leg locks matter on uneven ground.
    • Comfort: A padded top or backrest can be valuable during long meals and camp conversations.
    • Weather suitability: Dry fabric quickly after rain, and don’t leave folding furniture exposed longer than the manufacturer recommends.
    • Use case: A cooking bench, beach seat, and tent-side bench may need very different designs.

    For general outdoor safety, it’s sensible to follow local guidance on campsite placement, fire areas, and terrain. The National Park Service camping guidance is a useful reference for responsible campsite planning.

    🛠️ Practical Tip

    Measure the bench’s folded length against your vehicle’s storage compartment before buying. A product can be lightweight yet awkward to carry if its packed shape is too long.

    Best Portable Camping Benches by Design

    1. Classic Folding Slat Bench

    A classic folding slat bench is a dependable choice for car campers who want a simple seat that opens quickly. Its slatted top usually offers a firm sitting surface and can be easier to wipe down than mesh or upholstered fabric. The design works well beside a camp table, under an awning, or around a picnic setup.

    The trade-off is bulk. Slats and rigid supports generally fold flat rather than rolling into a small bundle, so this style suits vehicles better than hiking packs. Look for secure hinges and feet that don’t twist when the ground is uneven.

    💡 Tip

    Choose a slat layout with small gaps if you’ll use the bench near a fire ring; it reduces the chance of small items rolling underneath, though you should still keep fabric and gear away from sparks.

    2. Aluminum Roll-Top Bench

    An aluminum roll-top bench borrows its structure from a roll-top folding table. The surface breaks into connected slats or panels that roll around a frame, creating a compact package for transport. It’s a strong candidate for campers who want a lightweight, rigid seat without carrying a full-size folding bench.

    Assembly may involve fitting the top onto the frame, so it isn’t always as instant as a hinged model. The aluminum construction is also less forgiving if a slat becomes bent or a connector is damaged. Still, its small packed shape makes it attractive for compact camp kitchens and organized car-camping kits.

    ✨ Style Tip

    Pair a roll-top bench with a matching roll-top camping table so both pieces pack in similar shapes and share space efficiently in a storage box.

    3. Padded Folding Camp Bench

    A padded folding camp bench emphasizes comfort over minimum weight. Foam cushioning and a fabric cover make it more pleasant for extended meals, card games, or sitting beneath a canopy. It can also be useful at a tailgate or outdoor event where a bare aluminum top feels too hard.

    Padding adds cleaning and drying considerations. Mud, food spills, and rain can remain trapped in thicker materials, so check whether the cover is removable or the surface can be wiped clean. This is usually a better car-camping option than a backpacking seat.

    💡 Tip

    If the bench will stay outside under a shelter, bring a separate waterproof cover. A water-resistant seat surface is not the same as furniture designed for permanent outdoor exposure.

    4. Fabric Sling Bench

    A fabric sling bench uses tensioned textile material between a folding frame. It tends to feel softer than a hard-top bench and often folds into a slim profile. This design is comfortable for relaxed seating and can be easier to carry from a vehicle to a beach, campsite, or sports field.

    Fabric support varies considerably between models. Inspect the stitching, attachment points, and frame joints, and keep the stated capacity in mind. A sling seat can also collect sand and grit, so shake it out before folding to limit abrasion inside the joints.

    🛠️ Practical Tip

    Let a damp sling bench dry fully before placing it in its carry bag. Ventilation helps prevent musty odors and keeps moisture from sitting against the frame.

    5. Two-Person Folding Bench

    A two-person folding bench is designed for shared seating, making it useful for families, couples, and groups that want fewer separate chairs. One long seat can also serve as a staging surface for jackets, towels, or dry gear when nobody is sitting on it.

    Length is the key consideration. A longer bench may offer better seating but can be harder to maneuver through a narrow tent vestibule or store in a small hatchback. Check the central support and the total weight capacity rather than focusing only on the end legs.

    💡 Tip

    For shared seating, compare the usable seat length rather than the outside dimensions. Frame rails and wide side supports can reduce the space available for each person.

    6. Compact One-Person Camp Stool Bench

    A one-person camp stool bench sits between a stool and a narrow bench. It gives solo campers a small perch for cooking, changing footwear, or taking short breaks without the footprint of a full seat. Its simple shape is also practical as a side surface for a water bottle or small cooking kit when the seat is unused.

    This option is less suitable for shared meals or anyone who wants back support. Because the seat is compact, stability depends heavily on leg placement and ground conditions. A model with broad feet is preferable for soft soil and sand.

    ✨ Style Tip

    Use a compact one-person bench as part of a modular camp setup: it can become a seat near the stove, a small gear perch, or an extra place for a child without adding a full chair.

    7. Bench with Backrest

    A portable bench with a backrest is aimed at comfort-focused campers. The supported posture can be welcome during long evenings, especially for people who find backless benches tiring. It also feels more like outdoor furniture than basic camp gear.

    The backrest increases folded height and may add hinges or support bars that need inspection. It can also interfere with a narrow tent entrance or a compact car’s cargo layout. Choose this style when seated comfort matters more than the smallest packed dimensions.

    🛠️ Practical Tip

    Check whether the backrest folds flat or remains upright during storage. That single detail can determine whether the bench fits behind a seat or needs a larger cargo area.

    8. Adjustable-Height Camp Bench

    An adjustable-height bench can serve several roles around camp. Set it low for seating, raise it for a temporary work surface, or match its height to a folding camping table. This flexibility appeals to campers who carry fewer pieces of gear and want one item to do more than one job.

    Adjustability adds moving parts. Look for clearly marked locking positions and avoid using the bench on unstable slopes just because its legs can be set at different heights. The most useful designs make height changes simple without sacrificing a firm lock.

    💡 Tip

    Use the lowest stable setting on uneven ground. Raising the seat increases convenience, but it can also make a narrow bench feel less planted if the legs are not spread widely.

    9. Lightweight Backpacking Bench

    A lightweight backpacking bench is for hikers who want more support than a ground pad but don’t want to carry a conventional chair. These designs usually favor a narrow seat, minimal frame material, and a small carry size. They can be useful at a remote base camp or during a long rest stop.

    Weight savings often mean a smaller sitting area and less cushioning. Before choosing one, compare its packed weight with your existing sit pad or stool. For short breaks, a pad may be simpler; for repeated use around camp, a small folding bench can justify the extra structure.

    🛠️ Practical Tip

    Include the carry bag and straps in your packed-weight comparison. Small accessories can change how easy the bench is to attach to a backpack or place inside a hiking pack.

    10. Beach and Sand Bench

    A beach-oriented bench needs feet that won’t sink immediately into soft sand. A broad base, low center of gravity, and corrosion-resistant frame are more important here than a polished appearance. The same qualities can help on loose soil near a lakeside campsite.

    Sand can work into hinges, telescoping legs, and fabric folds. A bench that is easy to rinse and dry will be less troublesome than one with enclosed mechanisms that trap grit. Avoid assuming that corrosion-resistant aluminum makes every fastener or hinge saltproof.

    ✨ Style Tip

    Carry a small brush or rinse bottle for sand-heavy trips. Cleaning the leg joints before folding is easier than trying to remove packed grit later.

    11. Bench with Under-Seat Storage

    A bench with under-seat storage combines seating with organization. The compartment can hold blankets, games, lanterns, or clothing that needs to stay off damp ground. It’s especially handy in a family campsite where small items otherwise spread across the tent and picnic area.

    Storage compartments vary in ventilation and weather resistance. Don’t treat a fabric bin as waterproof unless that protection is clearly specified. The added structure may also make the bench heavier and slower to fold than a basic seat.

    💡 Tip

    Pack soft, nonessential items in the storage compartment and keep food, electronics, and important documents in sealed containers unless the manufacturer confirms suitable protection.

    12. Bench-Style Folding Camping Table

    A bench-style folding camping table is useful when you need a broad, firm top more than a dedicated seat. It can function as a cooking station, serving surface, gear table, or occasional bench if the manufacturer permits that use. This is the most versatile option for car campers who want one folding table to support several camp tasks.

    Never sit on a table unless it is explicitly designed and rated for seating. A table’s surface height, leg locks, and weight capacity may be suitable for cookware but not for a person. If seating is the main need, select a true bench instead of relying on a look-alike.

    🛠️ Practical Tip

    Use the product’s stated purpose as the deciding factor. A folding camping table can be an excellent camp kitchen, but it should not replace a certified seating bench without an appropriate load rating.

    Quick Comparison of Portable Camp Bench Styles

    Bench style Best for Main strength Portability profile Main drawback
    Classic folding slat bench Car camping and family picnics Firm, easy-clean surface Folds flat Can be bulky
    Aluminum roll-top bench Organized camp kitchens Compact packed shape Rolls or breaks down May take longer to assemble
    Padded folding bench Comfort-focused campers More forgiving seat Usually vehicle-friendly Needs careful drying
    Fabric sling bench Beach trips and relaxed seating Light, flexible comfort Often slim when folded Fabric can collect grit
    Two-person bench Families and couples Shared seating Longer packed profile Less convenient in tight spaces
    One-person camp stool bench Solo campers and short breaks Small footprint Highly portable No shared seating or backrest
    Bench with backrest Long evening seating Added back support More storage volume Heavier or taller when folded
    Adjustable-height bench Multi-use camp setups Flexible working height Depends on mechanism More parts to inspect
    Lightweight backpacking bench Remote camps and hikers Low carry burden Pack-oriented Smaller seat area
    Beach and sand bench Shorelines and loose ground Broad, stable feet Often portable by handle Sand can affect hinges
    Storage bench Family campsites Seat plus organization Moderate bulk Storage may not be waterproof
    Bench-style camping table Cooking and gear support Wide work surface Folds for vehicle transport Not necessarily safe for seating

    Best Bench Styles for Different Camping Trips

    For car camping

    Car campers have the most flexibility. A padded bench, two-person model, or backrest design can make a campsite more comfortable without creating a serious carrying problem. Prioritize stability, usable seat length, and easy cleaning.

    For backpacking

    Choose a lightweight one-person bench only if the comfort benefit justifies its packed weight. A compact folding design with a simple frame is easier to manage than a wide bench. Always compare it with a sit pad, which may weigh less and pack more easily.

    For families

    A two-person bench or storage bench can reduce the number of separate items around camp. Look for a clear capacity rating, stable feet, and a surface that can be wiped clean after meals. A backrest may be worthwhile for longer stays.

    For beach trips

    Broad feet, corrosion-conscious construction, and easy cleaning matter most. A fabric sling can be comfortable, but sand should be removed before folding. A low profile may also feel more stable on soft ground.

    For cooking and camp kitchens

    A true bench can provide a seat beside a camp table, while a folding table offers a better working surface for stoves and food preparation. Keep hot cookware on a product designed for that purpose, and never confuse a table’s load rating with a seating rating.

    Common Buying Mistakes to Avoid

    • Choosing by folded size alone without checking the usable seat area.
    • Ignoring the difference between total load capacity and per-person capacity.
    • Assuming aluminum automatically means every component is lightweight or corrosion-proof.
    • Buying a long bench that cannot fit through the tent door or vehicle hatch.
    • Leaving damp fabric folded inside its carry bag.
    • Using a camping table as a seat without explicit manufacturer approval.
    • Overlooking the locking pins, hinges, and feet because the seat top looks attractive.

    Frequently Asked Questions

    What is the best material for a portable camping bench?

    Aluminum is appealing when low weight and corrosion resistance matter. Steel may feel more substantial but can increase the carrying burden. Fabric adds comfort and packability, while rigid slats are easier to wipe clean.

    Are portable camping benches comfortable?

    Comfort depends on width, padding, seat tension, and whether the bench has a backrest. A padded or sling design is usually more comfortable for long sitting than a narrow, unpadded frame.

    Can a camping bench support two adults?

    Only if its stated weight capacity and usable seat length support that use. Check the manufacturer’s rating and consider how the load is distributed across the seat and center supports.

    Is a folding camping table the same as a camping bench?

    No. A folding table is built for a work surface and cookware, while a bench is designed for seating. Don’t sit on a table unless the product is specifically rated for that purpose.

    What should backpackers look for in a camp bench?

    Focus on packed weight, folded dimensions, setup time, and whether the bench offers enough comfort to justify carrying it. A narrow one-person model is generally more practical than a full two-person bench.

    Final Verdict

    The best portable camping benches depend on the job. A classic folding or two-person bench suits car campers and families, while a roll-top aluminum or lightweight one-person design makes more sense when storage space or pack weight matters. Padded, sling, and backrest models favor comfort; beach and adjustable-height designs solve more specific campsite problems.

    Before buying, compare the real seat area, weight capacity, folded dimensions, frame locks, feet, and cleaning requirements. Treat a bench-style camping table as a separate category unless seating is explicitly approved. The right choice is the one that fits your transport method and campsite routine—not simply the one with the smallest packed size.

  • Best Tents for Extended Base Camps: 12 Top Options

    Choosing the best tents for extended base camps is less about finding the lightest shelter and more about balancing livable space, weather protection, setup effort, and packed size. A tent used for long-term camping needs to handle repeated pitching, wet gear, changing weather, and daily life inside the base camp. Some options favor standing height and family comfort, while others use canvas construction or faster hub-style setup for overlanding and car camping.

    Below, you’ll find practical comparisons of 12 camping tents, including large family shelters, canvas models, and more portable designs. You’ll also learn which features matter most, where each tent fits, and when a rooftop tent or a smaller backpacking shelter may make more sense.

    What Matters in a Base Camp Tent

    An extended-stay shelter should feel usable after the novelty of the first night wears off. Space for changing clothes, storing equipment, cooking under cover, and waiting out rain can matter as much as sleeping capacity. A tent labeled for six people may sleep six closely packed campers, but it may not provide enough room for a comfortable base camp.

    • Interior volume: Near-vertical walls, generous peak height, and a practical floor plan make longer stays easier.
    • Weather protection: Look for a full-coverage rainfly, protected seams, sturdy poles, and a bathtub-style floor where appropriate.
    • Ventilation: Mesh panels, windows, roof vents, and adjustable doors help limit condensation.
    • Storage: Vestibules, gear lofts, pockets, and awnings keep wet or dirty equipment away from sleeping areas.
    • Setup: Large tents often require two people, especially in wind or when the fly is bulky.
    • Portability: A large cabin or canvas tent may be excellent at a drive-in base camp but unsuitable for backpacking.

    🛠️ Practical Tip

    Measure the packed gear you expect to keep inside the shelter before choosing a capacity. A tent that fits six sleeping bags may feel crowded once coolers, duffels, boots, and camp furniture are added.

    Comparison of the Best Tents for Extended Base Camps

    Product Best For Design Capacity Main Advantage Main Drawback
    The North Face Wawona 6 Families and gear-heavy camps Large vestibule tent Up to 6 Useful covered living and storage space Bulky for remote carrying
    NEMO Aurora Highrise 6 Comfort-focused family camping Freestanding dome Up to 6 High walls and livable interior Large packed size
    REI Co-op Wonderland 6 Drive-in base camps Roomy family tent Up to 6 Open interior layout Not intended for lightweight travel
    Big Agnes Bunk House 6 Frequent car campers Freestanding family tent Up to 6 Convenient room and storage design Heavy compared with backpacking tents
    MSR Habitude 6 Active families and groups Standing-height tent Up to 6 Durable, practical camp layout Setup is easier with two people
    Marmot Limestone 6 Three-season base camps Freestanding dome Up to 6 Balanced space and weather features Less spacious than cabin-style tents
    Kodiak Canvas Flex-Bow Deluxe Comfortable seasonal camps Canvas cabin-style tent Up to 6 Strong fabric and tall interior Heavy and slower to dry
    Springbar Classic Jack 140 Canvas camp setups Simple wall-tent design Varies by layout Open floor and uncomplicated structure Limited portability
    White Duck Outdoors Prota Deluxe Large family base camps Canvas cabin tent Varies by model Generous space and standing height Bulky packed load
    TETON Sports Mesa Large drive-in camps Cabin-style tent Varies by model Roomy vertical-wall interior Needs a substantial campsite
    Gazelle T4 Plus Fast setup and overlanding Hub-style tent with screen room Multiple occupants Rapid pitching and flexible living space Wide, heavy packed shape
    Eureka Copper Canyon LX 6 Family base camps Cabin tent Up to 6 Excellent usable headroom Large profile in strong wind

    💡 Tip

    Treat capacity labels as a starting point, not a comfort rating. For an extended base camp, subtract one or two sleeping places if the tent will also hold clothing, equipment, or a small table.

    Family and Comfort-Focused Base Camp Tents

    1. The North Face Wawona 6

    The North Face Wawona 6 is built around a particularly useful feature: a large front vestibule that can function as covered gear storage and a sheltered sitting area. Its roomy floor and tall interior make it more practical for families or groups staying at one campsite for several nights. The vestibule is the main reason to consider it over a conventional dome tent.

    Based on its layout, the Wawona 6 suits car camping, family base camps, and overland trips where packed size is less important than usable living space. It isn’t a sensible choice for carrying deep into the backcountry, and buyers should pay close attention to fly orientation and setup because large shelters can be awkward in wind.

    Pros

    • Large vestibule adds covered storage and living space.
    • Comfortable floor plan for families and gear-heavy trips.
    • Designed for repeated three-season camping use.

    Cons

    • Bulky compared with backpacking shelters.
    • More manageable with two people during setup.
    • Large fabric surfaces need careful tensioning in poor weather.

    💡 Tip

    Use the vestibule as a clean-to-dirty transition zone: leave boots and damp outer layers near the entrance, while keeping sleeping gear deeper inside the main tent.

    2. NEMO Aurora Highrise 6

    The NEMO Aurora Highrise 6 focuses on interior comfort through tall walls, generous peak height, and a design that feels closer to a small room than a low backpacking tent. Its structure is attractive to campers who want to stand, change clothes, and organize equipment without constantly crouching. Large windows and mesh areas also support airflow and visibility in fair weather.

    This camping tent works best at established sites where car access makes its packed size and weight manageable. The high profile provides livable space, but it also means campsite selection and proper staking matter more than they would with a low dome.

    Pros

    • High ceiling improves changing and organizing inside.
    • Roomy design is comfortable for family camping.
    • Ventilation areas help balance privacy and airflow.

    Cons

    • Not a lightweight option for long carries.
    • Tall walls can catch more wind than a low-profile shelter.
    • Large components may take practice to pack neatly.

    ✨ Style Tip

    Place a low folding shelf or soft-sided organizer along one wall rather than in the center. That keeps the main walkway clear and preserves the tent’s open feel.

    3. REI Co-op Wonderland 6

    The REI Co-op Wonderland 6 is aimed at campers who prioritize a spacious interior over compact packing. Its near-vertical walls create more usable floor area than a sharply sloped dome, which can make a noticeable difference during rainy days or longer family stays. The open design is particularly useful when occupants need to sit up, sort clothing, or move around indoors.

    It belongs at a drive-in campsite rather than on a backpacking route. Buyers should check which vestibule, mud-room, or footprint accessories are included with the specific package, because optional additions can change the shelter’s practical storage capacity.

    Pros

    • Vertical walls make the floor easier to use.
    • Comfortable choice for family base camps.
    • Works well with camp furniture and organized storage.

    Cons

    • Packed size limits transport options.
    • Accessories may vary by package.
    • Less suited to exposed, remote sites than a lower shelter.

    🛠️ Practical Tip

    Before buying, check the exact floor plan and accessory list. A footprint protects the floor, while a mud-room or vestibule changes how much living space remains inside.

    4. Big Agnes Bunk House 6

    The Big Agnes Bunk House 6 is a freestanding family tent with a focus on convenient everyday use. The interior is designed for standing room and organized storage, while the vestibule helps keep wet equipment outside the sleeping area. It offers a middle ground between a low dome and a very large cabin shelter.

    That balance makes it appealing to frequent car campers who want comfort without moving all the way to a heavy canvas tent. Its value depends on how often it will be used and whether the owner needs a smaller packed load for travel between camps.

    Pros

    • Useful combination of headroom and weather coverage.
    • Freestanding structure simplifies campsite placement.
    • Good fit for repeated family and group camping.

    Cons

    • Still too heavy for most backpacking trips.
    • Large vestibule fabric needs careful drying after wet trips.
    • May be more shelter than a small group needs.

    💡 Tip

    Practice fitting the fly and poles at home before a trip. Familiarity reduces setup time and makes it easier to pitch the tent before evening weather arrives.

    Freestanding Tents for Repeated Three-Season Use

    5. MSR Habitude 6

    The MSR Habitude 6 uses a tall, practical design intended for campers who want more interior comfort than a traditional backpacking tent provides. Its standing-height layout, storage features, and broad entry make it suitable for families, youth groups, and base camps where occupants will spend time inside during poor weather.

    It is a sensible choice for buyers who value construction and organization but do not need a canvas wall tent. The shelter is still a substantial load, so it belongs in a vehicle-supported camp rather than an overland route where every kilogram matters.

    Pros

    • Standing-height interior supports longer stays.
    • Useful storage and entry design for active camps.
    • Freestanding format is convenient on established ground.

    Cons

    • Weight and packed size limit portability.
    • Two-person setup is often more practical.
    • Not designed as a winter mountaineering shelter.

    🛠️ Practical Tip

    Stake the corners before extending the full structure. This gives the floor a stable shape and reduces the chance of twisting poles while the tent is being raised.

    6. Marmot Limestone 6

    The Marmot Limestone 6 is a conventional three-season dome-style shelter that balances sleeping capacity, ventilation, and weather coverage. Compared with a cabin tent, its sloped walls provide less standing space, but the lower profile can be easier to manage in exposed conditions. A freestanding structure also offers flexibility when the campsite surface is imperfect.

    This tent is best for campers who want a dependable all-rounder rather than maximum indoor living space. It can suit a base camp that moves between sites, especially when a family wants more protection and organization than a basic camping tent provides.

    Pros

    • Balanced design for family and group camping.
    • Lower profile than many cabin tents.
    • Good match for three-season travel between camps.

    Cons

    • Less standing room than high-wall shelters.
    • Interior can feel compact with a full group and gear.
    • Not intended for severe winter expeditions.

    💡 Tip

    For longer stays, use the vestibule for footwear and frequently accessed gear, but keep food sealed elsewhere. This preserves sleeping space and limits odors inside the tent.

    7. Eureka Copper Canyon LX 6

    The Eureka Copper Canyon LX 6 is a cabin-style shelter with near-vertical walls and a high ceiling. That shape gives families more usable floor area than a sloped dome and makes it easier to use cots, chairs, or a small table. It is especially attractive for a base camp where the tent will remain pitched for several days.

    The trade-off is a larger wind profile and a less compact packed form. Campers should use all suitable guylines and choose a sheltered site rather than treating the tall walls like a mountain tent.

    Pros

    • Excellent usable headroom for a family tent.
    • Cabin shape accommodates furniture more easily.
    • Comfortable for stationary drive-in camps.

    Cons

    • High walls require careful staking and guying.
    • Large packed size limits transport flexibility.
    • Not the right design for high-exposure alpine conditions.

    🛠️ Practical Tip

    Pitch a tall cabin tent with the narrowest side facing prevailing wind when possible. Add guylines before the weather turns rather than waiting until the walls start moving.

    Canvas Tents for Stationary Base Camps

    8. Kodiak Canvas Flex-Bow Deluxe

    The Kodiak Canvas Flex-Bow Deluxe is designed for campers who want a substantial, home-like shelter rather than a lightweight nylon tent. Canvas can offer a quieter, more solid-feeling interior, and the tall structure provides useful space for changing and organizing equipment. It is well suited to hunting camps, work camps, and long weekends at a drive-in site.

    Its limitations are significant for mobile travel. Canvas is heavy, and it should be thoroughly dried before storage after rain. This is a comfort-focused base camp tent, not a choice for backpackers or anyone moving camp every day.

    Pros

    • Comfortable standing-height interior.
    • Durable-feeling canvas construction for stationary camps.
    • Practical choice for repeated seasonal use when transport is vehicle-based.

    Cons

    • Heavy compared with synthetic camping tents.
    • Wet canvas needs careful drying before storage.
    • Longer setup and breakdown than a small dome.

    🛠️ Practical Tip

    Never pack canvas away damp for convenience. If weather prevents complete drying at camp, unpack it at home and let the fabric dry fully before long-term storage.

    9. Springbar Classic Jack 140

    The Springbar Classic Jack 140 uses a simple wall-tent concept with a broad, open interior. Its straightforward structure appeals to campers who prefer fewer complicated pole intersections and want a comfortable shelter for a fixed camp. The design can work well with cots, camp beds, and organized storage.

    As with other canvas tents, portability is the main compromise. It is more appropriate for overland travel with generous vehicle storage than for a lightweight trip where the shelter must be carried.

    Pros

    • Open interior is easy to arrange.
    • Canvas construction suits stationary camps.
    • Simple layout can be approachable for regular campers.

    Cons

    • Heavy packed load.
    • Needs drying and careful storage.
    • Large footprint may not suit small campsites.

    ✨ Style Tip

    Plan the interior before pitching it. Decide where beds, bins, and a central walkway will go so the large floor does not become a pile of loose equipment.

    10. White Duck Outdoors Prota Deluxe

    The White Duck Outdoors Prota Deluxe range is aimed at campers who want a larger canvas shelter with room for family living, beds, and extended gear storage. Depending on the selected size, these tents can provide the spacious feel associated with a traditional base camp or overland setup. Their appeal lies in comfort and interior volume rather than a small packed footprint.

    Exact dimensions, included poles, windows, and accessories vary by model, so buyers should compare the specific version rather than relying on the range name alone. The design makes the most sense for established camps and buyers prepared to manage canvas maintenance.

    Pros

    • Large layouts can support extended stays.
    • Canvas walls create a substantial camp shelter.
    • Suitable for beds, furniture, and organized equipment.

    Cons

    • Model specifications vary and require close checking.
    • Heavy and demanding to transport.
    • Canvas maintenance is part of ownership.

    💡 Tip

    Compare usable floor dimensions, not just sleeping capacity. A wide floor with clear walking space is more valuable for long-term camping than a high occupant number alone.

    11. TETON Sports Mesa

    The TETON Sports Mesa is a large cabin-style tent designed for campers who want standing room and a spacious interior at a vehicle-supported campsite. Its vertical-wall format can make it easier to arrange sleeping areas and camp furniture, which is useful when a base camp becomes a temporary living space.

    Because Mesa models differ in size and features, prospective buyers should verify the exact capacity, door arrangement, rainfly coverage, and pole system. The larger versions need a broad, reasonably level pitch and are better for car camping than remote travel.

    Pros

    • Cabin geometry creates practical headroom.
    • Useful for families and gear-heavy camps.
    • Large models can accommodate organized furniture.

    Cons

    • Exact specifications vary by model.
    • Large walls need secure staking in wind.
    • Not suitable for carrying far from a vehicle.

    🛠️ Practical Tip

    Check the campsite’s maximum tent dimensions before choosing a large Mesa model. Include guyline clearance, not just the floor measurement, when estimating the space required.

    Fast-Setup and Overlanding-Friendly Options

    12. Gazelle T4 Plus

    The Gazelle T4 Plus uses a hub-style frame intended to make setup faster than assembling a conventional pole tent. Its extra room can function as a screen room, gear area, or sheltered sitting space, giving it a flexible role in overlanding and drive-in base camps. This is useful for campers who move between locations but still want more than a basic sleeping shelter.

    The wide packed shape and overall weight limit its usefulness for hiking. It also has a large surface area, so it should be anchored carefully whenever wind is forecast. For easy repeated setup at vehicle-accessible camps, however, the hub design is a strong practical feature.

    Pros

    • Hub structure can simplify repeated setup.
    • Additional room provides flexible living or storage space.
    • Well suited to overland and car-camping use.

    Cons

    • Bulky packed shape.
    • Heavy for human-powered transport.
    • Large walls require secure anchoring in changing weather.

    ⚡ Quick Tip

    A fast frame does not remove the need for site preparation. Clear sharp stones, identify the wind direction, and stake the shelter before arranging furniture inside.

    How to Choose Between Nylon, Polyester, and Canvas

    Fabric choice affects the entire camping routine. Synthetic tents generally pack smaller and dry faster, which favors travelers who move often. Canvas can feel more substantial and comfortable for long stays, but its weight and drying requirements make it better suited to a permanent or semi-permanent base camp.

    • Synthetic dome or cabin tent: A practical balance for most three-season family camps.
    • Canvas wall tent: Best when interior comfort, durability, and stationary use matter more than portability.
    • Hub-style shelter: Useful for overlanding when fast setup is valued.
    • Lightweight backpacking tent: Better when the base camp requires a long approach on foot.

    Fabric alone doesn’t determine weather resistance. Pole strength, fly coverage, seam construction, floor design, ventilation, and correct staking all play a role. For general safety planning, consult the National Weather Service wind safety guidance before choosing an exposed campsite or leaving a large shelter unattended.

    💡 Tip

    If a synthetic tent will be stored wet after a rainy departure, choose a model that is manageable to dry at home. A lighter tent is not automatically easier to own if its fly and floor remain damp for days.

    Which Tent Fits Your Camping Style?

    For families wanting maximum comfort

    The NEMO Aurora Highrise 6, REI Wonderland 6, Eureka Copper Canyon LX 6, and The North Face Wawona 6 emphasize headroom and livable space. The Wawona stands out when covered gear storage matters, while the cabin-style options are better for furniture and open interior movement.

    ✨ Style Tip

    Families should count storage as part of capacity. If everyone brings separate duffels, select a vestibule or roomier floor plan instead of relying on the advertised sleeping number.

    For canvas camp comfort

    The Kodiak, Springbar, White Duck, and TETON options suit campers who drive close to the site and expect to stay put. They offer a more permanent base camp feel, but buyers need room in the vehicle and a plan for drying and storing the shelter.

    🛠️ Practical Tip

    Canvas buyers should also budget campsite time for maintenance. Keep a dry storage area available and inspect poles, zippers, seams, and guy points before every longer trip.

    For overlanding and frequent moves

    The Gazelle T4 Plus and The North Face Wawona 6 make sense when gear is transported by vehicle and the shelter must serve as more than a sleeping room. A rooftop tent is another option for travelers who move daily, though it provides less ground-level living space and requires a compatible vehicle and rack system.

    ⚡ Quick Tip

    For a moving camp, compare packed shape as well as packed weight. A long narrow bag may fit a vehicle better than a shorter but bulky hub package.

    Setup, Ventilation, and Weather Checks

    Large tents are easier to live in, but they also expose more fabric and need more attention during setup. Place the door away from the strongest usual wind, tension the fly evenly, and use the available guylines. Keep vents open when conditions allow; condensation can make an otherwise capable shelter feel damp.

    1. Choose level ground away from drainage channels and dead branches.
    2. Lay out the floor and identify doors, vents, and the wind-facing side.
    3. Assemble or extend the poles and attach the main body without forcing connections.
    4. Add the rainfly, vestibules, and guylines before moving gear inside.
    5. Check that doors open freely and that water will drain away from the floor.
    6. Recheck stakes and tension after the first weather change.

    🛠️ Practical Tip

    Don’t seal every vent during light rain unless conditions demand it. A little airflow often helps reduce condensation more effectively than simply adding extra interior space.

    Frequently Asked Questions

    What is the best tent for a base camp?

    The best choice depends on how the camp is reached and how long it stays in place. Large family tents suit vehicle-accessible camps, while canvas shelters favor stationary setups and lightweight tents work better when equipment must be carried.

    What are the best tents for long-term camping?

    Canvas models are often appealing for long-term camping because they provide substantial living space and a durable-feeling structure. A large synthetic cabin or dome tent may be easier to transport and dry, especially for trips that move between sites.

    Are large cabin tents good in wind?

    They can be suitable in moderate conditions when correctly pitched, but tall walls catch more wind than low-profile designs. Use all appropriate stakes and guylines, and avoid exposed locations when strong weather is expected.

    What tents are used at Everest Base Camp?

    Expedition base camps use specialized shelters selected for altitude, cold, snow, wind, and logistical demands. Those tents are not the same as family camping tents and should not be treated as interchangeable.

    Is a rooftop tent better than a ground tent for overlanding?

    A rooftop tent can provide quick sleeping access and keeps occupants off the ground, but it adds vehicle weight and offers less ground-level living space. A ground tent is usually more flexible for families, pets, cooking, and extended stays.

    Final Verdict

    The best tents for extended base camps depend on the kind of camp you’re building. The North Face Wawona 6 and NEMO Aurora Highrise 6 favor family comfort, while dome-style models such as the Marmot Limestone 6 offer a more balanced moving-camp design.

    Canvas options from Kodiak, Springbar, White Duck, and TETON make more sense when space and stationary comfort outweigh packed weight. For frequent vehicle-based moves, the Gazelle T4 Plus adds useful setup convenience.

    Before buying, check the actual floor plan, packed dimensions, fly coverage, ventilation, and weather limits rather than relying only on the capacity label. Match the shelter to your transport, campsite size, and expected conditions; that decision matters more than choosing the most expensive or largest model.

  • Best Camping Lanterns for Large Tents: 12 Top Picks

    Best Camping Lanterns for Large Tents: 12 Top Picks

    A large tent needs more than a small reading light. The best camping lanterns for large tents spread usable brightness across a wide interior, run long enough for the evening, and remain easy to move, hang, or recharge. A lantern that looks bright at the campsite may still leave corners dark inside a family tent, while a high-output model can drain batteries quickly.

    This roundup compares lanterns for car camping, family trips, emergency use, and portable lighting. You’ll see how Goal Zero, BioLite, Black Diamond, LuminAID, and other options differ in output, power sources, portability, controls, and runtime so you can choose based on your tent size and camping style.

    How to Choose the Best Camping Lanterns for Large Tents

    Large tents usually benefit from a broad light source rather than a narrow beam. Look for a lantern with adjustable brightness, a stable base, a hanging hook or loop, and enough output to illuminate the central living area without creating harsh glare.

    • Brightness: Higher lumen output is useful for big interiors, but adjustable modes help conserve battery power.
    • Power source: Rechargeable batteries reduce disposable waste, while replaceable batteries can be easier to manage on longer trips.
    • Runtime: Check the stated run time at different brightness settings, not only the maximum figure.
    • Hanging options: A lantern suspended from the tent ceiling usually spreads light more evenly than one placed on the floor.
    • Weather resistance: A water-resistant design is helpful around damp ground, condensation, and sudden showers.
    • Portability: Car campers can carry larger lanterns, while backpackers may prefer compact solar or USB models.
    • Extra functions: USB charging, a power bank, red light, or a built-in flashlight can add useful flexibility.

    For guidance on safe battery handling and portable power equipment, consult the National Fire Protection Association’s lithium-ion battery safety information.

    Quick Comparison of Lanterns for Large Tents

    Product Best For Power Type Notable Feature Main Drawback
    Goal Zero Lighthouse 600 Bright central tent lighting Rechargeable USB and hand crank High output with multiple charging options Larger and heavier than compact lanterns
    BioLite AlpenGlow 500 Comfortable ambient lighting Rechargeable USB Warm and cool light modes Not the smallest option for backpacking
    Black Diamond Apollo Compact car camping Rechargeable battery with backup options Adjustable brightness and hanging design Moderate rather than maximum output
    LuminAID PackLite Max 2-in-1 Solar backup and travel Solar and USB Flat-pack design with phone charging Solar charging depends on sunlight
    MPOWERD Luci Outdoor 2.0 Lightweight supplemental lighting Solar Inflatable, compact construction Lower output than large powered lanterns
    Coleman Classic Recharge 1000L Large family tents Rechargeable battery High maximum brightness Bulkier for carrying long distances

    High-Output Lanterns for Large Family Tents

    1. Goal Zero Lighthouse 600

    Goal Zero Lighthouse 600 - Best Camping Lanterns for Large Tents

    The Goal Zero Lighthouse 600 is designed for campers who want strong general lighting from one main lantern. Its adjustable output, directional lighting options, USB charging, and hand-crank backup make it especially practical for family camping and emergency kits. The design is more substantial than a small backpacking lantern, but that extra size supports a higher lighting capacity and a stable presence inside a large tent.

    Pros

    • High maximum output for illuminating a broad tent interior.
    • Multiple ways to recharge, including USB and hand-crank power.
    • Useful as a central lantern or an emergency light.

    Cons

    • Its larger body takes up more packing space.
    • Maximum brightness will reduce run time more quickly than low modes.

    💡 Practical Tip

    Hang the Lighthouse near the tent’s highest central point and use a lower setting for meals or conversation. This reduces shadows without wasting the battery on full power all evening.

    2. Coleman Classic Recharge 1000L

    The Coleman Classic Recharge 1000L is aimed at campers who prioritise maximum brightness over compact packing. Its high-output setting can suit a large family tent, screened shelter, or campsite table, while lower modes are more appropriate for reading and relaxing. Because it is a bigger lantern, it makes more sense for car camping than for long backpacking trips.

    Pros

    • Very bright maximum setting for spacious tents and outdoor areas.
    • Rechargeable design avoids relying solely on disposable batteries.
    • Useful as a primary campsite light.

    Cons

    • Bulk and weight limit its appeal for lightweight travel.
    • High output can shorten the usable run time between charges.

    ✨ Style Tip

    Use a bright lantern outside the tent for cooking or packing, then reduce it indoors. A lower setting is usually more comfortable against light-coloured tent walls.

    3. UST 700 Lumen W-946 Lantern

    The UST 700 Lumen W-946 Lantern offers the kind of output that can work well in a larger tent without moving into the most specialised emergency-light category. Its broad lantern format suits table use, while adjustable settings help balance brightness and battery consumption. It is a sensible option for campers who want a straightforward high-output light rather than a lantern filled with extra functions.

    Pros

    • Strong output for a family tent or outdoor cooking area.
    • Adjustable modes provide more control over power use.
    • Traditional lantern shape is easy to position on a table.

    Cons

    • May be less convenient to carry than a compact rechargeable model.
    • Buyers should verify the current battery configuration before purchase.

    🛠️ Practical Tip

    Before a trip, check whether the selected version uses rechargeable or replaceable batteries. Packing a spare power source matters more with a lantern that serves as your campsite’s main light.

    4. Energizer LED Camping Lantern

    An Energizer LED camping lantern can be a practical choice for buyers who prefer familiar battery-powered equipment and simple controls. Depending on the model, output and features vary, so check the exact lumen rating, battery type, water resistance, and runtime before ordering. Larger models can provide useful general lighting for a tent, while smaller versions work better as secondary lights.

    Pros

    • Simple operation suits beginners and occasional campers.
    • Replaceable batteries can be useful away from mains power.
    • Often available in several sizes and output levels.

    Cons

    • Exact performance depends heavily on the model number.
    • Disposable batteries add weight and ongoing replacement costs.

    💡 Tip

    Don’t choose an Energizer lantern by brand name alone. Compare the exact lumen output and battery runtime because compact and full-size versions can serve very different tent-lighting needs.

    Rechargeable Lanterns for Comfortable Tent Lighting

    5. BioLite AlpenGlow 500

    The BioLite AlpenGlow 500 is a strong fit for campers who want useful brightness with a more comfortable atmosphere. It offers adjustable white light, warmer tones, colour options, and a candle-flicker-style mode, making it less harsh than a permanently bright utility lantern. USB charging and a built-in battery make it convenient for car camping, base camps, and family trips.

    Pros

    • Up to 500 lumens provides substantial light for many large tents.
    • Warm and cool modes make it flexible for different activities.
    • Rechargeable battery reduces dependence on disposable cells.

    Cons

    • Its feature set may be unnecessary for campers who only need basic white light.
    • Recharge planning is important on longer trips without vehicle access.

    ✨ Style Tip

    Use warm light after dark and reserve the cooler, brighter setting for cooking, organising gear, or finding items. It creates a more relaxed tent interior without giving up maximum output when you need it.

    6. Black Diamond Apollo

    The Black Diamond Apollo is a compact rechargeable lantern with a useful balance of portability and output. Its dimmable light, fold-out legs, and hanging capability make it easy to place on a table or suspend inside a tent. It may not flood a very large shelter like a 1,000-lumen model, but it is a versatile middle-ground option for couples, small families, and car campers who value manageable gear.

    Pros

    • Compact design is easier to pack than many high-output lanterns.
    • Fold-out legs improve stability on uneven campsite surfaces.
    • Adjustable brightness helps preserve battery power.

    Cons

    • Moderate output may leave distant corners dim in a very large tent.
    • It is not the lightest option for minimalist backpacking.

    🛠️ Practical Tip

    For a larger shelter, pair the Apollo with a small headlamp or secondary light rather than running it at maximum brightness all night. That gives you task lighting without making the central lantern do everything.

    7. Black Diamond Moji+

    Black Diamond Moji+ - Best Camping Lanterns for Large Tents

    The Black Diamond Moji+ is better suited to ambient and personal lighting than to illuminating a very large tent on its own. Its compact body and colour or dimming features make it useful on a sleeping shelf, table, or beside a camp chair. Think of it as a flexible supplemental lantern, or as a primary light for a smaller shelter.

    Pros

    • Small footprint works well in crowded tents.
    • Adjustable light can support reading and relaxed evening use.
    • Easy to carry as a secondary campsite light.

    Cons

    • Limited output makes it less suitable as the only light in a large tent.
    • Compact size means less broad illumination than full-size lanterns.

    💡 Tip

    Place the Moji+ near a doorway or sleeping area where its lower output is useful. For a large tent, combine it with a brighter hanging lantern rather than expecting it to light the entire interior.

    8. Goal Zero Lighthouse Micro Charge

    The Goal Zero Lighthouse Micro Charge is a small rechargeable light with a built-in USB charging function. It is easy to pack and useful as a personal lantern, backup light, or bedside source inside a tent. Its size limits its role in a large shelter, but that is also its advantage: it can provide close-range illumination without taking up meaningful storage space.

    Pros

    • Very portable for travel, emergency kits, and backpacking.
    • USB charging adds value when a phone or power bank is available.
    • Useful as a personal light alongside a brighter lantern.

    Cons

    • Not designed to replace a high-output central lantern.
    • Small controls and battery capacity may feel limited for group use.

    ✨ Style Tip

    Keep a micro lantern near the tent entrance or in an organiser pocket. It can be found quickly during a nighttime bathroom trip without switching on the main light.

    Solar and Lightweight Lanterns for Backup Lighting

    9. LuminAID PackLite Max 2-in-1 Phone Charger

    The LuminAID PackLite Max 2-in-1 Phone Charger combines an inflatable lantern format with solar charging and USB power-bank functionality. Its flat-packed shape is convenient for travel, and the built-in handle makes it easy to hang or carry. It is not the brightest option in this roundup, but it offers useful independence when sunlight is available and works well as a backup for a larger lantern.

    Pros

    • Solar charging can reduce reliance on wall outlets.
    • Folds flat for easy storage in a travel bag.
    • Phone-charging capability adds emergency usefulness.

    Cons

    • Solar charging speed depends on weather and direct sunlight.
    • Output may be modest for illuminating a large tent by itself.

    🛠️ Practical Tip

    Start charging the PackLite early in the day rather than waiting until evening. Place it where the solar panel has clear exposure, then use its lowest useful mode after dark to preserve stored power.

    10. MPOWERD Luci Outdoor 2.0

    The MPOWERD Luci Outdoor 2.0 is a compact inflatable solar lantern designed for lightweight outdoor lighting. Its collapsible body takes little room in a pack, and the solar charging system can be handy for multi-day trips with reliable daylight. For a large tent, it works best as a secondary lamp, reading light, or entrance marker rather than the main source of illumination.

    Pros

    • Lightweight and easy to store.
    • Solar charging is convenient away from electrical outlets.
    • Inflatable construction is well suited to travel and casual camping.

    Cons

    • Lower output is not ideal for a spacious family tent.
    • Cloudy weather can limit charging opportunities.

    💡 Tip

    Use the Luci as a distributed light source. One near the entrance and another beside a sleeping area can be more useful than placing a single low-output lantern in the middle of a big tent.

    11. BioLite AlpenGlow 250

    The BioLite AlpenGlow 250 provides the same general style of ambient lighting as its larger sibling in a more compact format. Its output is better suited to small and medium tents, but it can still work in a large shelter when paired with a second lamp. Warm settings and adjustable modes make it pleasant for evenings when maximum brightness is not necessary.

    Pros

    • Compact alternative for campers who like adjustable ambient light.
    • Rechargeable operation simplifies repeated weekend trips.
    • Useful as a personal or secondary tent lantern.

    Cons

    • May not provide enough coverage as the only lamp in a large tent.
    • Lower output requires more careful placement.

    ✨ Style Tip

    Use the AlpenGlow 250 at the sleeping end of a large tent and place a brighter lantern near the centre. This two-light arrangement reduces the need for an uncomfortable, high-intensity setting.

    12. Black Diamond Volt Lantern

    The Black Diamond Volt Lantern is a rechargeable camping lantern with a compact design and enough flexibility for general campsite duties. It can serve as a table light, tent light, or backup power source depending on the version and feature set. Its practical size suits campers who want one lantern that packs easily but still offers more functionality than a basic personal light.

    Pros

    • Rechargeable design is convenient for regular camping.
    • Compact enough for car camping and shorter travel.
    • Useful as part of a layered lighting setup.

    Cons

    • Check the current specifications because features can vary by model revision.
    • May need support from a second lantern in a very large tent.

    🛠️ Practical Tip

    Check whether the version you’re considering includes the charging and power-bank features you need. Product names can cover related models with different controls, outputs, and battery arrangements.

    Which Lantern Setup Works Best for a Large Tent?

    A single bright lantern is convenient, but two smaller lights can create more even coverage. The right arrangement depends on whether you need task lighting, soft evening illumination, or a backup if the main battery runs out.

    • For a family tent: Choose a high-output central lantern such as the Goal Zero Lighthouse 600 or Coleman Classic Recharge 1000L.
    • For relaxed evenings: The BioLite AlpenGlow 500 offers more control over colour temperature and brightness.
    • For backup power: Consider a LuminAID PackLite Max or another solar-and-USB model.
    • For backpacking: A compact lantern such as the Luci Outdoor 2.0 or Goal Zero Micro Charge reduces packed weight.
    • For mixed use: Pair one bright central lamp with a small Moji+, AlpenGlow 250, or personal light.

    What Brightness Do Large Tents Need?

    There is no single lumen number that suits every shelter. A small two-person tent can be comfortable with far less light than a tall family tent with separate sleeping and living areas. For general guidance, a lantern with adjustable output is more useful than one with a high maximum rating but no low mode.

    Higher lumens help with cooking, sorting equipment, and group activities. Lower modes are better for reading, conversation, and preserving battery life. Reflective tent fabric also makes a lantern appear brighter, so positioning matters almost as much as raw output.

    Frequently Asked Questions

    What is the most powerful camping lantern?

    High-output models such as the Coleman Classic Recharge 1000L are designed for strong general illumination, while the Goal Zero Lighthouse 600 offers a useful balance of brightness and charging flexibility. Check the exact maximum output and runtime for the current version.

    How many lumens should a lantern have for a large tent?

    Large tents generally benefit from a moderate-to-high output lantern with adjustable settings. The ideal level depends on the tent’s layout, fabric, and intended use, but a dimmable model is usually more practical than one fixed at maximum brightness.

    Are rechargeable lanterns better than battery lanterns?

    Rechargeable lanterns are convenient for regular camping and reduce disposable battery use. Replaceable-battery models can be easier to keep running on longer trips where USB charging or sunlight is unreliable.

    Are solar lanterns bright enough for large tents?

    Solar lanterns can provide useful ambient or backup lighting, but many compact models have lower output than large rechargeable lanterns. For a spacious shelter, use one as a secondary light or combine several strategically.

    Should a camping lantern be hung or placed on the floor?

    Hanging a lantern high usually spreads light more evenly and reduces shadows. A floor or table position is useful for close-range tasks, but it may leave the upper and far sides of a large tent darker.

    Final Verdict

    The best camping lanterns for large tents depend on the balance you want between brightness, runtime, portability, and charging options. Goal Zero Lighthouse 600 and Coleman’s high-output model suit campers who need one strong central light, while BioLite AlpenGlow 500 is better for adjustable, comfortable evening illumination. LuminAID and Luci models make useful solar backups, and compact Black Diamond lanterns work well in a layered lighting setup.

    Before buying, check the current lumen rating, power source, run time at usable settings, hanging options, and packed size. A bright lantern is helpful, but two well-placed lights may provide better coverage and flexibility than one oversized unit.