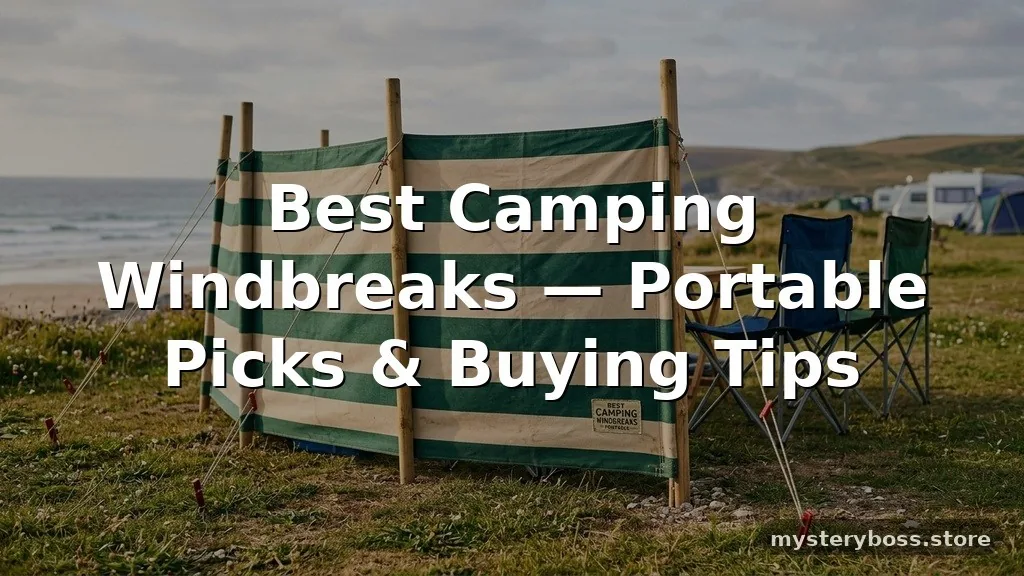
Strong gusts can turn a comfortable campsite into a cold, dusty, noisy place, especially beside an exposed lake, on a beach, or above the tree line. The best camping windbreaks provide a practical barrier without adding the bulk of a full shelter, but the right design depends on how you travel. A family car camper may prefer tall multi-panel coverage, while a backpacker needs a lightweight portable option that packs small and sets up quickly.
This guide compares useful windbreak styles, explains the trade-offs between privacy, stability, weight, and coverage, and highlights what to check before buying. You’ll also find practical advice for beach wind, sun protection, cooking areas, and changing conditions.
What Makes a Good Portable Camping Windbreak?
A camping windbreak is a fabric or panel barrier supported by poles, guy lines, or a self-supporting frame. It reduces direct wind exposure around a tent, chair, cooking area, or beach setup. It may also provide privacy and some shade, although most windbreaks are not intended to replace a weather-rated tent or emergency shelter.
The best design depends on the conditions and your transport. A high, wide windbreak offers more protection but usually catches more wind and takes longer to anchor. A shorter, lightweight portable panel is easier to carry and set up, though it may leave the upper body exposed.
- Wind direction: A useful windbreak blocks the prevailing gusts without becoming an unstable sail.
- Panel height: Taller panels improve privacy and seated comfort, while lower panels are often easier to secure.
- Portability: Packed length, total weight, and pole design matter for hiking and public transport.
- Anchoring: Strong pegs, guy lines, and multiple attachment points help keep the shelter in place.
- Ventilation: Some airflow is useful; a completely sealed wall can place extra force on the frame.
- Fabric and construction: Look for reinforced corners, durable hems, reliable pole sleeves, and clear care instructions.
💡 Practical Tip
Before choosing a height, sit in the chair or use the cooking setup you plan to place behind the barrier. A windbreak should block the wind at your actual body position, not simply look tall when standing beside it.
Portable Camping Windbreak Styles Worth Considering
The options below are design categories rather than claims about one specific brand or model. Product listings vary, so check the current packed size, material, pole system, and included accessories before ordering. The numbering continues across each category so you can compare the ideas easily.
1. Classic Three-Panel Privacy Windbreak

A three-panel windbreak is a versatile choice for campsites, picnics, and beach trips. Its angled layout can block wind from one direction while creating a modest private area behind it.
This format often suits car campers and families because it offers useful cover without requiring the footprint of a full gazebo. Look for reinforced pole pockets and guy-line points, particularly if the middle panel is broad and high.
Pros
- Balances wind protection, privacy, and reasonable setup time.
- Can be angled to match changing wind direction.
Cons
- More panels mean a longer packed bundle than a single screen.
- Its stability depends heavily on correct pegging.
💡 Tip
Place the central panel across the strongest gusts and angle the side sections slightly toward the wind. This can reduce the exposed edge and create a more comfortable pocket than setting the wall in a perfectly straight line.
2. Four-Panel Family Camp Screen
A four-panel screen creates a broader sheltered zone for several chairs, a small table, or children’s play space. It is a practical option for longer stays where privacy and comfort matter more than minimum packed weight. The extra panel gives you more layout flexibility, but it also increases the amount of fabric and pole structure that must be secured.
Pros
- Provides generous side coverage for groups and family camps.
- Can divide a campsite from a nearby path or neighboring pitch.
Cons
- Usually needs more pegs and a larger clear area.
- Can be cumbersome for short stops or small campsites.
🛠️ Practical Tip
Count the usable campsite width before packing this style. A long screen can fit comfortably at a spacious car-camping pitch but may interfere with tent doors, fire rules, or neighboring sites in a crowded campground.
3. Compact Two-Panel Privacy Screen
A two-panel windbreak is a sensible middle ground for solo campers, couples, and weekend users. It provides a small wind shadow around one or two chairs and can screen a changing area or cooking corner. Because there are fewer poles and joints, setup is often less involved, although the smaller footprint offers less protection if gusts shift during the day.
Pros
- Generally easier to carry and store than larger multi-panel systems.
- Useful for personal privacy and short outdoor stops.
Cons
- Limited coverage for groups or large furniture.
- May need repositioning when the wind direction changes.
✨ Style Tip
Choose a darker or more opaque fabric if privacy matters, but check whether the material becomes noticeably warmer in direct sun. A lighter panel may feel more comfortable during summer afternoons.
4. Heavy-Duty Canvas Wind Wall
A canvas or other heavyweight textile wind wall is aimed at frequent car campers, base camps, and users who value substantial coverage over low weight. The dense material can feel more secure and may offer better privacy than thin mesh, but the trade-off is a heavier packed load and slower drying after rain. Exact weather resistance depends on the fabric treatment and seams, so don’t assume a windbreak is waterproof unless the specifications say so.
Pros
- Offers a solid, substantial barrier for exposed campsites.
- Often better suited to repeated base-camp use than ultralight screens.
Cons
- Less suitable for backpacking or long carries.
- Can be bulky when damp and may need careful storage.
🛠️ Practical Tip
Never pack a canvas-style screen while it is wet for longer than necessary. Air it out fully before storage and inspect the seams, pole sleeves, and peg points at the start of the next trip.
5. Mesh-Top Windbreak
A windbreak with a solid lower panel and mesh upper section can reduce wind around seated campers while preserving airflow and a view. This design is useful in warm weather, where a completely opaque wall can trap heat. It generally provides less privacy than a full-height solid screen, but the open upper section may make the campsite feel less enclosed.
Pros
- Balances wind reduction with ventilation and visibility.
- Suitable for warm-weather camps and daytime use.
Cons
- Offers limited privacy above the solid lower portion.
- Fine mesh may be harder to clean after sandy trips.
💡 Tip
For beach use, shake or brush sand from the mesh before folding it. Fine grit can work into pole sleeves and zippers, making the next setup less smooth.
6. Adjustable-Slat Privacy Windbreak
An adjustable-slat design uses hinged, tensioned, or independently supported sections that can be opened or angled. This gives you more control over privacy and airflow than a fixed flat wall. It can work well on campsites where the wind changes, but additional hinges or connectors create more parts to inspect and pack.
Pros
- Allows you to vary the angle and amount of exposure.
- Can provide a more tailored shelter around chairs or tables.
Cons
- Moving components may add complexity.
- Requires careful setup to prevent uneven tension.
✨ Style Tip
Use the most open angle on calm days and close the windward side as gusts build. Keeping one side partially open can help avoid creating a sealed pocket that receives pressure from every direction.
7. Lightweight Backpacking Wind Panel
A lightweight backpacking panel is designed for hikers who want a small barrier around a cooking spot, sleeping mat, or rest area without carrying a full-size campsite screen. These panels may use thin fabric, compact poles, or trekking-pole compatibility. Their small coverage makes them less suitable for family privacy, but they can be a useful compromise in exposed locations where every gram matters.
Pros
- Designed around low packed weight and compact storage.
- Fits solo trips, minimalist camps, and short rest stops.
Cons
- Usually offers less height and coverage.
- Lightweight materials may require gentler handling.
🛠️ Practical Tip
Check whether the panel includes poles or expects trekking poles. A screen that looks light on the product page may require extra hardware that changes the total carry weight.
8. Trekking-Pole-Compatible Wind Shelter
This shelter uses trekking poles as its support structure, reducing the number of dedicated poles in your pack. It is attractive to backpackers who already carry trekking poles and want a flexible wind barrier at camp. Setup depends on pole length, fabric tension, and suitable ground for anchoring, so practice is useful before relying on it in an exposed location.
Pros

- Can reduce duplicate equipment for hikers who already use trekking poles.
- Provides a flexible option for minimalist camps.
Cons
- Not useful if you don’t carry compatible poles.
- May take more adjustment than a freestanding frame.
💡 Tip
Measure the usable length of your trekking poles and compare it with the shelter’s stated pole range. A mismatch can leave the fabric slack or place unnecessary strain on the attachment points.
9. Pop-Up Beach Windbreak
A pop-up beach windbreak is built for quick daytime use, often with a flexible frame or a simple folding structure. It can provide fast protection from beach wind and blowing sand around low chairs, towels, or a small picnic. Its convenience is appealing, but a pop-up frame still needs firm anchoring; speed of setup does not remove the risk of movement in strong gusts.
Pros
- Quick to open and convenient for short visits.
- Often stores in a compact circular or folded carry case.
Cons
- Can be awkward to fold until the technique is familiar.
- May offer limited height and less campsite privacy.
🛠️ Practical Tip
Use sand-specific anchors or fillable ballast where ordinary tent pegs won’t hold. Follow the manufacturer’s folding sequence carefully, since forcing a flexible frame can damage its joints or twist the fabric.
10. Low-Slung Sand Windbreak
A low sand windbreak sits close to the ground and targets blowing sand rather than full-body privacy. It is useful for beach blankets, low seating, and gear that needs protection from grit. The lower profile can be easier to stabilize than a tall wall, although it won’t block wind around a standing or high-seated user.
Pros
- Low profile may be more stable in open beach conditions.
- Good for protecting blankets, bags, and low picnic areas.
Cons
- Limited privacy and upper-body wind protection.
- Not a substitute for a tall campsite screen.
✨ Style Tip
Place the bottom edge as close to the sand as practical and weigh down loose corners. Small gaps at ground level can let a surprising amount of blowing sand pass through.
11. Sun-and-Wind Side Panel
A side panel designed to attach to an awning, canopy, or similar shelter can reduce wind and direct sun from one side. It is a strong option for car campers who already own compatible outdoor equipment and want to expand its usefulness. Compatibility is the key concern: attachment points, dimensions, and pole positions need to match the existing shelter.
Pros
- Can add side protection without carrying a separate freestanding screen.
- Useful for combining shade, wind reduction, and privacy.
Cons
- May work only with a particular canopy or awning system.
- Attached fabric can increase the load on the main shelter in gusts.
💡 Tip
Check the attachment method before buying. A panel that relies on a specific channel, buckle, or roof-bar connection may not fit a visually similar canopy from another manufacturer.
12. Reflective Emergency Wind Barrier
A reflective emergency barrier is a compact backup for exposed stops, roadside emergencies, or minimalist trips. It is usually intended to reflect heat or create a temporary wind shield rather than deliver the comfort, privacy, or durability of a dedicated camping windbreak. Its value lies in low storage space and readiness, not in replacing a properly anchored shelter.
Pros
- Small backup option for emergency kits and lightweight travel.
- Can provide short-term protection when a full screen is unavailable.
Cons
- Usually has limited structural support and privacy.
- May be noisy or difficult to secure in strong wind.
🛠️ Practical Tip
Treat an emergency barrier as a temporary aid, not a structure for sleeping under. Keep it secured away from flames and inspect it for tears before packing it into an emergency kit.
Comparison of Portable Windbreak Options
There is no single format that suits every trip. The table below compares the general strengths and limitations of the designs above; exact weight, size, and materials vary by product.
| Option | Best For | Coverage | Portability | Main Limitation |
|---|---|---|---|---|
| Three-panel privacy screen | General campsite use | Medium | Medium | Needs careful anchoring |
| Four-panel family screen | Groups and longer stays | High | Low to medium | Larger footprint and packed size |
| Two-panel screen | Solo campers and couples | Low to medium | Medium to high | Limited shelter area |
| Heavy-duty canvas wall | Frequent car camping | Medium to high | Low | Heavy and slower to dry |
| Mesh-top windbreak | Warm-weather camps | Medium | Medium | Less upper-level privacy |
| Backpacking wind panel | Hiking and minimalist camps | Low | High | Smaller protection zone |
| Pop-up beach windbreak | Short beach trips | Low to medium | Medium | Folding and anchoring can be tricky |
| Awning side panel | Existing canopy owners | Medium | Depends on canopy | Compatibility restrictions |
How to Choose a Camping Windbreak
Match the Windbreak to Your Transport
For a vehicle-based trip, packed size is often less important than usable coverage and durability. Backpackers need to consider total carried weight, pole length, and whether the windbreak shares equipment with the tent or trekking poles. A lightweight portable screen that fits inside a pack can be more useful than a larger model left at home because it is too awkward to carry.
💡 Tip
Measure your vehicle’s storage compartment or backpack opening, not just the available volume. A long folded pole can prevent an otherwise compact windbreak from fitting.
Check Height, Width, and Panel Shape
Height determines where the wind is blocked. A seated user may need a different panel height than someone using a standing kitchen table. Width affects the size of the protected zone, while angled or multi-panel designs can create more useful shelter than one flat sheet of the same total fabric area.
🛠️ Practical Tip
Sketch the footprint with tent pegs or a tape measure before buying a large screen. Include space for guy lines, which extend beyond the fabric and can become a trip hazard in a busy campsite.
Prioritize Anchoring Over Fabric Thickness
A thick fabric does not automatically make a windbreak safe or stable. The pole joints, hem, eyelets, guy lines, and pegs all carry force.
For sand, look for anchors suited to loose ground; for firm soil, longer or stronger pegs may be more appropriate. Always follow local camping rules and the manufacturer’s setup instructions.
💡 Tip
Pack a few spare guy lines and compatible pegs rather than relying only on the items supplied. Test them at home so you know which attachments are used for the corners and which control the poles.
Consider Ventilation and Fire Safety
Windbreaks can make a cooking area feel calmer, but fabric and open flames are a dangerous combination. Keep stoves, lanterns, heaters, and fire pits well away from fabric, and never use a windbreak as a sealed cooking shelter. A screen should reduce exposure, not eliminate the airflow needed around fuel-burning equipment.
🛠️ Practical Tip
Before setting up near a stove or fire ring, check the campsite’s fire regulations and create a clear buffer around the fabric. If gusts become difficult to control, pack the screen away rather than adding more tension.
Read the Weather and Site Conditions
A windbreak is not a substitute for checking conditions. Forecast wind speed, gust direction, ground type, nearby trees, and exposure all affect setup decisions. The National Weather Service wind safety guidance is a useful reference for understanding why strong winds can create hazards beyond simple discomfort.
💡 Tip
Set up with an escape plan for the fabric and poles. If the weather worsens, a windbreak should be one of the easiest items to lower and pack, not a structure you feel obliged to keep standing.
Which Windbreak Is Best for Your Trip?
For Families and Car Campers
A four-panel family screen or classic three-panel privacy design usually offers the most useful mix of coverage and comfort. Choose a model with several guy-line points, durable pole sleeves, and enough width for chairs or a table. A larger screen is worthwhile only if your campsite can accommodate it safely.
For Solo Campers and Couples
A two-panel screen, mesh-top design, or compact pop-up may be easier to manage. These options give you a personal wind shadow without taking over a small pitch. If privacy is a major concern, favor opaque fabric; if warm-weather airflow matters more, a mesh upper panel may be preferable.
For Backpackers
A lightweight panel or trekking-pole-compatible shelter is the logical starting point. Focus on packed weight, attachment strength, setup complexity, and the number of extra stakes required. Small coverage is often an acceptable trade-off when the alternative is carrying a bulky screen for many miles.
For Beach Days
Look at pop-up beach windbreaks and low-slung sand screens, then check how they anchor in loose ground. Portable beach gear should be quick to open, but it still needs a reliable way to resist gusts and blowing sand. A tall wall may provide more privacy, while a low design can be easier to keep stable.
How to Set Up a Portable Windbreak
- Choose a position that blocks the prevailing wind without putting the screen directly beside a fire or stove.
- Clear sharp stones, branches, and other objects that could damage the fabric or create uneven tension.
- Lay out the panels, poles, guy lines, and pegs so you can identify each part before raising the structure.
- Secure the windward corners first, using anchors suited to soil, grass, gravel, or sand.
- Insert or connect the poles according to the instructions, avoiding force if a joint does not align.
- Attach the remaining panels and adjust the angle so the screen creates useful protection rather than a flat sail.
- Tension the guy lines evenly, leaving enough flexibility for normal movement without loose fabric flapping.
- Check the setup again after the first gusts and lower it if conditions become unsafe or the anchors begin to pull out.
🛠️ Practical Tip
Do a gentle hand check on every corner, pole connection, and guy line before sitting behind the screen. Early adjustment is easier than repairing a torn sleeve after the wind has already loaded the frame.
Frequently Asked Questions
What is the best windbreak for camping?
The best option depends on your trip. A three-panel screen suits general car camping, a larger four-panel model works for families, and a lightweight panel is more appropriate for backpacking. Prioritize stable anchoring and practical coverage over maximum height alone.
Are windbreaks worth it for camping?
They can be worthwhile at exposed campsites because they reduce direct wind, improve seated comfort, and add privacy. Their usefulness depends on site conditions, and they should not be treated as a replacement for a tent or severe-weather shelter.
What are good heavy-duty windbreaks for camping?
Heavy-duty canvas walls and reinforced multi-panel screens are the main styles to consider. Check the pole construction, corner reinforcement, guy-line points, packed weight, and care requirements rather than relying only on a “heavy-duty” label.
How do you block wind while camping?
Position the windbreak across the prevailing gusts, secure the windward corners first, use suitable pegs or sand anchors, and tension the guy lines evenly. Keep some ventilation and lower the structure if conditions become too strong.
Can a beach windbreak be used at a campsite?
Often, yes, if its height and anchoring system suit the campsite. Beach models may be convenient and portable, but some have limited privacy, lighter frames, or anchors designed only for sand.
Final Verdict
The best camping windbreaks balance coverage, stability, privacy, and portability rather than maximizing one feature. Families and car campers will usually benefit from a three- or four-panel screen, while couples may prefer a compact two-panel or mesh-top design. Backpackers should look closely at packed weight and trekking-pole compatibility, and beach users need reliable sand anchoring more than a tall fabric wall.
Before buying, measure your available storage space, consider the ground where you’ll camp, and check the complete setup weight. A well-anchored, appropriately sized camping windbreak will be more useful than a larger model that is difficult to carry or unsafe to leave standing in changing weather.
Leave a Reply